Jeep Articles & News
Detroit EZ Locker Installation (and Problems)
Part One. Lock it up!
We were looking for some extra traction on the ’99 Wrangler, so we went with Detroit’s EZ Locker. The decision was made much easier since we got the locker used and, well…really cheap! This installation was fairly straightforward for the mechanically inclined. If you don’t know how to find the open end of a combination wrench, you should probably have a pro install your locker for you.
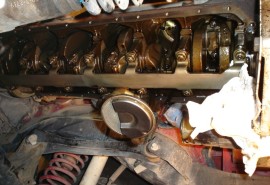
This should serve as an outline of the procedures WE followed (and some tips), not as a substitute for reading the instructions that came with your locker! The procedures here apply to a Dana 35-c axle, and will be different for other model axles. Basic preparation includes jacking up and supporting the vehicle and axle with suitable jackstands, placing the transmission in neutral (only after chocking the front wheels!), and removing the rear wheels. Enough small talk, on with it already…
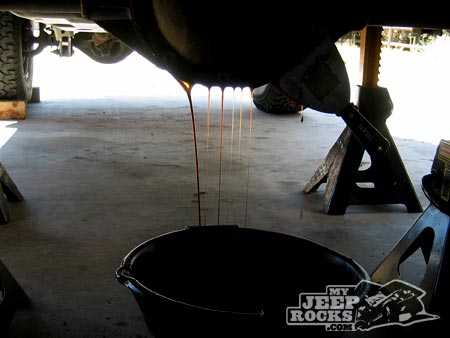
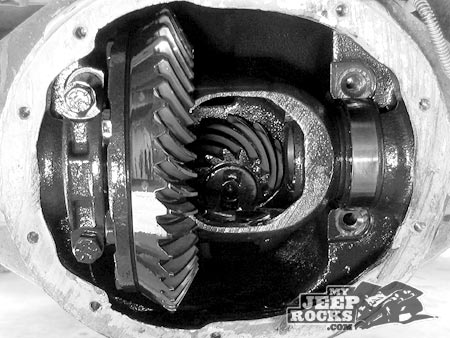
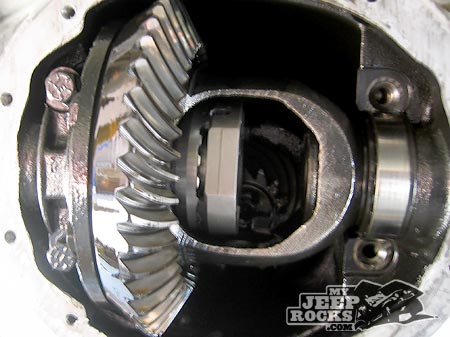
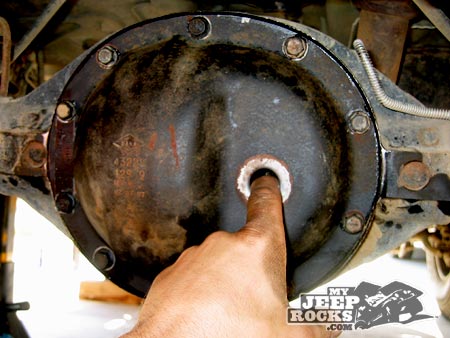
STEP 1. Remove diff cover.
Remove the differential cover bolts and drain the oil. Removing the cover can be difficult. I have found that using a scraper tapped in between the cover and housing works nicely.
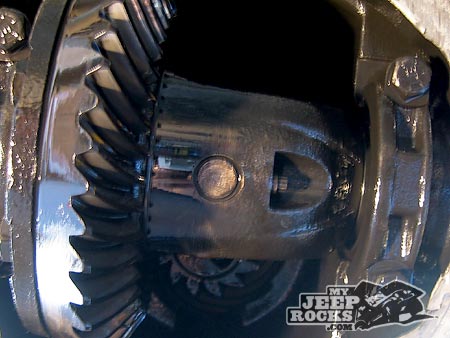
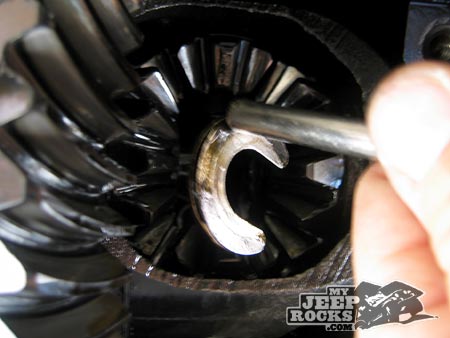
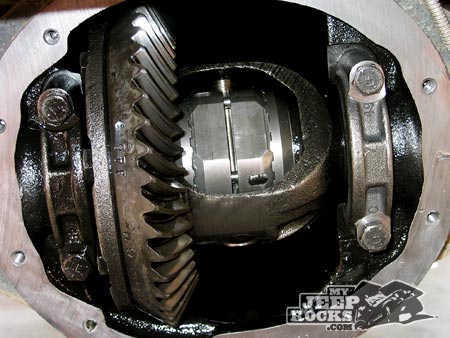
STEP 2. Remove cross pin retaining bolt.
After that satisfying rush of differential fluid, you should be looking at something kinda like this. If you aren’t, rotate the driveshaft until you see the cross pin retaining bolt. This is the small 12 point bolt that keeps the cross pin in place. I needed to get more leverage than a tiny 1/4″ wrench would allow, and I had some issues getting a socket on this bolt! I pulled the right bearing cap to allow more space and get the socket and ratchet on there.
STEP 3. Remove cross pin.
Once you have the cross pin retaining bolt out, the cross pin should slide right out.
STEP 4. Remove c-clips.
With the cross pin removed, you should see the c-clip on the end of the axle. In order to get it off, push the axle inward to allow it to slide out of the groove.
* TIP *
I used a magnet to keep from dropping the c-clips.
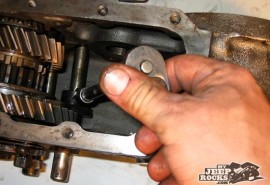
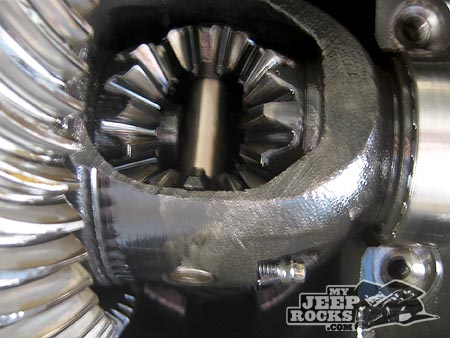
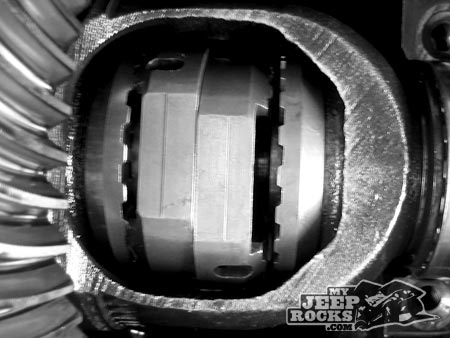
STEP 5. Remove Spider Gears.
Once the c-clips are off of both axles, slide the axles out a few inches to allow you to remove the spider gears. They should slide right out. Make note of which side gear came off of which side, and make sure you get the thrust shims with the gear. Keep track of the orientation of these shims, you will need to place them on the side gears of the locker! When you are done, this is what you should see.
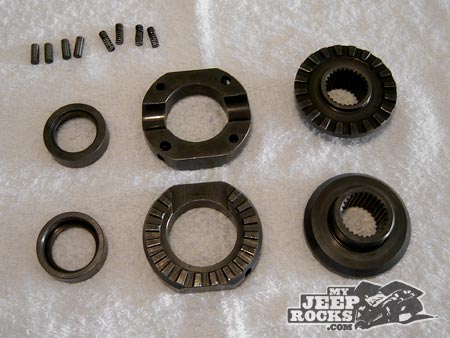
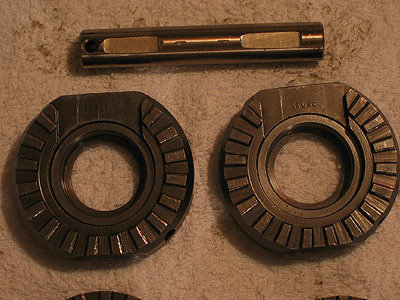
STEP 6. Prepare Locker.
This is all there is to it. If you aren’t looking at a pile of parts that resembles this, you’re screwed. I suggest cleaning all parts thoroughly in solvent such as brake cleaner. This ensures that all machining residue is removed. Place the thrust shims off of the old side gears on the side gears for the locker, paying careful attention to orient them the same way they came out. Lubricate the washers and gears with gear oil to get ’em ready for installation.
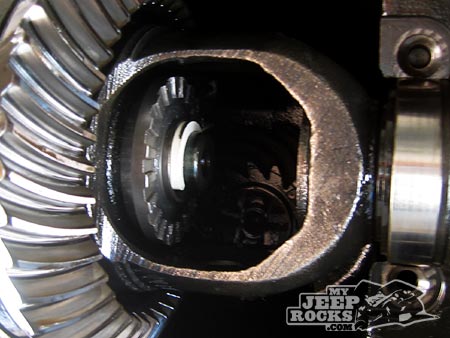
STEP 7. Install Side Gear and C-clip.
I started with the ring gear side, sliding the side gear into the carrier (lube here), with a partner slowly working the axle into the side gear. Once the splines mesh, push the axle in far enough to expose the c-clip groove. Place the c-clip in the groove and pull the axle back to seat it in its place. The first side is easy, because you have lots of room in there still, the next one is a bit trickier!
STEP 8. Install Spacer
Install the spacer with the large diameter deeper recess over the c-clip. It should seat up against the side gear with no space showing.
STEP 9.
Prepare the first clutch by applying some light grease to the clutch dogs to help hold things together during the next few steps. Apply grease and place two of the dowel pins in the recesses with the oval openings. Leaving them in the recessed position will allow you more freedom to jockey things around in there for now, and let you pull things apart much easier if you miss something.
STEP 10.
Install the side gear into the carrier, but do not slide the axle in yet. Getting the c-clip on the other axle is a bit trickier. Prepare the components as above by coating with a thin coat of light grease to keep things stuck together. Slide the spacer into the clutch in the proper orientation so that it will slide over the c-clip on the end of the axle. Place the greased dowel pins into the clutch opposite the ones you installed in the first clutch. Slide the clutch/spacer into the carrier as shown, with the slot in the clutch facing out so you can get the c-clip in there. Have your partner slide the axle in while holding the whole mess together. Watch for the c-clip groove to appear. Make sure the spacer is out of the way so the c-clip can make it into the groove. Carefully slip the c-clip in there and rotate the clutch so the slot faces upward. Hopefully gravity takes over to drop the c-clip in place. Reach into the cross pin hole and push the spacer over the c-clip. Make sure the spacer seats against the side gear.
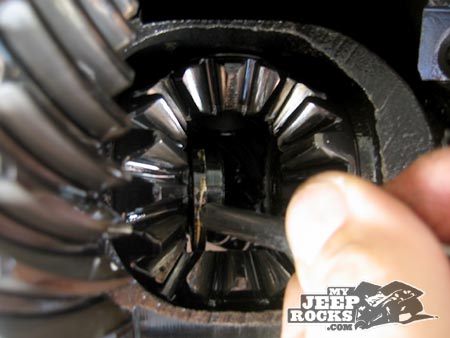
STEP 11.
Rotate the clutches so the dowel pin holes line up. This was easiest with a partner carefully turning the axle shaft while holding the clutches in the carrier. Slide the dowel pins over into the opposite clutch side with a pick or small screwdriver. Place some grease on the ends of the springs and caps and install in the oblong windows to hold the dowel pins in place. The caps go toward the dowel pins. If you had to remove the bearing cap, now would be a good time to put it back and torque the bolts to 55 ft-lb.
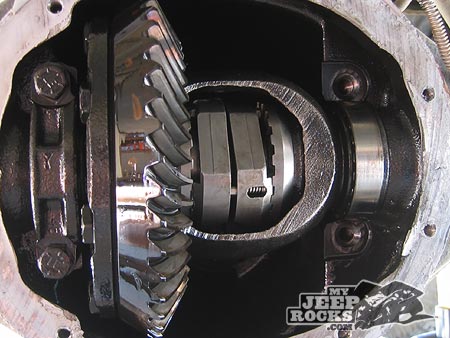
STEP 12.
Once the dowel pins are in place, you need to line up the hole for the cross pin in the locker with the cross pin holes in the carrier. Rotate the wheels and/or driveshaft until you get the two lined up in a location where you can slide the cross pin into place. Lubricate everything well at this point, especially the cross pin. Install the cross pin retaining bolt with a coat of blue loc-tite on the threads to ensure that it stays where it belongs. Now would be a good time to double check your work and make sure there are no “spare” parts laying around!
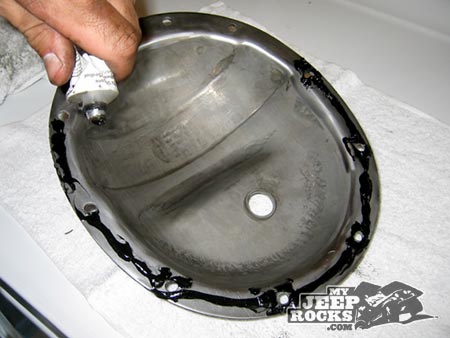
STEP 13.
Prepare the differential cover and housing surfaces with a wire wheel and make sure they are free of oil, grease, silicone, etc. before assembly. Use silicone to seal the surfaces. Tighten the bolts evenly in several steps, alternating across the cover.
STEP 14.
Ok, so you put your oil in here…
2. Problems with the Detroit EZ Locker
Part 1: We bought this locker used under somewhat screwy circumstances from a pretty flaky dude. It started out that he just didn’t like this thing, so he wanted someone to trade him straight up, spider gears for this locker. Sounds like a great deal, eh? We sure thought so… It turns out that we ended up buying the locker (cheap, mind you), so at least we kept the carrier internals (thankfully)! He couldn’t wait to get this thing out, so he had a shop install an open carrier for him. A word to the wise on lockers – you get what you pay for apparently. This unit looked to be in decent shape from what my untrained-to-screwed-up-differentials eye could see. Read on…
The first test run around the front yard yielded some interesting pops and bangs, which we felt were normal for these units. No biggie. Then we went for a ride and discovered that the left side was unlocking when going straight line down the road for no apparent reason. This was happening only under acceleration, or even while just holding speed. Occasionally, our efforts were rewarded with a satisfyingly bone-jarring BAM! and a nice shift to the left maneuver of the entire Jeep. Again, we have heard lots of quirks make these lockers interesting daily driver accessories. Then we got to the trail…
Our first clue that something was really screwed was when we were climbing an obstacle and the left side would let loose and unlock. We have always heard that the most common problem with these is getting them to unlock, not with them unlocking under load (that kinda defeats the purpose of a locker, no?) We managed to get it home without any more obscene antics than we had on the way out, so we thought maybe we just did something wrong. We went home and read the manual again, and then again, and then read several articles on installing EZ lockers on the net. We concluded that everything was in order inside (it is pretty simple in there). The next day, after talking to several people and searching the net for all the info we could find, we concluded that we should change the diff fluid to a slightly lighter 75W-90 to try to make things a little less greasy in there. We changed the fluid out for some fancy 75W-90 hi performance gear oil. Another friend said he had similar experiences in the first 50 miles or so of driving, so we went for a drive. About 40 miles down the road, and 10 miles from home, the locker started “unlocking” both axles at the same time while under acceleration. If you understand the basic principle of these lockers, you know that this means both axles unlocked and no power was going to the rear wheels. As you can imagine, the horrendous racket that occurs when things settle back down in there and assume their usual positions is enough to wake the dead, and cause us to reach for our wallets. We limped it home, but haven’t looked inside it yet. I’m quite certain that the clutch dogs are wasted, but we’ll see when we get it apart.
Part 2: So this is what an EZ locker looks like after having spun against the side gears several times…
Note the rounded edges of the clutch dogs…not good. The cross pin is actually in pretty decent shape, although the slight scarring where the spacer sits (the two small marks in the center of the pin), were not there prior to the locker spin.

The side gears are also pretty beat up. We’re not 100% sure, but we think this one is wasted. Note the nice little hunks out of a few of the dogs.
Lessons learned: don’t buy a used EZ locker unless you know what you’re doing, and definitely don’t drive it home once it starts spinning in the carrier! And that’s all we have to say about that…