Jeep Articles & News
Rock-It Man Ultimate Rockers Install
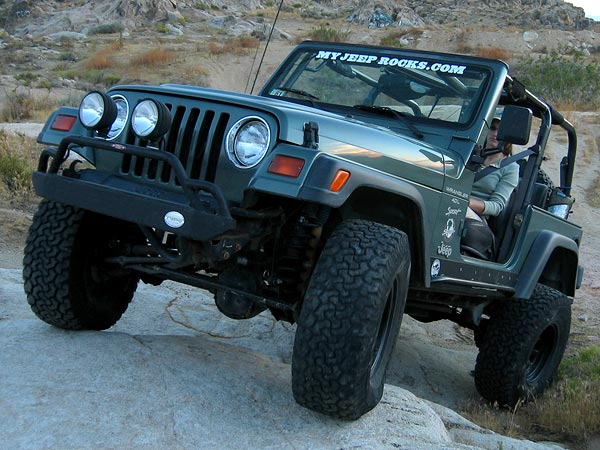
When we started out our TJ modifications with some homemade rocker protection, a cage, budget boost lift, and some 33s, we didn’t plan on building this Jeep for the big stuff. It’s a daily driver, so we figured we couldn’t get too radical anyway. As time went by and we planned our next upgrades, we started noticing more and more rigs with rocker protection that looked as if someone had bashed them on the rocks BEFORE they put the rockers on. In many instances, further inspection revealed the real culprit – inadequate rocker protection in spite of the fact that the vehicle had rocker guards installed. We started doing our research, and came up with a short list of criteria that would ensure we don’t wreck our junk: wheel well to wheel well protection, rocker panel to frame coverage, and a high clearance design that would not sacrifice any ground clearance and help slide us off the rocks.
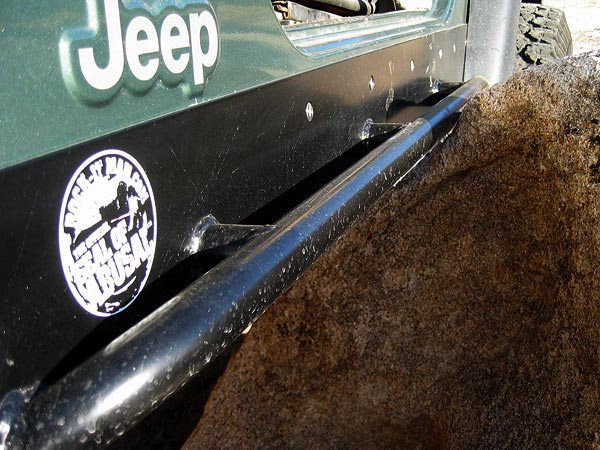
We found Rock-It Man Fabrication in Temecula, California had just what we were looking for. Their Ultimate Rockers are the finest quality and design that we have seen. The rocker is sandwiched to the body panel just below the door sill by a steel plate to essentially create one long single mounting point versus a number of small mounting points as is typically provided by rockers that simply bolt or screw into the body panel. This ensures you don’t wrinkle the body even with the hardest drops onto an obstacle, the most common form of damage on vehicles with lesser rocker guards.
It is a good idea to read this writeup or the instructions completely prior to starting to ensure you have all of the tools necessary and you are comfortable with what is required. There are a couple steps that need to be followed exactly or you will have problems. If you are uncomfortable with any of the installation steps, feel free to contact the shop. Contact details can be found at the end of this article.
Installation time: Approx. 3 Hours
Tools Required:
- Electric Drill
- 3/8″ Drill Bit
- 17/32″ Drill Bit (MUST BE EXACT!! – not 1/2″, not 9/16″!!!)
- #4 Phillips Screwdriver Bit (#3 bit will work, but #4 is prefered)
- 10 mm Socket or Wrench
- 9/16″ Socket
- 1/2″ Socket
- 11/16″ Wrench
- 9/16″ Wrench 3/8″ Drive Ratchet
- 1/4″ Drive Ratchet
- Two or Three C-Clamps
- Floor Jack and Some Wood
- Safety Glasses
- A helper will come in handy, but in a pinch they can be installed solo.
Before starting, check to be sure that all the hardware in present. If something is missing, e-mail or call the shop ASAP!
Included Hardware:
- 16 – 5/16″ Countersunk Phillips Screws
- 6 – 3/8″ Countersunk Phillips Screws
- 4 – 3/8″ Bolts
- 4 – 5/16″ RivNuts (only 2 are required 97-02)
- 10 – 3/8″ RivNuts
- 4 – 5/16″ Nuts
- 4 – 5/16″ Fender Washers
- 1- 3/8″ RivNut tool (one 3/8″ bolt, one oversized nut and two 3/8″ washers)
- 1 – 5/16″ RivNut tool (one 5/16″ bolt, one oversized nut and two 5/16″ washers)
Step 1. Vehicle Prep
Remove stock fender flare extensions (if they are still on there). Using a 10 mm socket, remove the last 3 fender flare bolts from the front fender and the first 2 from the rear. Move the wiring harness from the inside of the tub, no need to remove it, just get it out of the way. Do NOT skip this step prior to drilling, or you will destroy your wiring! Prep any pre-existing damage to deter further rusting.
Step 2. Test Fit and Pre Load
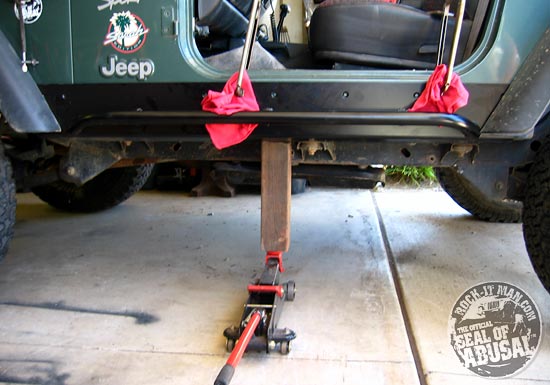
Put the rocker on the jeep, center it side to side and clamp the sides with your c-clamps… be careful not to cover or limit access to any of the holes in the rocker or you will have to reposition your clamps prior to drilling. The front edge of the rocker guard should be flush with the front fender sheet metal. Take your floor jack and some wood and jack up on the bottom of the guard. Use EXTREME caution that you do not allow the wood or jack to move and slip out from under the rocker. Do not apply excessive force to the rocker, just enough to lift up on the body slightly and ensure the rocker is seated.
This procedure is called “preloading” and is an essential part of an effective rocker installation. By doing this you virtually eliminate gaps between the rocker and the guard. The rocker is now as close to being part of the tub as possible. If this procedure is not followed you may cause more harm than good.
Step 3. Drilling
Wear your safety glasses.
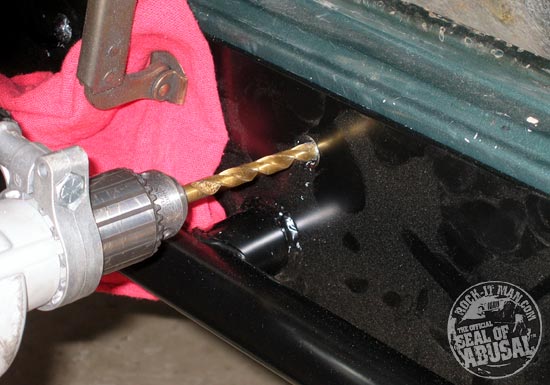
Using a 3/8″ drill bit, drill through all the holes on the side and underneath. Be careful not to drill into any wires or other stuff on the inside of the tub! On the last hole toward the back of the vehicle (last 2 holes on 03+) be careful not to drill too far, as the bit may catch on the other side and break the bit off. On the underside, only drill through the first layer of the tub, DO NOT drill through the second layer and into the passenger compartment.
Step 4. Final Drilling
For this step a 17/32″ drill bit MUST be used, 1/2″ or 9/16″ will not work!
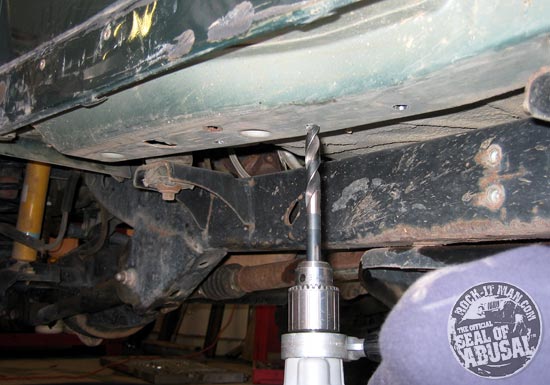
Remove clamps and the rocker guard from the jeep. Take your 17/32″ drill bit and drill out the rear most hole on the side of the Jeep, near the rear flare. On 03+ the last 2 holes need to be drilled to 17/32″. On the underside, all 5 holes need to be drilled to 17/32″. Debur, prime, and prep the holes to remove obstructions to the backing plate and prevent rust.
Step 5. Install RivNuts
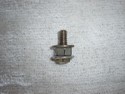
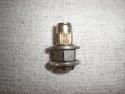
This part can be a little tricky. Assemble your 5/16″ and 3/8″ rivnut tool, starting by placing a washer followed by oversized nut (spacer), and another washer.
Install the 5/16″ RivNut on the assembled 5/16″ RivNut installer as shown.
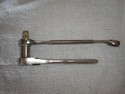
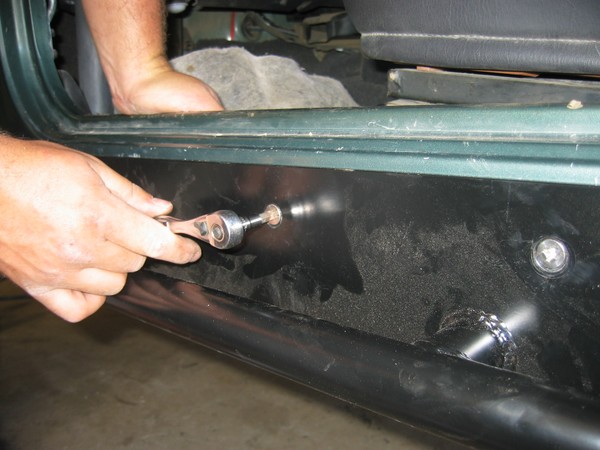
Equip a ratchet with the appropriate size socket for the RivNut installer bolt. Use a wrench to hold the nut in place while turning the ratchet as shown.

On 97-02 TJ’s the last side hole takes a 5/16″ RivNut. On 03+ the last 2 holes take 5/16″ RivNuts. On all 97-05 TJ’s all the underside holes take 3/8″ RivNuts. Insert the RivNut and tool into the hole. Make sure that the smaller (5/16″) RivNuts are used along the side in the 3/8″ hole(s) you drilled and the 3/8″ rivnuts are used on the bottom in the 17/32″ holes. The installation is the same with the 5/16″ as it is for the 3/8″. Please follow these instructions. If the rivnuts are not installed correctly, you will have a hell of a time fixing them!

When tightening the bolt you will have to use some force to start the collapse of the RivNut, after the initial collapse you will feel it getting easier. When the bolt becomes hard to turn, the RivNut is collapsed and SHOULD NOT be tightened anymore. At the same time, it is just as bad to have an under tightened RivNut as an overtightened one. Take your time, and don’t be afraid to stop and look to see if the RivNut is completely collapsed tight against the sheetmetal. When the rivnut it fully collapsed, remove the bolt (tool) and move to the next hole.
Step 6. Final Installation
Re-install the rocker guard as per Step Two.
Line up the holes and start installing the 5/16″ side hardware into the backing plate, using your #4 Phillips bit. The easiest way of doing this is by starting in the middle. Get one screw started, but loose, then move to the next one. Leave all the screws loose until they are all in place, then start to crank down on them. Once the sides are tight, take your jack and wood and jack up the bottom of the rocker. Install the 3/8″ screws and 3/8″ bolts along the underside.
Repeat the above steps for the other side.
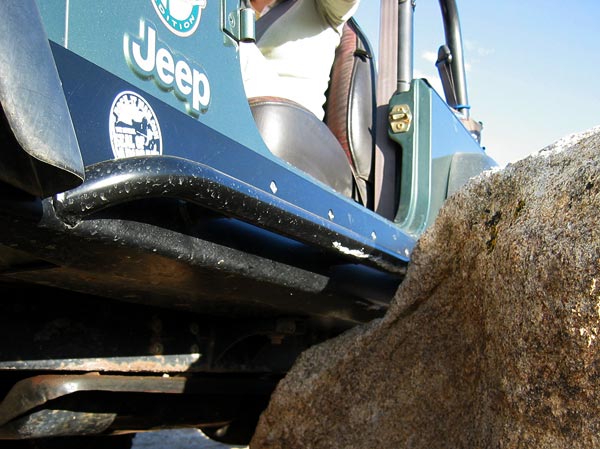
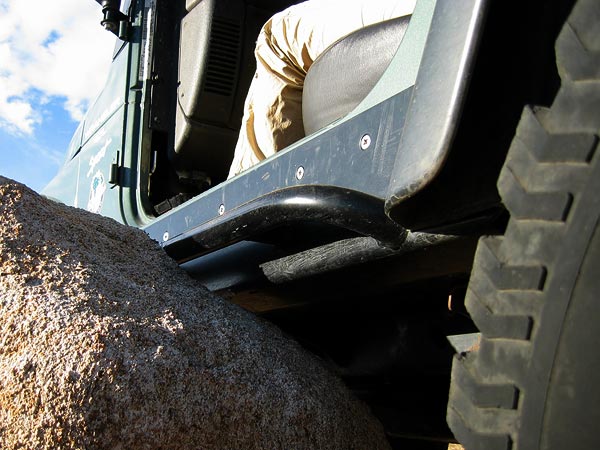
Step 7. Beat them on the rocks!
That’s what they’re made for.
Photos


Contact Info
If you have any comments, concerns or questions about these or any other Rock-It Man product, please contact them directly!
Rock-ItMan.com
Phone: 951-551-6181