Announcement

Collapse
No announcement yet.

turbo diesel Willys!

Collapse

Forum Thread First Post

Collapse
X
 
  • Filter
  • Time
  • Show
Clear All
new posts

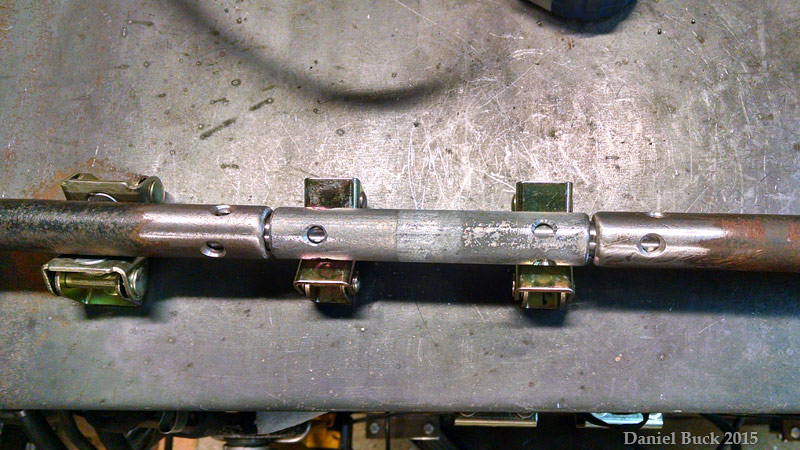
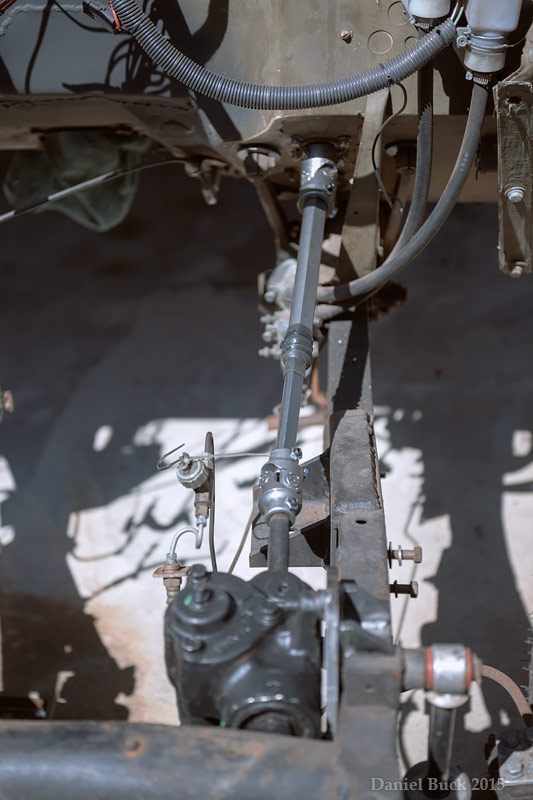
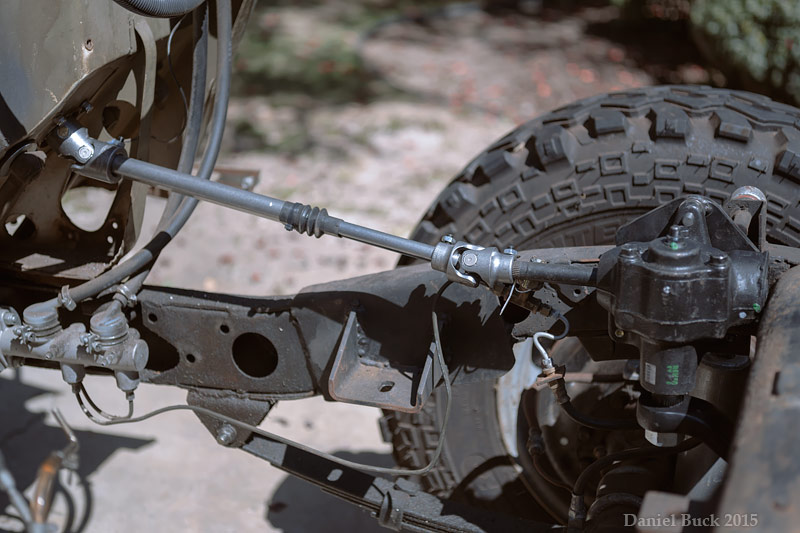
  • 1/4" wouldn't be a problem. I've got some 3/8" laying around too, maybe I could make the top and bottom pieces out of that. V groove it real good to make sure the weld gets fully in there. Drilling those big holes is gonna suck. haha At least I have a drill press now.

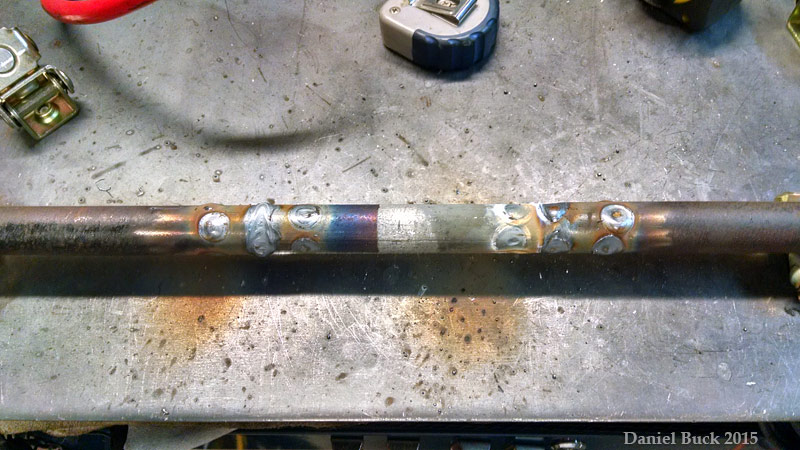
    I'm thinking I'll make the entire part, and then the last step will be welding in the cast steel splines. That way the cast iron only goes through one heat cycle? I can take my time doing everything else, then after welding the cast steel just toss it in sand as soon as I'm done the cast steel weld.

    I'll have the rest of the pitman arm to practice on ahead of time.

    I've got an idea on how to put some internal structure on the inside of the arm, drill some slots through the top and bottom parts, and slide some flat bar through the slots, and weld them up on the inside and the outside, then wrap the entire thing in the thickest metal I can manage to bend a radius on.

    I'm kinda pumped, I want to do this now
    Last edited by daniel_buck; 01-25-15, 12:43 AM.
    [COLOR="#FF0000"]R[/COLOR]edneck [COLOR="#FF0000"]D[/COLOR]riveway [COLOR="#FF0000"]F[/COLOR]ab
    www.DanielBuck.net - www.DNSFAIL.com - www.FurnitureByBuck.com

    Comment


    • Don't cut the splined section round, leave a short stub sticking out so you have more weld surface to mate the two

      Comment


      • Hah, to late for that, I already cut it! I was thinking the same thing just after I finished cutting it, if I left 1/2" or so of the shaft there, it would probably have more weld strength.

        Oh well, I'll just make sure to fully weld both sides of the upper and lower plate, if I can. The first plate I know I'll be able to weld top and bottom all the way around, the 2nd plate I may not be able to weld all the way around on the inside, I could get at least 3/4 of the way around.

        Playing with some folded patterns in solidworks, I'll post up a screenshot. I'm more of a computer guy than a cardboard guy. I can just print out my folds, and cut the patterns. I've got plenty of 1/4" plate, I thought I had some 3/8", but nothing large enough, just small pieces. Kinda wish I had a plasma torch, hah! I'll just cut it wide with my band saw and angle grinder, then die-grind it to shape the curves. Should be fun!
        [COLOR="#FF0000"]R[/COLOR]edneck [COLOR="#FF0000"]D[/COLOR]riveway [COLOR="#FF0000"]F[/COLOR]ab
        www.DanielBuck.net - www.DNSFAIL.com - www.FurnitureByBuck.com

        Comment


        • You don't have to go that crazy with it, you are just using computer guy muscle, power anything added to that. So all it will ever see is your torque plus the reduction multiplication of the gear ratio in the box and some added impact loads, which you will not like since it will spin the steering wheel.

          Comment


          • That's true. There's no power steering here. Just my guns powering the wheel

            I still don't have a good idea of metal thickness and welds when building something. What is strong enough, what's not strong enough, and what's overkill.
            [COLOR="#FF0000"]R[/COLOR]edneck [COLOR="#FF0000"]D[/COLOR]riveway [COLOR="#FF0000"]F[/COLOR]ab
            www.DanielBuck.net - www.DNSFAIL.com - www.FurnitureByBuck.com

            Comment


            • A lot of times it's more how something is made and strengthened then the thickness of the material used. Same goes for the amount of weld used

              Comment


              • I picked up a pitman arm from a local steering shop! I took a photo of it, but I can't open that photo for some reason, I'll take another one.

                Got the steering bracket mostly done. I'm gonna put one more plate on the outside of the frame, so that the two lower bolts pass through both plates and the frame, holes in the frame are sleeved. Sandwiching the frame will be nice and strong I think. Probably WAY overkill for manual steering. The upper bolt that's above the frame is braced. Yea, I know the metal is comically thick, I just kept it the same thickness as the original bracket. At this point, I probably should have just started fresh and made the bracket myself, oh well.

                I'm probably going to have to move the shock mount, or maybe make the shock mount apart of the steering bracket. The other steering bolt that goes through the frame MAY contact the shock can when the shock compresses. We'll see. I'm not worried about that.

                Last edited by daniel_buck; 02-08-15, 10:13 AM.
                [COLOR="#FF0000"]R[/COLOR]edneck [COLOR="#FF0000"]D[/COLOR]riveway [COLOR="#FF0000"]F[/COLOR]ab
                www.DanielBuck.net - www.DNSFAIL.com - www.FurnitureByBuck.com

                Comment


                • Decided to re-use the draglink, it was about 5 inches to short, so I lengthened it. Dispite my efforts to keep it from bending one way or the other, it has a SLIGHT bend in it. Bud I don't really think this will be a problem.


                  [COLOR="#FF0000"]R[/COLOR]edneck [COLOR="#FF0000"]D[/COLOR]riveway [COLOR="#FF0000"]F[/COLOR]ab
                  www.DanielBuck.net - www.DNSFAIL.com - www.FurnitureByBuck.com

                  Comment


                  • Some new steering parts arrived, I think these are the last parts I'm waiting on.

                    And Chuck, thanks for the tip on the license plate! I found a clear 1946 plate that I can have registered to my jeep. This is going to look so much better than the new white plate :-D

                    It's interesting, I guess in 46 they didn't stamp the plate with a year like they did previous years, they used a 45 plate and bolted on a separate 46 stamped piece of metal. At first I thought that was not right, but apparently that's how it was in 46. Maybe that was from a metal shortage during the war?


                    Last edited by daniel_buck; 03-23-15, 08:14 PM.
                    [COLOR="#FF0000"]R[/COLOR]edneck [COLOR="#FF0000"]D[/COLOR]riveway [COLOR="#FF0000"]F[/COLOR]ab
                    www.DanielBuck.net - www.DNSFAIL.com - www.FurnitureByBuck.com

                    Comment


                    • Daniel give me some quick pointers on tig welding, borrowed one and want to use it to make a aluminum hood frame for my buggy

                      Comment


                      • Have you TIGd steel before? I've done a fair amount of Steel TIG, aluminum though, I've only done enough to be dangerous. Not sure I can offer to many tips on that.

                        In general though, get the electrode real close to the puddle, almost dipping into it. And keep your hands steady, that's the hardest part, keeping your hands steady. I thought I had steady hands until I started tig welding. haha

                        The biggest challenge I have with aluminum specifically, is ending up with a deep crater at the end of my welds. I guess I need to taper off the power slower and put a bit more filler rod in the puddle at the end. And maybe try making a circular motion with the electrode as the power tapers off. TIG as much as you can while you have the machine, seat time seems to be the best thing you can do! I hate welding on scrap, it feels like a waste to me, I like to make practical things. But I really do need to just run some beads on scrap alot more than I do. Seat times seems to be very valuable on TIG. It's not a squirt gun like MIG is, haha

                        I have not done thin aluminum, I've been using a few scrap pieces of 1/4". I imagine thin aluminum will blow holes through pretty quick. Once the aluminum gets hot, it flows like butter. I almost punched a hole through 1/4" after the metal was real hot. Your first few beads on the metal when it's cold will feel alot different than the rest of them once the aluminum gets hot.
                        Last edited by daniel_buck; 03-23-15, 10:41 PM.
                        [COLOR="#FF0000"]R[/COLOR]edneck [COLOR="#FF0000"]D[/COLOR]riveway [COLOR="#FF0000"]F[/COLOR]ab
                        www.DanielBuck.net - www.DNSFAIL.com - www.FurnitureByBuck.com

                        Comment


                        • I got a pedal with it, which seems to be what will solve your issue at the end of your weld

                          Comment


                          • Yea, it takes two hands and a foot all doing different things, haha
                            [COLOR="#FF0000"]R[/COLOR]edneck [COLOR="#FF0000"]D[/COLOR]riveway [COLOR="#FF0000"]F[/COLOR]ab
                            www.DanielBuck.net - www.DNSFAIL.com - www.FurnitureByBuck.com

                            Comment


                            • Got the steering column in place. Just need to finish off the steering box mount. I sleeved the 2nd hole through the frame yesterday.

                              There may actually be even more room now for the exhaust, since the ross box isn't back there near the firewall. Hard to tell until the motor is in. I'm gonna try and get a few extra hands here next weekend and get the transmission bolted to the motor, and the motor dropped in. Then I can start working on a crossmember for the transmission.


                              [COLOR="#FF0000"]R[/COLOR]edneck [COLOR="#FF0000"]D[/COLOR]riveway [COLOR="#FF0000"]F[/COLOR]ab
                              www.DanielBuck.net - www.DNSFAIL.com - www.FurnitureByBuck.com

                              Comment


                              • Well, after a little tequila to celebrate Easter with some neighbors in the driveway (another weekend off!) I came up with the modification to the grill to accommodate the new location of the radiator. The radiator has been moved to the passenger side as far as it can go. It's a tight fit, but it works


                                [COLOR="#FF0000"]R[/COLOR]edneck [COLOR="#FF0000"]D[/COLOR]riveway [COLOR="#FF0000"]F[/COLOR]ab
                                www.DanielBuck.net - www.DNSFAIL.com - www.FurnitureByBuck.com

                                Comment

                                Working...
                                X