Announcement

Collapse
No announcement yet.

turbo diesel Willys!

Collapse

Forum Thread First Post

Collapse
X
 
  • Filter
  • Time
  • Show
Clear All
new posts

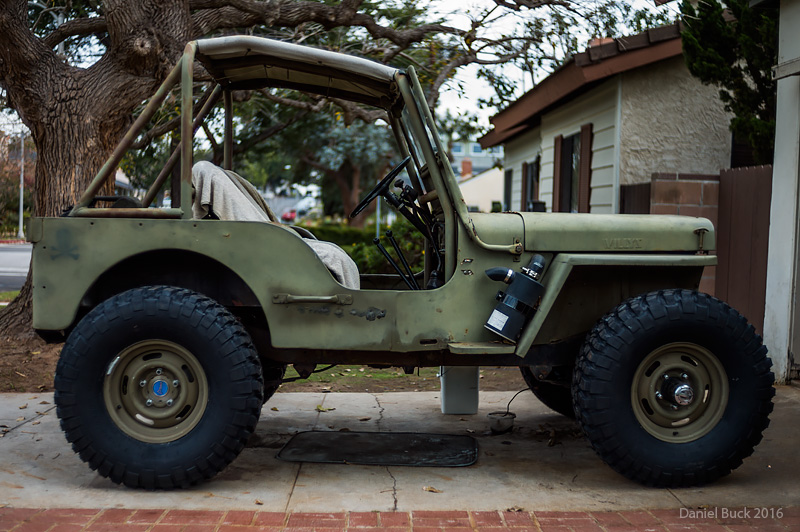
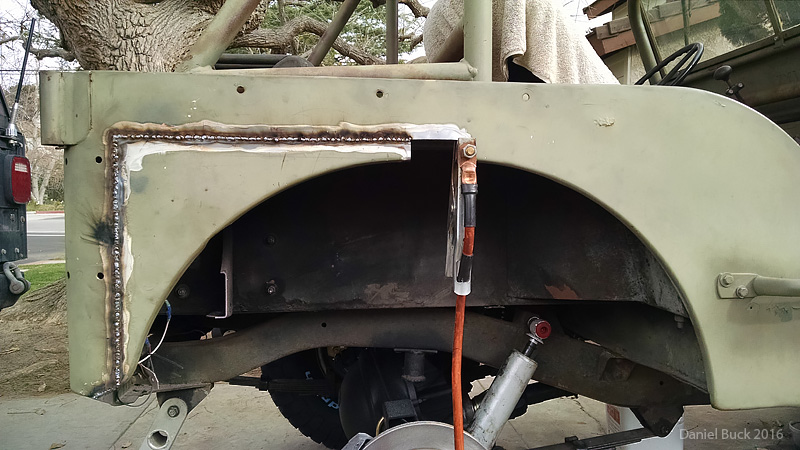
  • Looking sweet! Great work as always. I think moving the axles was a good call, it looks right.

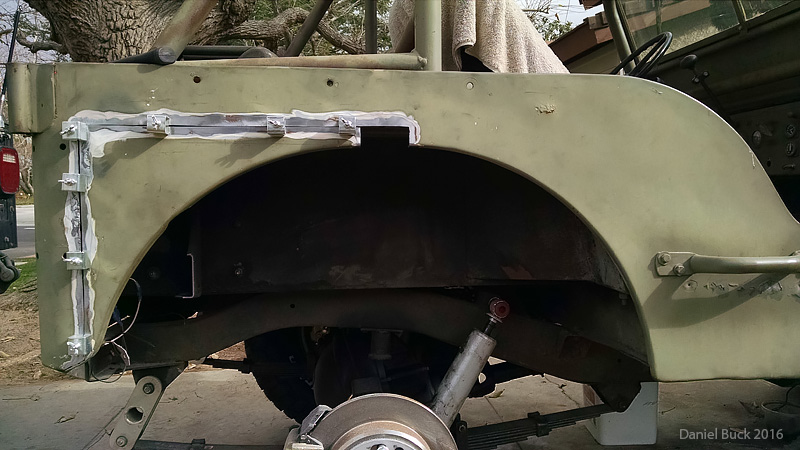
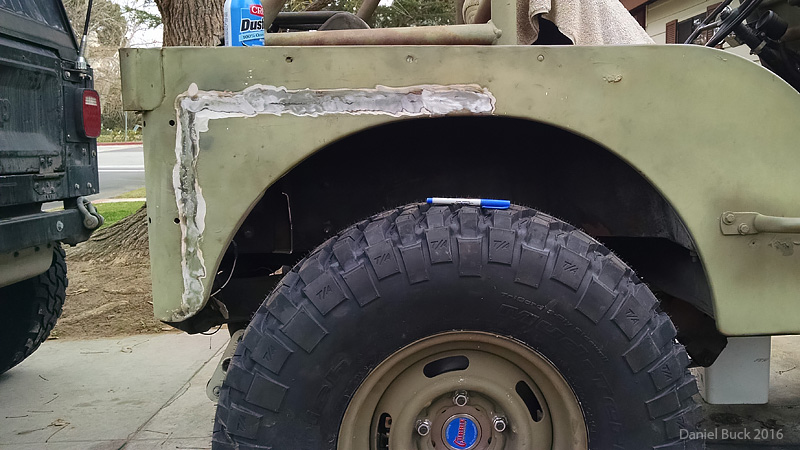
    I like the black cardboard idea. I would cut a circle 33.5" and try to simulate where the tire will be at full bump, mark it and cut it. Then the only question is do you want that raw, cut edge or are you going to put a lip back on it.

    Comment


    • I was going to try and use a large protractor and a marker from the center of the axles.

      I like the cardboard idea as well. It would be adjustable, haha

      As far as the actual cutting is concerned, I was planning on making that decision once I knew exactly where I wanted to cut. Then evaluate the situation (pizza and ale), and decide if I want to just jigsaw around that cut line and bend up my own lip to weld back in. Or, to cut a few 90 degree cuts and remove some of the flat panel to try and preserve the actual lip itself, then move it back and weld it up (probably would still need to make some flat filler pieces, but that's easy I think).

      Maybe I should give it a shot both ways. One on each side. haha! I'd learn alot more about sheet metal work that way
      [COLOR="#FF0000"]R[/COLOR]edneck [COLOR="#FF0000"]D[/COLOR]riveway [COLOR="#FF0000"]F[/COLOR]ab
      www.DanielBuck.net - www.DNSFAIL.com - www.FurnitureByBuck.com

      Comment


      • I always thought about adding the lip back to mine, I even saved the original for a while just in case I wanted to weld it back on. But after I put the aluminum corners on I forgot about it.

        The trick to sheetmetal welding is a little bit at a time as to not overheat and distort. When you think "just a couple more spots..." move to a different area.

        Comment


        • New shoes! I dig the look


          [COLOR="#FF0000"]R[/COLOR]edneck [COLOR="#FF0000"]D[/COLOR]riveway [COLOR="#FF0000"]F[/COLOR]ab
          www.DanielBuck.net - www.DNSFAIL.com - www.FurnitureByBuck.com

          Comment


          • Got both rear wheel well cuts done. Driver side I did in the dark, but got it done

            Tomorrow I'll pick up some bondo and smooth out the passenger side where I had to grind down through the old bondo. :\ There was alot of bondo on the passenger side


            [COLOR="#FF0000"]R[/COLOR]edneck [COLOR="#FF0000"]D[/COLOR]riveway [COLOR="#FF0000"]F[/COLOR]ab
            www.DanielBuck.net - www.DNSFAIL.com - www.FurnitureByBuck.com

            Comment


            • That was a nice way to do the fender cut.
              Rich

              Comment


              • came out great... I never even thought of that.

                Comment


                • Can't take credit for the idea, I got the idea from a few flat fender build threads and from emails to folks. I was encouraged to keep the factory lip around the wheel well, I'm glad I did. Once the OD green paint arrives (I ran out of it) after I spray it, hopefully it will look factory. I don't generally care about stuff looking factory, but for a body cut like this, I'd be happy for it to look factory

                  I don't think I'll notice any difference in the ride quality with the 2" wheel base stretch, but I like the look.

                  Man I can't wait to clock some miles on this thing again. My first big trip will be to Moab this Easter, that's what I'm barreling ahead full steam for. That Friday a bunch of us flat-fender folks on Pirate are meeting up and doing a flat fender run. (not sure what trail yet)

                  Jonah, what are you and Opy doing this Easter? Hint hint...
                  Last edited by daniel_buck; 01-27-16, 08:13 PM.
                  [COLOR="#FF0000"]R[/COLOR]edneck [COLOR="#FF0000"]D[/COLOR]riveway [COLOR="#FF0000"]F[/COLOR]ab
                  www.DanielBuck.net - www.DNSFAIL.com - www.FurnitureByBuck.com

                  Comment


                  • If I can finish this new front axle before then....

                    Comment


                    • I drove it to burbank yesterday (70+ miles total), and drove it around today a bit to look for some parts and to just enjoy driving it

                      I have proof, Tom saw me at Pepboys

                      No shocks, so it's a bit bouncy. I need to make the upper shock mounts (on all 4 corners) taller, and I need to adjust the bump stops. THinking about going with some sort of air/hydro bumps, since I seem to hit the bumps fairly often (I suspect these Atlas springs are alot more flexible than the factory ones!)

                      I'm in Bulgaria for the next few weeks, when I return home I'll start on the shocks and bumps.
                      [COLOR="#FF0000"]R[/COLOR]edneck [COLOR="#FF0000"]D[/COLOR]riveway [COLOR="#FF0000"]F[/COLOR]ab
                      www.DanielBuck.net - www.DNSFAIL.com - www.FurnitureByBuck.com

                      Comment


                      • In Bulgaria visit Plovdiv, Bansko and the Rila monastary

                        Comment


                        • It's a work trip, not a leisure trip, so I'm sure what length of time off I'll have to go out exploring. But I'll try and check them out if I'm near by and have a few days free. I'll be in Sofia for most of the time.

                          I've seen some photos of some of the real old city ruins there, I'd definitely love to check out some of the old buildings. Maybe in a future trip I'll have more time to explore.
                          [COLOR="#FF0000"]R[/COLOR]edneck [COLOR="#FF0000"]D[/COLOR]riveway [COLOR="#FF0000"]F[/COLOR]ab
                          www.DanielBuck.net - www.DNSFAIL.com - www.FurnitureByBuck.com

                          Comment


                          • Back from Bulgaria, it was a fun trip!


                            I got the new drag link, tie-rod and pitman arm on there, and took it to the local old school shop to get it aligned. Made a steering stabilizer mount, will finish that up in the next day or two, and make taller shock mounts for the front. It drives down the road nicely, even without front shocks or stabilizer.

                            The disk brakes are NICE, so much better than even the larger 11" drums. Don't have to mash the brake pedal to come to a stop.

                            Got a 0-3000 RPM tach gauge and put 2 magnets and a sensor on the crank pulley, I like this better than the 0-5000 tach that read off of the alternator (it would sometimes go eratic, not often though). I didn't need to change the tach, it's just something I've been wanting to do. The motor doesn't spin faster than 3000 RPM, so I like being able to use the full sweep of the gauge now.

                            And I figured out my speedometer. I decided to ditch the mechanical drive speedometer, so I put in a GPS driven speedometer that's used in boat applications. Got it wired up and tested it yesterday, works perfectly! I'll never have to touch it again, regardless of my gears or tire size. That's pretty cool It'll be nice to have accurate odometer readings now.

                            Moved the battery from under the hood to under the passenger seat. I like that alot better.

                            Lets see, what else. Oh, for my trip to Moab at the end of the month, I'm just going to temporarily cover up the huge hole in the floor where the transmission is, with a welding blanket folded over a few times. That should keep the heat off my leg, and reduce some of the noise. And keep anything from potentially falling down through there and hitting the spinning driveshaft. When I return from Moab, I'll get started making a metal cover for the transmission.

                            The Willys is juuust about ready for the drive! after the shocks and steering stabilizer are on, there's nothing major left.
                            Last edited by daniel_buck; 03-06-16, 10:36 AM.
                            [COLOR="#FF0000"]R[/COLOR]edneck [COLOR="#FF0000"]D[/COLOR]riveway [COLOR="#FF0000"]F[/COLOR]ab
                            www.DanielBuck.net - www.DNSFAIL.com - www.FurnitureByBuck.com

                            Comment


                            • Here's the front shock hoops bends. I decided to use one of my square tube dies that I use for furniture to bend these up, a very tight 3.5 CLR 1" square die. I normally run thin walled .065 tubing through this die for furniture projects, but I wanted something thicker for the shock mounts (and to see how the thicker material would bend!) I found some 1x1" tubing with .120 wall, it bent real nice! Very little deformation.

                              But man, I had a bitch of a time getting the tubes dislodged from the die, MUCH more difficult than the thinner .065 tubing. Probably because the .065 tubing deforms more than the .120 wall tubing did. Even with everything sprayed down with WD40, I had to put the die in my bench vise and wail on the tubing with a 4 pound hammer.


                              Anyway, here's the bends, the driver side bend I had to split up into 2 90s instead of 1 180, because I needed to get around my steering box mount.


                              [COLOR="#FF0000"]R[/COLOR]edneck [COLOR="#FF0000"]D[/COLOR]riveway [COLOR="#FF0000"]F[/COLOR]ab
                              www.DanielBuck.net - www.DNSFAIL.com - www.FurnitureByBuck.com

                              Comment


                              • shock mounts done!


                                [COLOR="#FF0000"]R[/COLOR]edneck [COLOR="#FF0000"]D[/COLOR]riveway [COLOR="#FF0000"]F[/COLOR]ab
                                www.DanielBuck.net - www.DNSFAIL.com - www.FurnitureByBuck.com

                                Comment

                                Working...
                                X