Announcement

Collapse
No announcement yet.

turbo diesel Willys!

Collapse

Forum Thread First Post

Collapse
X
 
  • Filter
  • Time
  • Show
Clear All
new posts

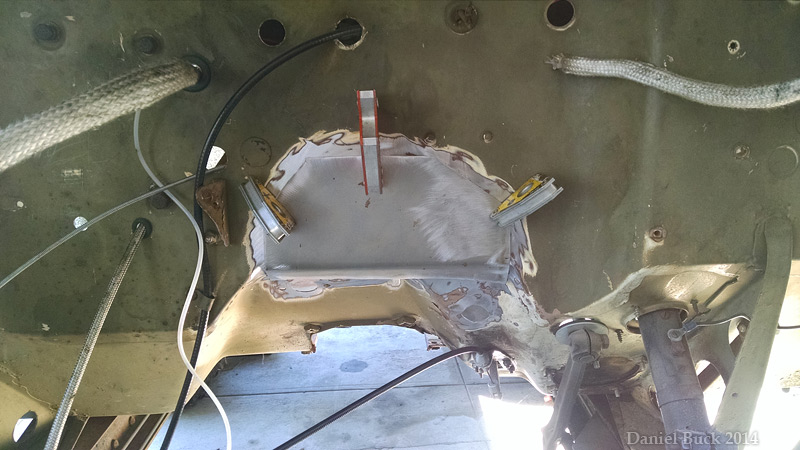
  • got the hole in the firewall patched up, and filled in alot of the other smaller holes that were either factory, or drilled in there at some point in it's life. Just the essential holes are left now.

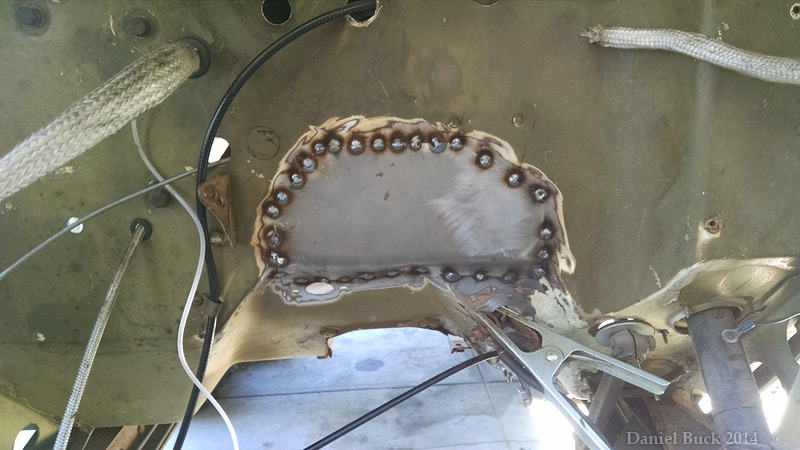
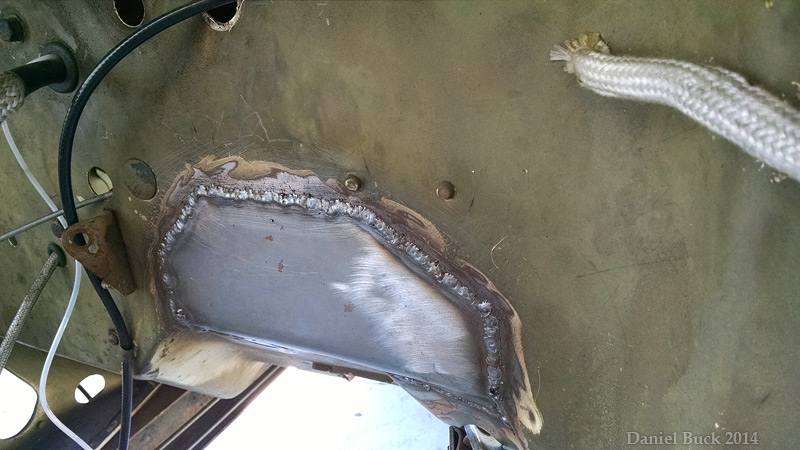
    I wasn't quite sure how the main hole would turn out, I've never done any sheet metal patch work. It's not perfect, but it came out alot better than I expected, haha! I'm happy Welding the lower portion wasn't to fun, but it's done. I had to pound on the lower portion a bit to make it match the shape of the firewall, but it was pretty easy.

    I'm pretty confident I can make a raised tunnel for the transmission.

    tack tack tack tack tack tack


    [COLOR="#FF0000"]R[/COLOR]edneck [COLOR="#FF0000"]D[/COLOR]riveway [COLOR="#FF0000"]F[/COLOR]ab
    www.DanielBuck.net - www.DNSFAIL.com - www.FurnitureByBuck.com

    Comment


    • got most of the factory steering removed.

      I've got a question though, is there a way to remove the steering column (with the wheel still attached)? The upper bearing on the worm gear is keeping the shaft from being removed. I'm going to be cutting off the worm gear anyway, I guess I might as well just cut it right here in the jeep? Then the shaft would be removed easilly. I'm going to grind flat spots on the end of the shaft for modern u joints. (or maybe weld the joint on there, not sure)

      I want to avoid taking off the steering wheel if I can, as I've heard how much of a pain that can be. I like the original wheel, and I don't want to crack it while trying to remove it.


      [COLOR="#FF0000"]R[/COLOR]edneck [COLOR="#FF0000"]D[/COLOR]riveway [COLOR="#FF0000"]F[/COLOR]ab
      www.DanielBuck.net - www.DNSFAIL.com - www.FurnitureByBuck.com

      Comment


      • Gonna have to cut it. Worm shaft is an integrall part of the steering shaft, column tube goes over it and then the steering wheel on top

        Comment


        • ahh, thanks!
          [COLOR="#FF0000"]R[/COLOR]edneck [COLOR="#FF0000"]D[/COLOR]riveway [COLOR="#FF0000"]F[/COLOR]ab
          www.DanielBuck.net - www.DNSFAIL.com - www.FurnitureByBuck.com

          Comment


          • Finally, both adapters are on! I'm draining the rest of the oil from the transfer case now, before I put it on. I thought I got it all when I removed it, but there's still a ton in there, it's like molasses


            [COLOR="#FF0000"]R[/COLOR]edneck [COLOR="#FF0000"]D[/COLOR]riveway [COLOR="#FF0000"]F[/COLOR]ab
            www.DanielBuck.net - www.DNSFAIL.com - www.FurnitureByBuck.com

            Comment


            • Slow progress I realized that there were two holes in the transmission inbetween the adapter than weren't plugged up, so I removed the adapter and made some 1/2" plugs to plug up some holes. They were threaded, so I cut off some bolts, made a screwdriver slot, and binged the top threads with a chisel to make them "lock" so that they wouldn't possibly vibrate loose and end up inside the transmission. I also put red loctite on them just for good measure.

              Then I put that high-tack stuff on both sides of the gasket, and put the adapter back on over the transmission and flush plugs.


              [COLOR="#FF0000"]R[/COLOR]edneck [COLOR="#FF0000"]D[/COLOR]riveway [COLOR="#FF0000"]F[/COLOR]ab
              www.DanielBuck.net - www.DNSFAIL.com - www.FurnitureByBuck.com

              Comment


              • Got the transfer case bolted onto the transmission adapter, and got the motor adapter and flywheel bolted on.

                I don't think I'll be able to tighten down the nut for the overdrive unit fully (100-120lbs) until I get the transmission mated to the engine. I'll put it in gear then torque that nut down, and then install the rear part of the overdrive.

                Need to lightly sand (Brillo pad probably) the flywheel, it was outside on the motor for a few days before I got the motor pulled, it picked up a little bit of surface rust back then.

                I'm gonna get the clutch installed, then wait for a 2nd set of hands to help me put the transmission back horizontal again, haha


                Last edited by daniel_buck; 12-21-14, 08:21 PM.
                [COLOR="#FF0000"]R[/COLOR]edneck [COLOR="#FF0000"]D[/COLOR]riveway [COLOR="#FF0000"]F[/COLOR]ab
                www.DanielBuck.net - www.DNSFAIL.com - www.FurnitureByBuck.com

                Comment


                • I'm slow, I know!

                  Got the passenger side motor mount almost done. I still need to put a gusset/rib on the underside. Trying out some TIG welding. Not perfect and even looking... gotta get more practice, haha

                  These motor mounts will push the motor forward 1.75 inches. That will leave about 1/4" room for the radiator fan 
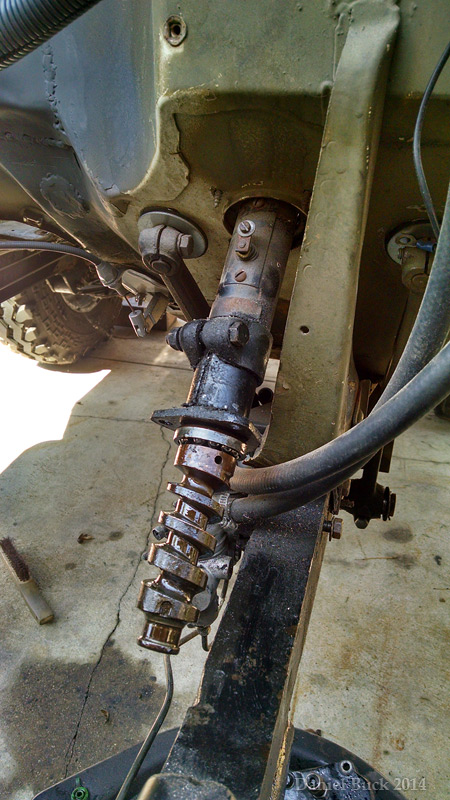
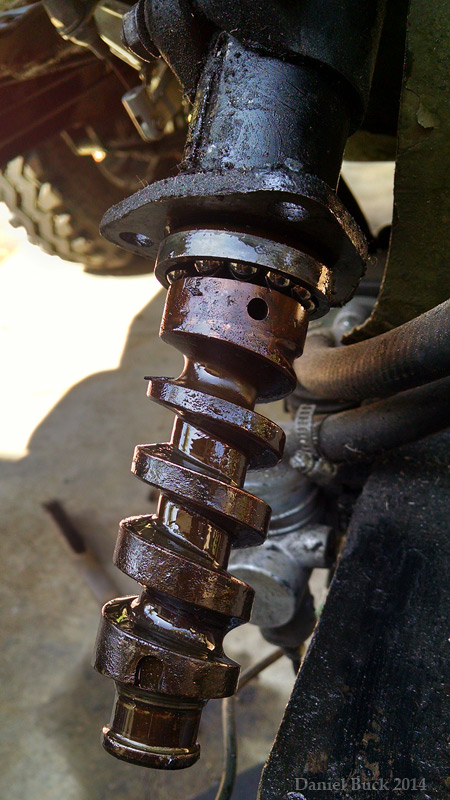
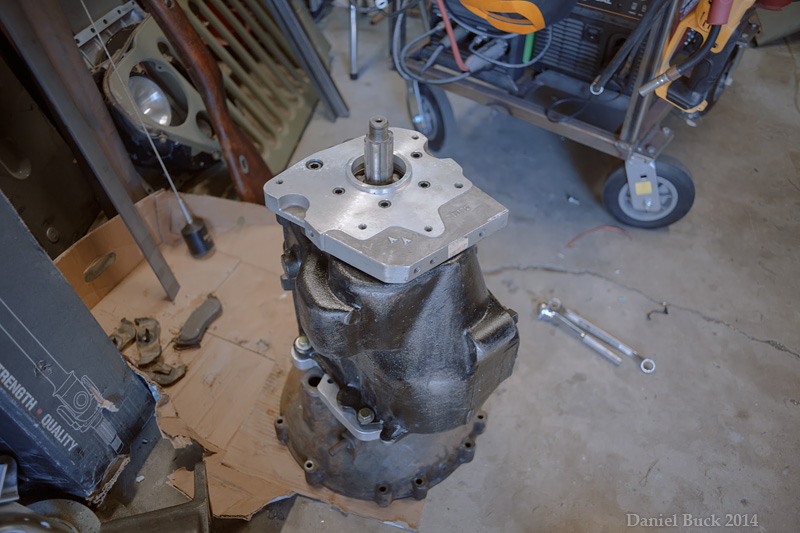
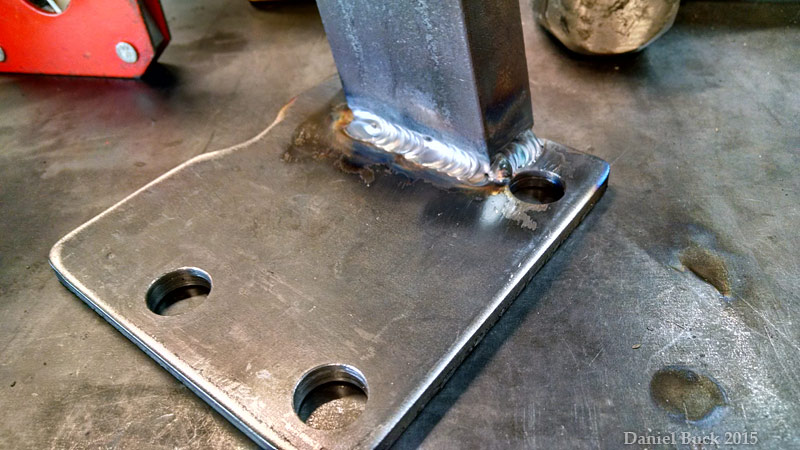
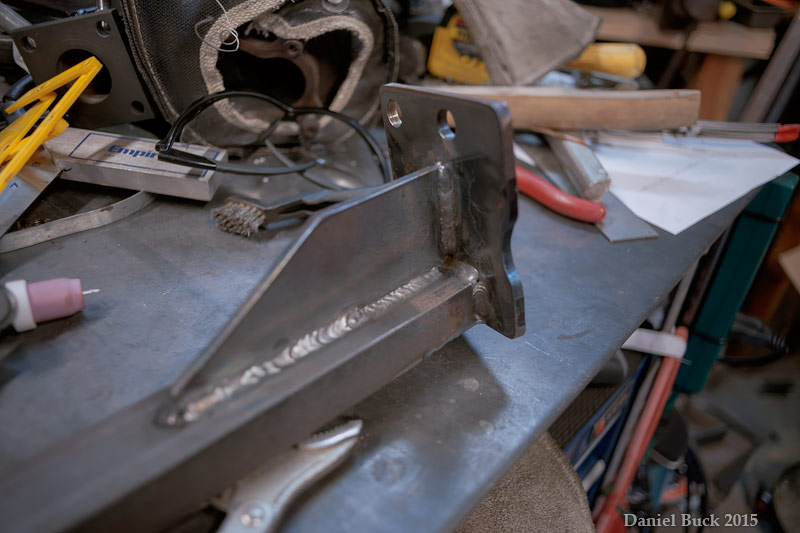
I'll slot the hole on the end of the motor mount that mounts to the rubber isolator to give some wiggle room incase 1/4" isn't enough space. Hopefully I won't need to lengthen and shorten the driveshafts... but we'll see
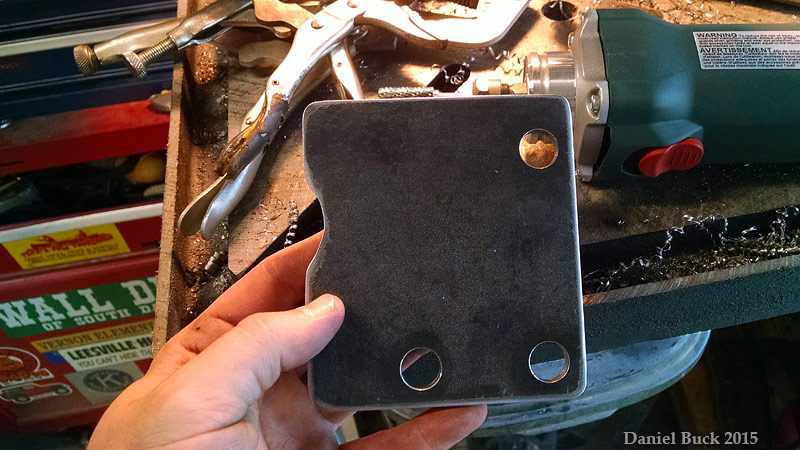
                  Used my new die grinder to cut out the notch where there's a fitting on the motor that gets in the way of the plate. Man, the die grinder with carbide bits just munches through the plate so easily. And I'll be grinding out the weld area near that bolt hole so the bolt can be flush with the plate, it's a tight fit but it'll work.


                  [COLOR="#FF0000"]R[/COLOR]edneck [COLOR="#FF0000"]D[/COLOR]riveway [COLOR="#FF0000"]F[/COLOR]ab
                  www.DanielBuck.net - www.DNSFAIL.com - www.FurnitureByBuck.com

                  Comment


                  • almost done with this mount, just need to cut the end of the channel to length, and drill the mount hole. I'm happy with the TIG welds on this, some are better than others, most of them they aren't near as even/steady as I'd like them to be, but they don't look like garbage, haha


                    [COLOR="#FF0000"]R[/COLOR]edneck [COLOR="#FF0000"]D[/COLOR]riveway [COLOR="#FF0000"]F[/COLOR]ab
                    www.DanielBuck.net - www.DNSFAIL.com - www.FurnitureByBuck.com

                    Comment


                    • Ok, starting to think about the steering. I'm going to move the radiator from the driver's side to the passenger side (and figure out the battery location later) so that I can move the steering box farther forward. It's a reverse style box, so the pitman arm extends forward. It's going to be a tight fit, but it'll fit! I've modified the upper shock mounts to give me a little extra room, and I'll need to modify the baffles on the grill to match the new radiator placement, that should be trivial though.

                      The bracket than I'm using to mock this up with was originaly intended to use the factory radiator position, which would leave the steering box about 2-3 inches farther back than how I have it sitting right here. I don't mind moving the radiator, and from what I've been told it's good to get the steering box farther forward. I COULD notch the front cross member and move it even farther forward. I've never setup steering before, so I don't know how far forward is optimal.

                      I'll be boxing the section of frame forward of the cross member, and there will be a winch plate mounted there as well. After it's all done, it should be stiffer. I imagine later on down the road I will be replacing the entire frame with something stronger (it's inevitable, right? haha), but for now I'm keeping the factory frame.

                      Here's some photos showing the pitman arm centered and at full turn, does this look reasonable in regards to how far forward of the axle this is?


                      Last edited by daniel_buck; 01-19-15, 10:13 PM.
                      [COLOR="#FF0000"]R[/COLOR]edneck [COLOR="#FF0000"]D[/COLOR]riveway [COLOR="#FF0000"]F[/COLOR]ab
                      www.DanielBuck.net - www.DNSFAIL.com - www.FurnitureByBuck.com

                      Comment


                      • Length of the pitman arm/ the throw of it determines how much the wheels will turn. Looking at it a steering box with a rear ward pointing pitman arm would have suited this setup better. Box of a CJ5 or CJ7 might have worked better. Then all that would be needed is to work around the radiator with the steering shaft (think U joints) Also try and get the draglink horizontal

                        Comment


                        • I was going to try and keep the box behind the crossmember, but I think you are right, going with a regular steering box with a rearward facing pitman arm is probably going to be the best thing. I'll still have to notch the cross member to get the steering shaft to the box (or put a hole through it) but that's fine.
                          [COLOR="#FF0000"]R[/COLOR]edneck [COLOR="#FF0000"]D[/COLOR]riveway [COLOR="#FF0000"]F[/COLOR]ab
                          www.DanielBuck.net - www.DNSFAIL.com - www.FurnitureByBuck.com

                          Comment


                          • Got the front bumper and frame horns removed. There were a few cracks in there, so I cut it all out. Not really sure what style bumper I want to do, I may just do a simple boxed 'cross member' type bumper that goes inbetween the frame rails, and weld it all up, then box up the frame and put some fish plates on the outsides of the frame rails going from the front cross member to the end of the frame to strengthen everything for the steering and twisting. The frame is flat, and nothing attaches to it in that area so that would be pretty simple to do.

                            Last edited by daniel_buck; 01-20-15, 08:42 PM.
                            [COLOR="#FF0000"]R[/COLOR]edneck [COLOR="#FF0000"]D[/COLOR]riveway [COLOR="#FF0000"]F[/COLOR]ab
                            www.DanielBuck.net - www.DNSFAIL.com - www.FurnitureByBuck.com

                            Comment


                            • and I found this sweet little gem on the side of the frame. I was able to remove it without damaging it. According to the numbers, it's VIN 40500, which matches the plate on the body. So I'm guessing this old jeep was all original

                              [COLOR="#FF0000"]R[/COLOR]edneck [COLOR="#FF0000"]D[/COLOR]riveway [COLOR="#FF0000"]F[/COLOR]ab
                              www.DanielBuck.net - www.DNSFAIL.com - www.FurnitureByBuck.com

                              Comment


                              • Ya know it's starting to look more and more like Jonah's Opy, which is a good thing

                                Comment

                                Working...
                                X