Announcement

Collapse
No announcement yet.

turbo diesel Willys!

Collapse

Forum Thread First Post

Collapse
X
 
  • Filter
  • Time
  • Show
Clear All
new posts

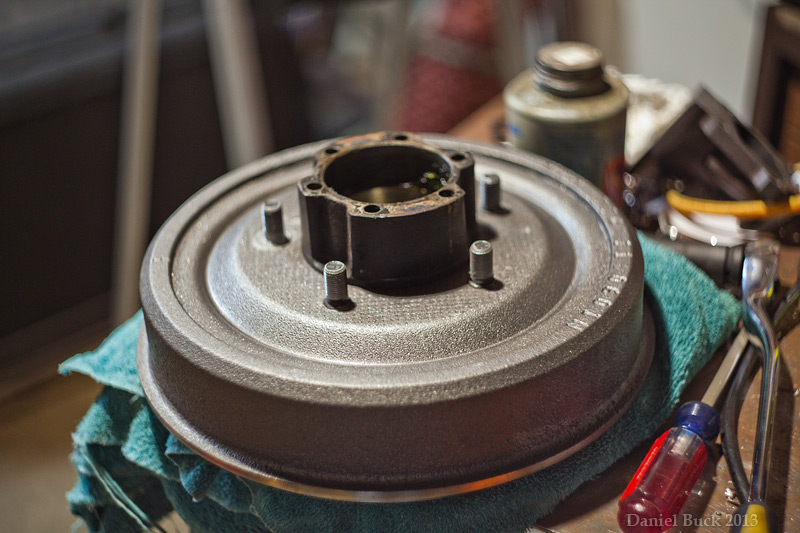
  • Got the studs installed to the hubs and drums, first time ever doing that, it went pretty smoothly I think. Just used a nice thick washer and put a good amount of anti-seize on the threads, and cranked it down with my largest ratchet (2 foot handle). The last few pulls were pretty darn tight, and by the 8th lug or so, I was getting tired, haha! 1 beer per hub

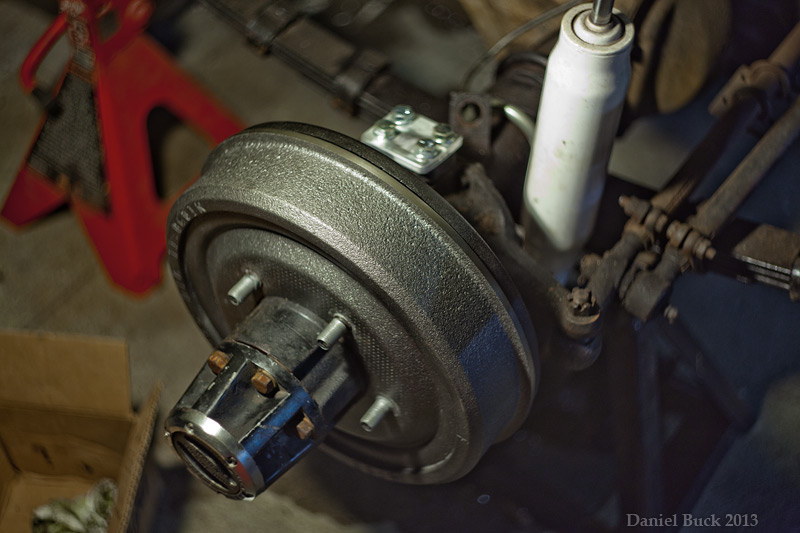
    So, now it's time to pop these suckers back on! Anyone know the procedure for torquing the large hub nuts? They weren't really on there very tight, so I assume it was something like torque it snug to seat the bearing, then back off 1/8th of a turn or something? Then just get the the 2nd hub nut snug?

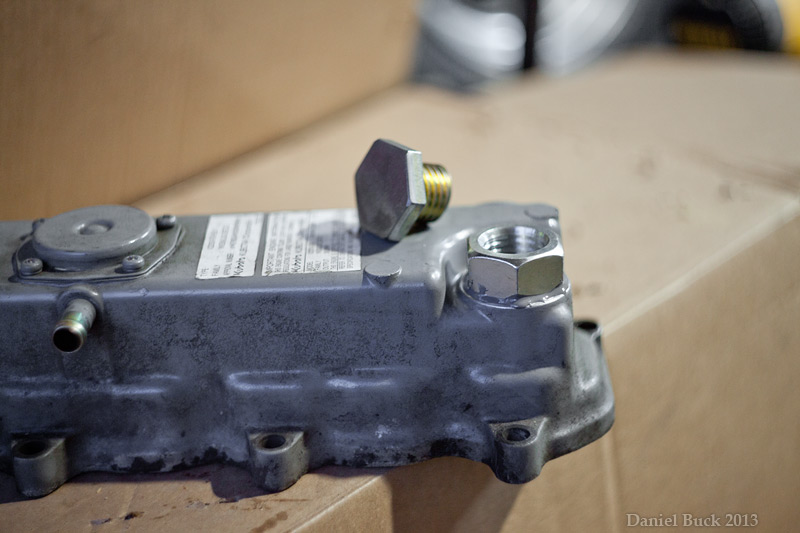
    And here's those king pin cap covers.


    [COLOR="#FF0000"]R[/COLOR]edneck [COLOR="#FF0000"]D[/COLOR]riveway [COLOR="#FF0000"]F[/COLOR]ab
    www.DanielBuck.net - www.DNSFAIL.com - www.FurnitureByBuck.com

    Comment


    • Trying to do just a little bit every night, chip away at it

      Got the front brakes on, and the little king pin cap covers. I couldn't figure out how to bend the spindle washer to make it a lock washer, once I figure out how to do that I'll remove the hub cover and do that. I can do that without jacking the jeep or removing the wheels. Anyone know how to bend one side of that washer after the spindle nut is on? I can't seem to get any leverage on it to bend it, not much space to fit a tool in there.

      Tomorrow I'll run the front brakes, bleed them, and finally start working on the electrical

      [COLOR="#FF0000"]R[/COLOR]edneck [COLOR="#FF0000"]D[/COLOR]riveway [COLOR="#FF0000"]F[/COLOR]ab
      www.DanielBuck.net - www.DNSFAIL.com - www.FurnitureByBuck.com

      Comment


      • Mark where you want to bend them then prebend them a bit in the vice

        Comment


        • if I prebend it, won't the spindle nut just flatten it out as it gets tight? or would the pre bend on the very edge just give me a bit more room to get something in there?
          [COLOR="#FF0000"]R[/COLOR]edneck [COLOR="#FF0000"]D[/COLOR]riveway [COLOR="#FF0000"]F[/COLOR]ab
          www.DanielBuck.net - www.DNSFAIL.com - www.FurnitureByBuck.com

          Comment


          • Originally posted by daniel_buck View Post
            if I prebend it, won't the spindle nut just flatten it out as it gets tight? or would the pre bend on the very edge just give me a bit more room to get something in there?
            The latter part of what you just wrote

            Comment


            • So I've got the fuel gauge hooked up to my fuel cell's sending unit. The sending unit calls for a 0-90 OHM gauge. I have no clue what the gauge is. But I do know this, I've got a little less than 5 gallons in the cell (it holds 15 gallons), and the gauge is reading 3/4 full.

              So, the gauge is working, but it's probably expecting a different OHM range. Is there something I can put in-line to calibrate the gauge? Or am I going to have to get a different gauge? It's not the end of the world that the gauge doesn't read right, but I'd like it to.
              [COLOR="#FF0000"]R[/COLOR]edneck [COLOR="#FF0000"]D[/COLOR]riveway [COLOR="#FF0000"]F[/COLOR]ab
              www.DanielBuck.net - www.DNSFAIL.com - www.FurnitureByBuck.com

              Comment


              • You're positive the float is in the optimal vertical position in the tank? If so you might try adding some resistors in line until you get a good reading. IIRC more current (and less r)generally equals more empty.

                EDIT: That depends on the float/ wiper setup. If the float just slides on it, then less resistance = more full, so the resistors would make it worse. Can you raise the float level in the tank?

                EDIT the EDIT: I corrected the above to say less resistance = more full. Sorry.
                Last edited by inVERt'D; 11-03-13, 08:16 PM.
                holes = cowbell

                Comment


                • As it turns out, my gauge needs the opposite, 0 OHMs would mean full, while my sending unit sends 0 OHMs when it's empty. So, I just ordered a new gauge. The gauge looks the same (same manufacturer, Stewart Warner) and is setup for 0-90 OHM, 0 being empty.
                  [COLOR="#FF0000"]R[/COLOR]edneck [COLOR="#FF0000"]D[/COLOR]riveway [COLOR="#FF0000"]F[/COLOR]ab
                  www.DanielBuck.net - www.DNSFAIL.com - www.FurnitureByBuck.com

                  Comment


                  • A video of the jeep! I love how the turbo sounds :-D


                    http://www.youtube.com/watch?v=ky6mi...ature=youtu.be
                    [COLOR="#FF0000"]R[/COLOR]edneck [COLOR="#FF0000"]D[/COLOR]riveway [COLOR="#FF0000"]F[/COLOR]ab
                    www.DanielBuck.net - www.DNSFAIL.com - www.FurnitureByBuck.com

                    Comment


                    • Originally posted by daniel_buck View Post
                      As it turns out, my gauge needs the opposite, 0 OHMs would mean full, while my sending unit sends 0 OHMs when it's empty. So, I just ordered a new gauge. The gauge looks the same (same manufacturer, Stewart Warner) and is setup for 0-90 OHM, 0 being empty.
                      Sorry I actually meant to say the opposite of what I did on my first EDIT, because that was just a restate of what I said the first time around. Glad you got it sorted out.

                      Originally posted by daniel_buck View Post
                      A video of the jeep! I love how the turbo sounds :-D


                      http://www.youtube.com/watch?v=ky6mi...ature=youtu.be
                      That turbo does cool, almost cartoonish, even!
                      holes = cowbell

                      Comment


                      • Originally posted by daniel_buck View Post
                        As it turns out, my gauge needs the opposite, 0 OHMs would mean full, while my sending unit sends 0 OHMs when it's empty. So, I just ordered a new gauge. The gauge looks the same (same manufacturer, Stewart Warner) and is setup for 0-90 OHM, 0 being empty.
                        Why don't you keep the old gauge; each run could start on "Empty" and finish on "Full" and you could make up a good story about how your flux capacitor creates fuel out of thin air.
                        If you don't like the way I drive, stay out of the bushes!
                        KI6MLU

                        Comment


                        • haha, I thought about that Russ! But unfortunately the old gauge wasn't 0-90 (or rather, 90-0), it's something like 130-0. Still could have worked I guess, it would just never show completely full (or, "empty" when full, haha!) Just to save confusion though, and since I found a gauge that looks the same, I just ordered a new one.
                          [COLOR="#FF0000"]R[/COLOR]edneck [COLOR="#FF0000"]D[/COLOR]riveway [COLOR="#FF0000"]F[/COLOR]ab
                          www.DanielBuck.net - www.DNSFAIL.com - www.FurnitureByBuck.com

                          Comment


                          • Here's a photo of the engine bay, got the wires going over to the driver side nice and clean now, still not sure what to do with that jumble behind the fuse box, I think my decision to use the large 6 pin connectors was not a good idea, no way to really cover them up.

                            And also in hind site, I should have put a second entry hole on the front of the box, so that I wouldn't have to bend alot of the wires around the box to enter the rear of the box. Maybe I'll save that for a rainy day. Right now I'm just going to be happy to drive it again Also on that rainy day, I think I'll pick up a set of battery cables that are a bit shorter. The power cable is probably a foot to long, and the ground cable could probably be 6 or 8 inches shorter.
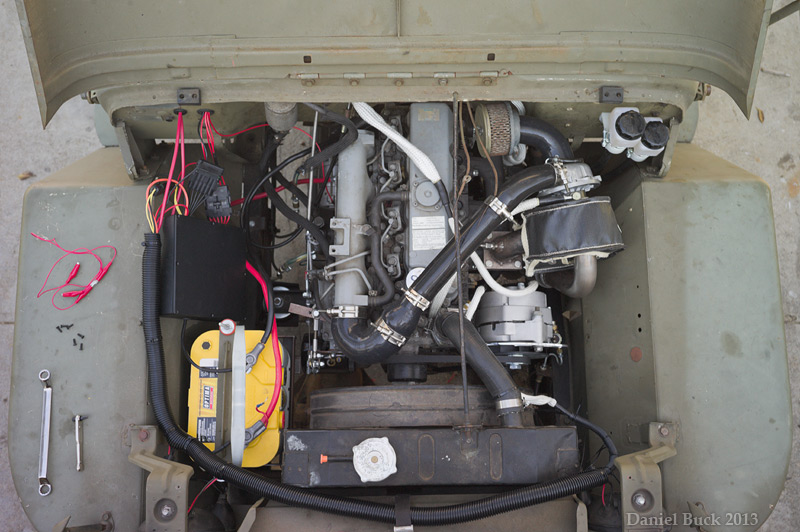

                            I've checked most things off my list. Still left to do, I have to run the wires to the tail lights, and then figure out a way to hook up the engine coolant temperature gauge probe to the motor. The probe is just slighty smaller than the entry hole, not enough room for an adapter. And then finally I need to put a stiffer spring in the governor, as it is now the motor cuts power way to soon in the RPMs. I knew this would have to be done, but I saved it for the last step since it will still be drivable, it just won't have full power. I also need to move the gas pedal over a bit, it's to close to the brake pedal, I sometimes hit it when I'm braking. Although right now, since I haven't adjusted the brakes or finished bleeding them, the pedal falls to the floor, so maybe once the pedal is firm I may not need to move the throttle pedal over, we'll see. Since I don't have full brakes yet, I guess it's just as well that I don't have full power yet I'll also be doing something with the intake to the turbo, still haven't decided if I want to run the intake into the jeep and under the dash, or maybe out the side of the engine bay and behind the passenger fender, not sure, but I think for sure I don't want it drawing air from inside the engine bay.


                            I also broke down and ordered a set of custom springs from a local spring company, Atlas Spring. They said they have made springs for these old jeeps before, and they should be much softer than what I have. They will also push the front axle forward 1 inch or so, though I guess just on inch really won't make much of a difference in handeling. After taking several pictures while standing on the bumper, I realized that man the springs are really stiff, I can jump on the bumper, and the jeep hardly moves, haha! So i thought about it for a while, then finally broke down and called up Atlas.

                            I drove it around the block (with almost no brakes, LOL!) and it sounds so sweet, man I wish my TJ sounded like this now, haha


                            [COLOR="#FF0000"]R[/COLOR]edneck [COLOR="#FF0000"]D[/COLOR]riveway [COLOR="#FF0000"]F[/COLOR]ab
                            www.DanielBuck.net - www.DNSFAIL.com - www.FurnitureByBuck.com

                            Comment


                            • Got the exhaust finished, and and came up with a solution for the oil cap. I had a cap with a rubber press-in fitting that I thought was going to work, but as I was driving around, it popped out twice. And the last time it popped out I heard it hit the hood and then the ground, so I had to come up with something. I guess once the motor got warmed up, the rubber just gets so soft that the pressure pops it off.

                              The problem is that the valve cover is really close to the rockers, so the cap can't really protrude very much. So, I JB welded on a large nut, which gave me threads, and enough depth to actually have 5-6 full threads.

                              I'll put a rubber O-ring on the bolt to both help it seal, and hopfully give it sort of a "lock washer" effect and see if it stays put. I ground down the top of the bolt so it's thinner. If I notice that it starts to work itself loose, what I'll do is weld a little tab with a small hole in it to one side of the bolt, and use some bailing wire to wire it snug so that it can't work loose.


                              Last edited by daniel_buck; 11-12-13, 12:02 AM.
                              [COLOR="#FF0000"]R[/COLOR]edneck [COLOR="#FF0000"]D[/COLOR]riveway [COLOR="#FF0000"]F[/COLOR]ab
                              www.DanielBuck.net - www.DNSFAIL.com - www.FurnitureByBuck.com

                              Comment


                              • If the JB weld lets go you can tap the cover for either 1" or 1 1/4" NPT and use a socket head plug.
                                God forgives, rocks don't
                                -sons of thunder

                                Comment

                                Working...
                                X