Announcement

Collapse
No announcement yet.

Personalizing My Zuk

Collapse

Forum Thread First Post

Collapse
X
 
  • Filter
  • Time
  • Show
Clear All
new posts

  • #76
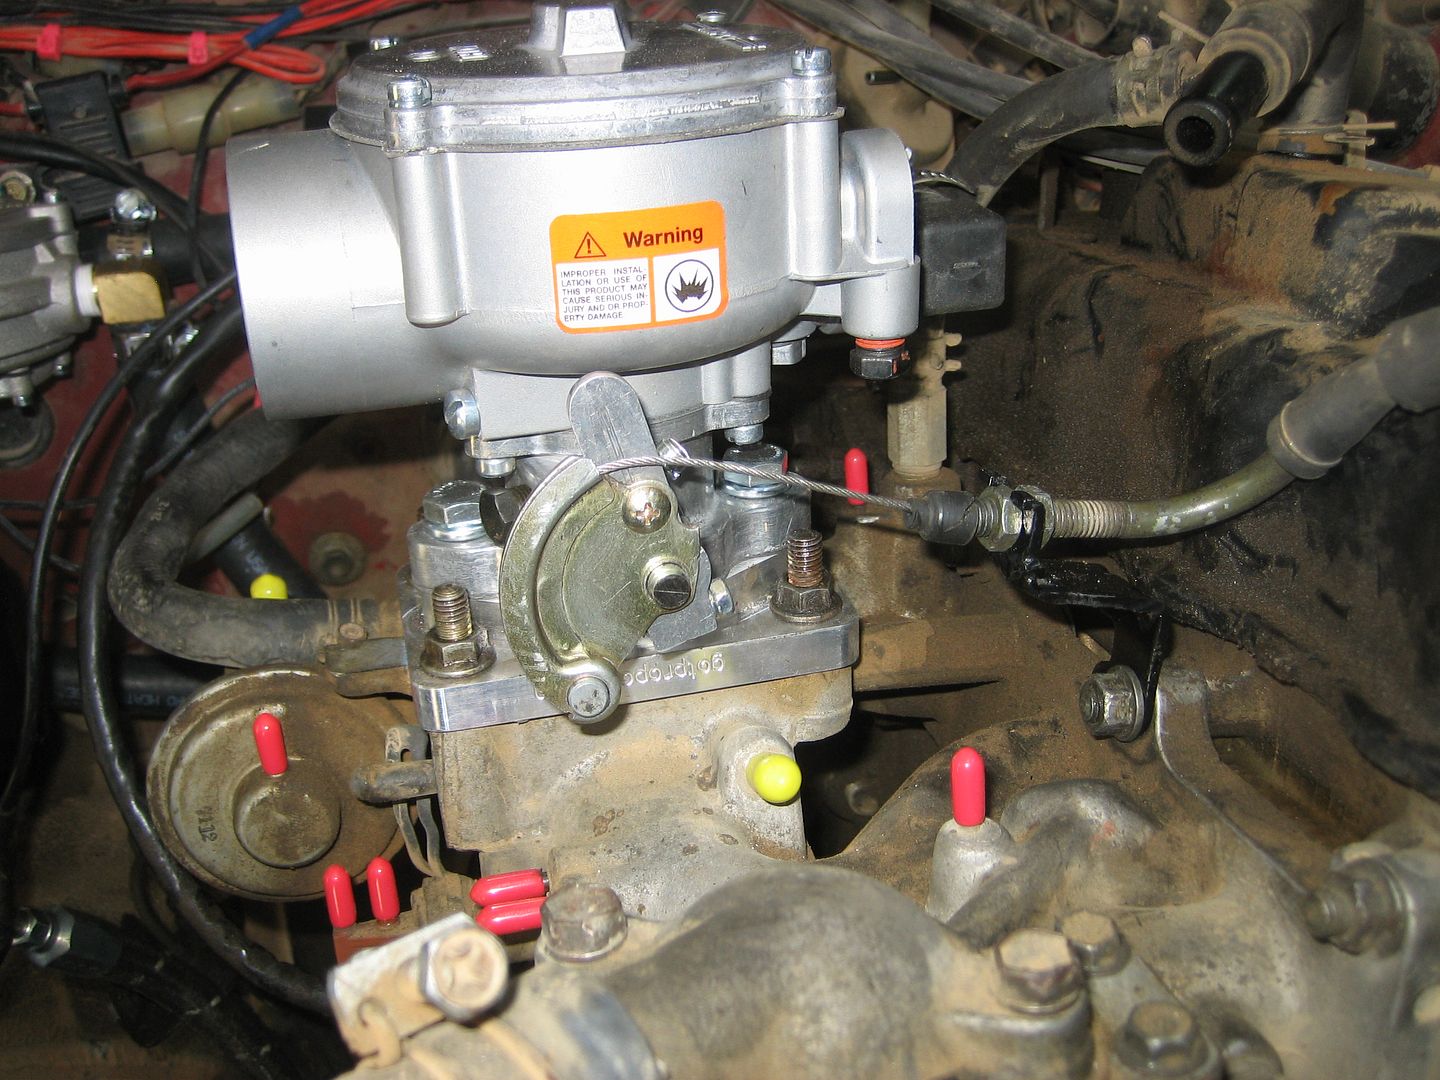
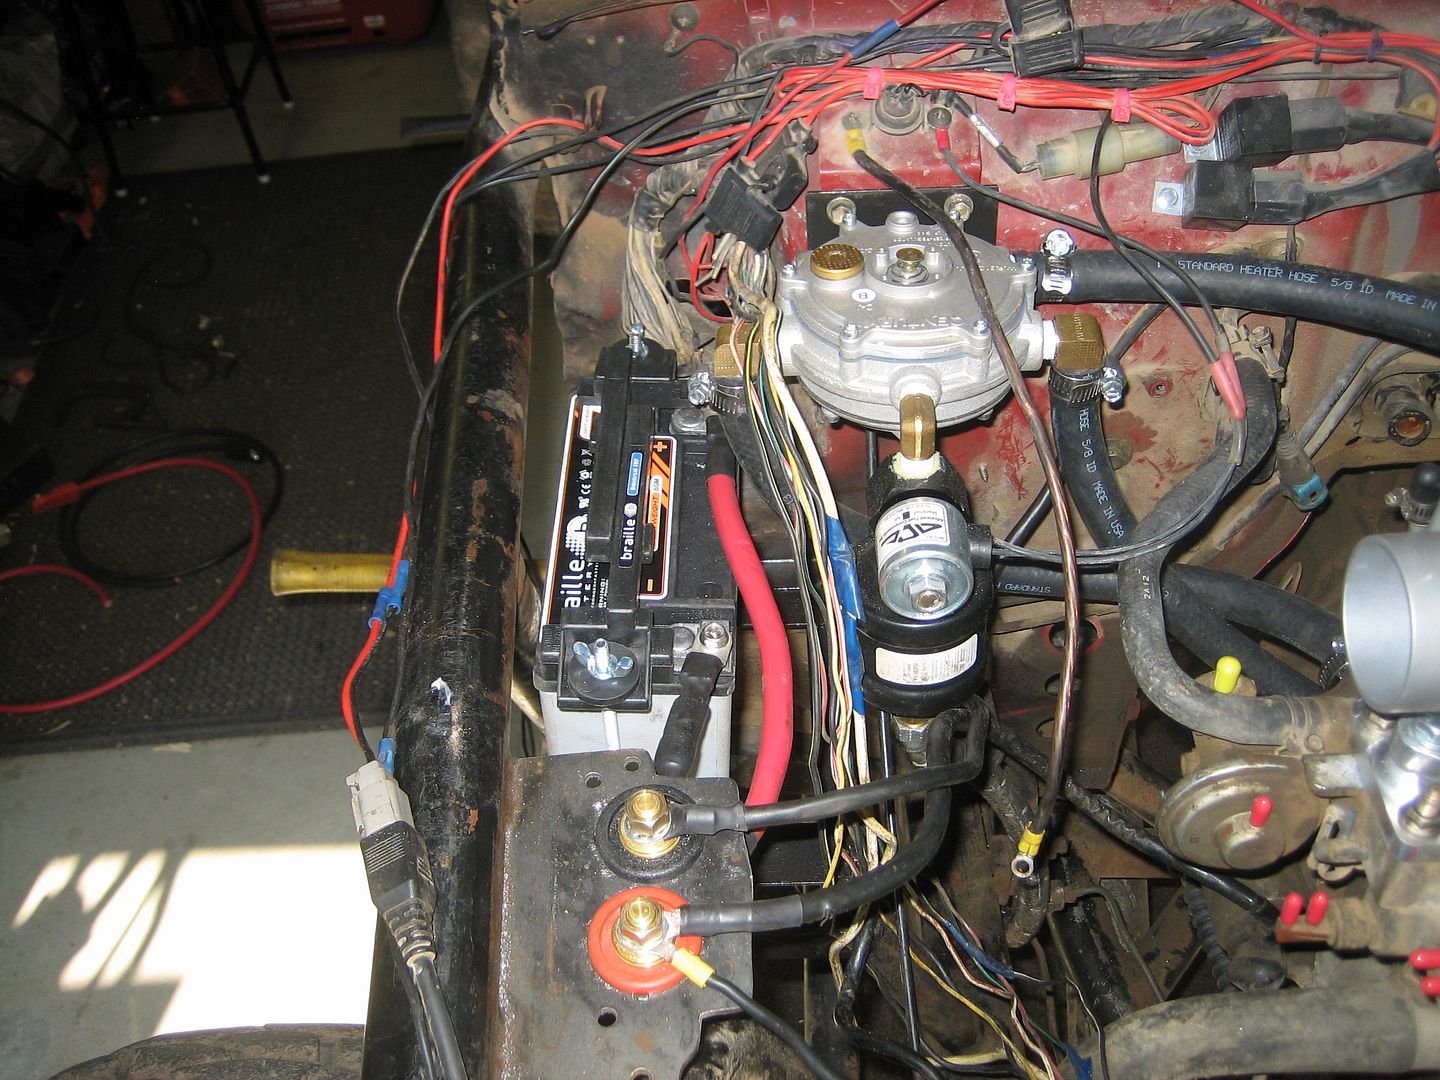
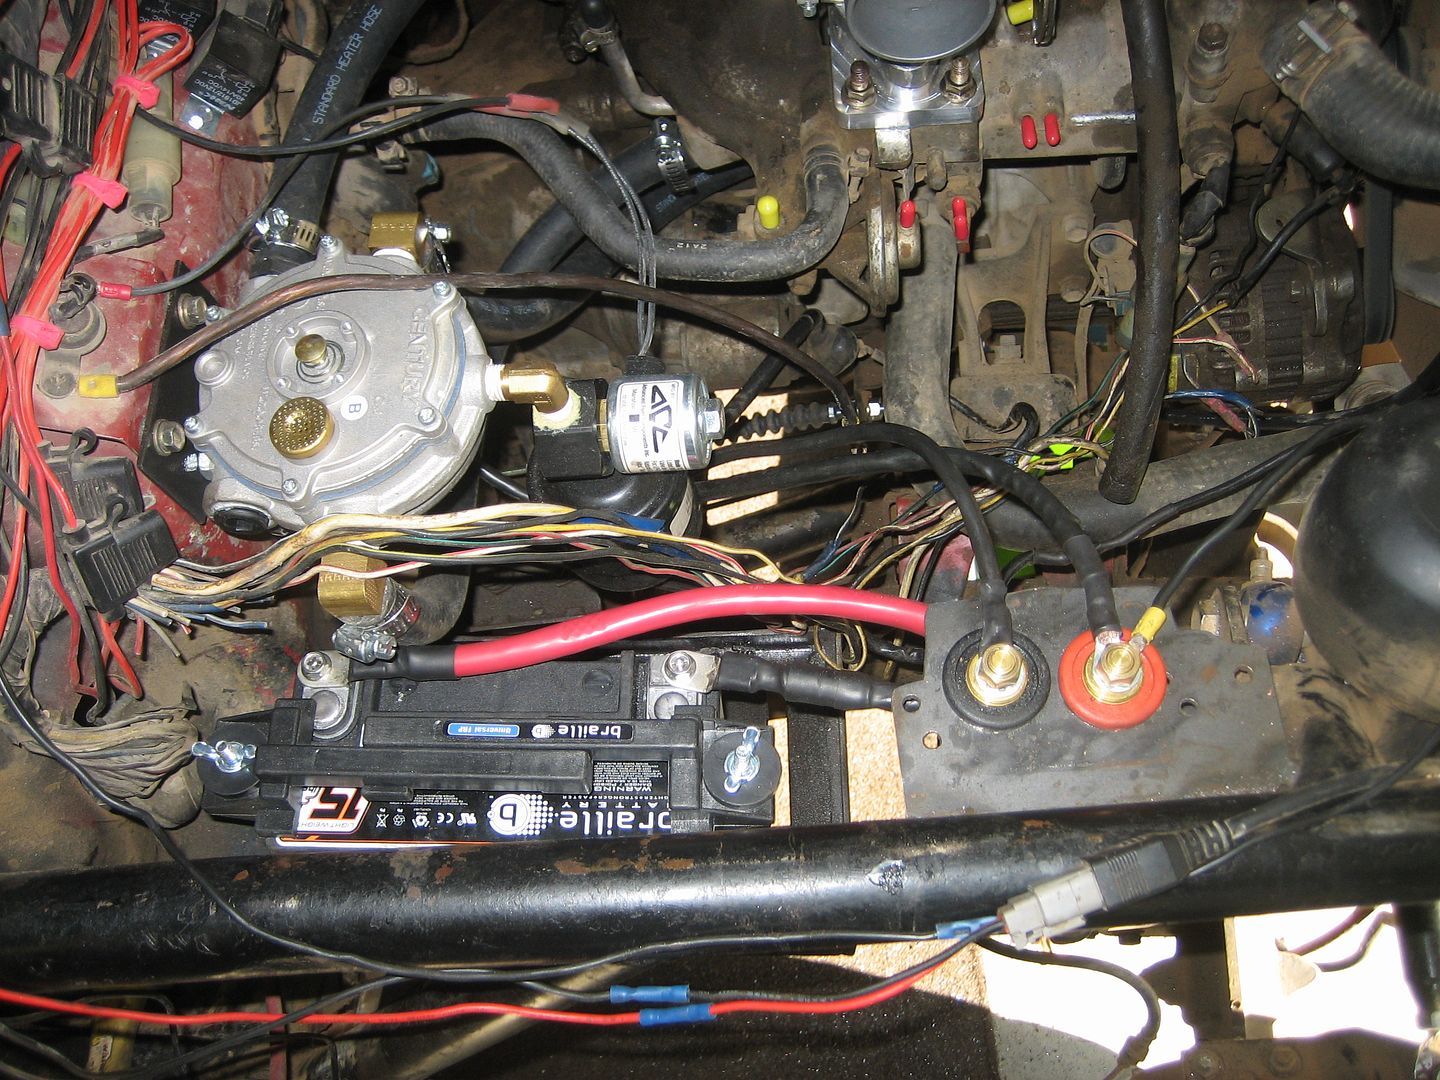
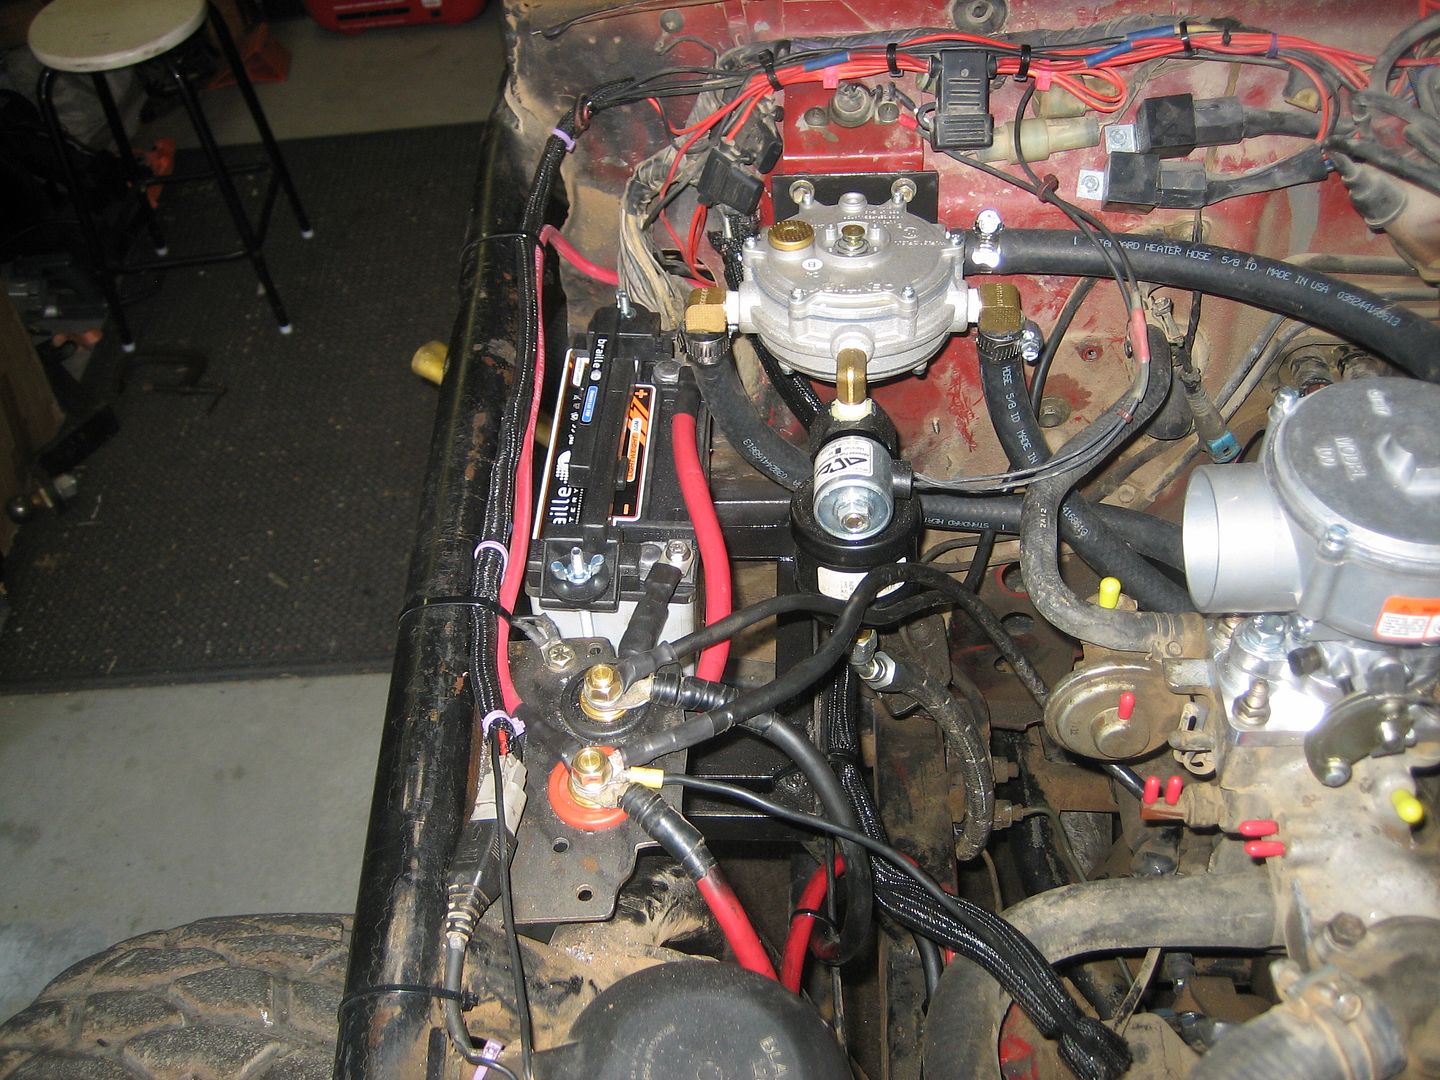
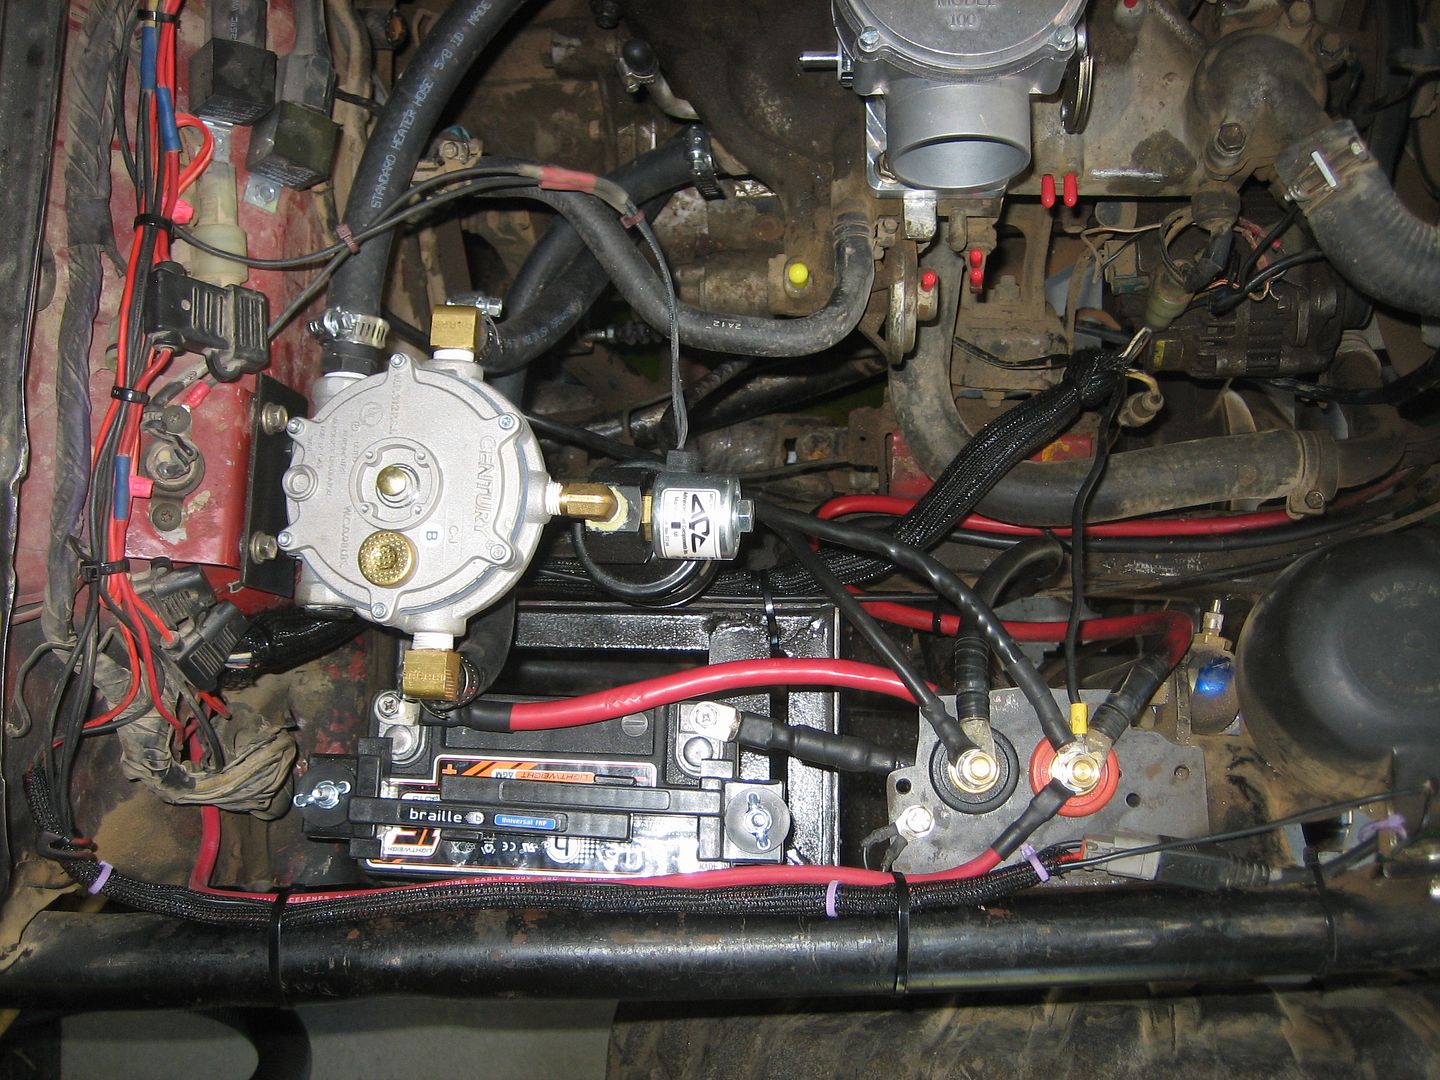
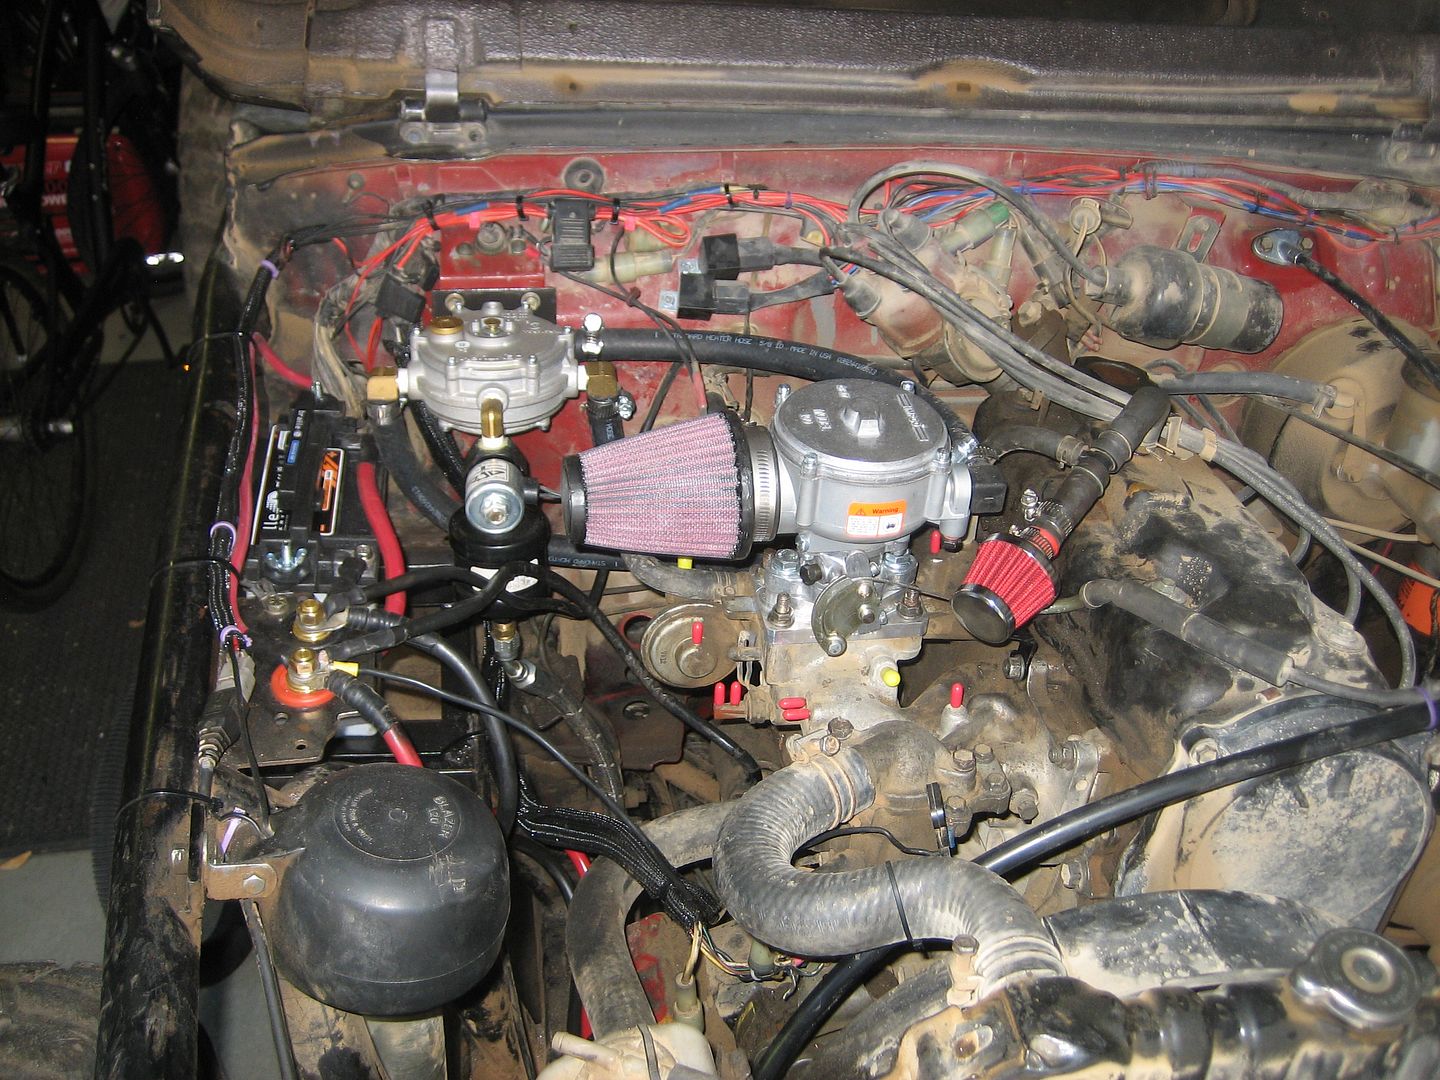
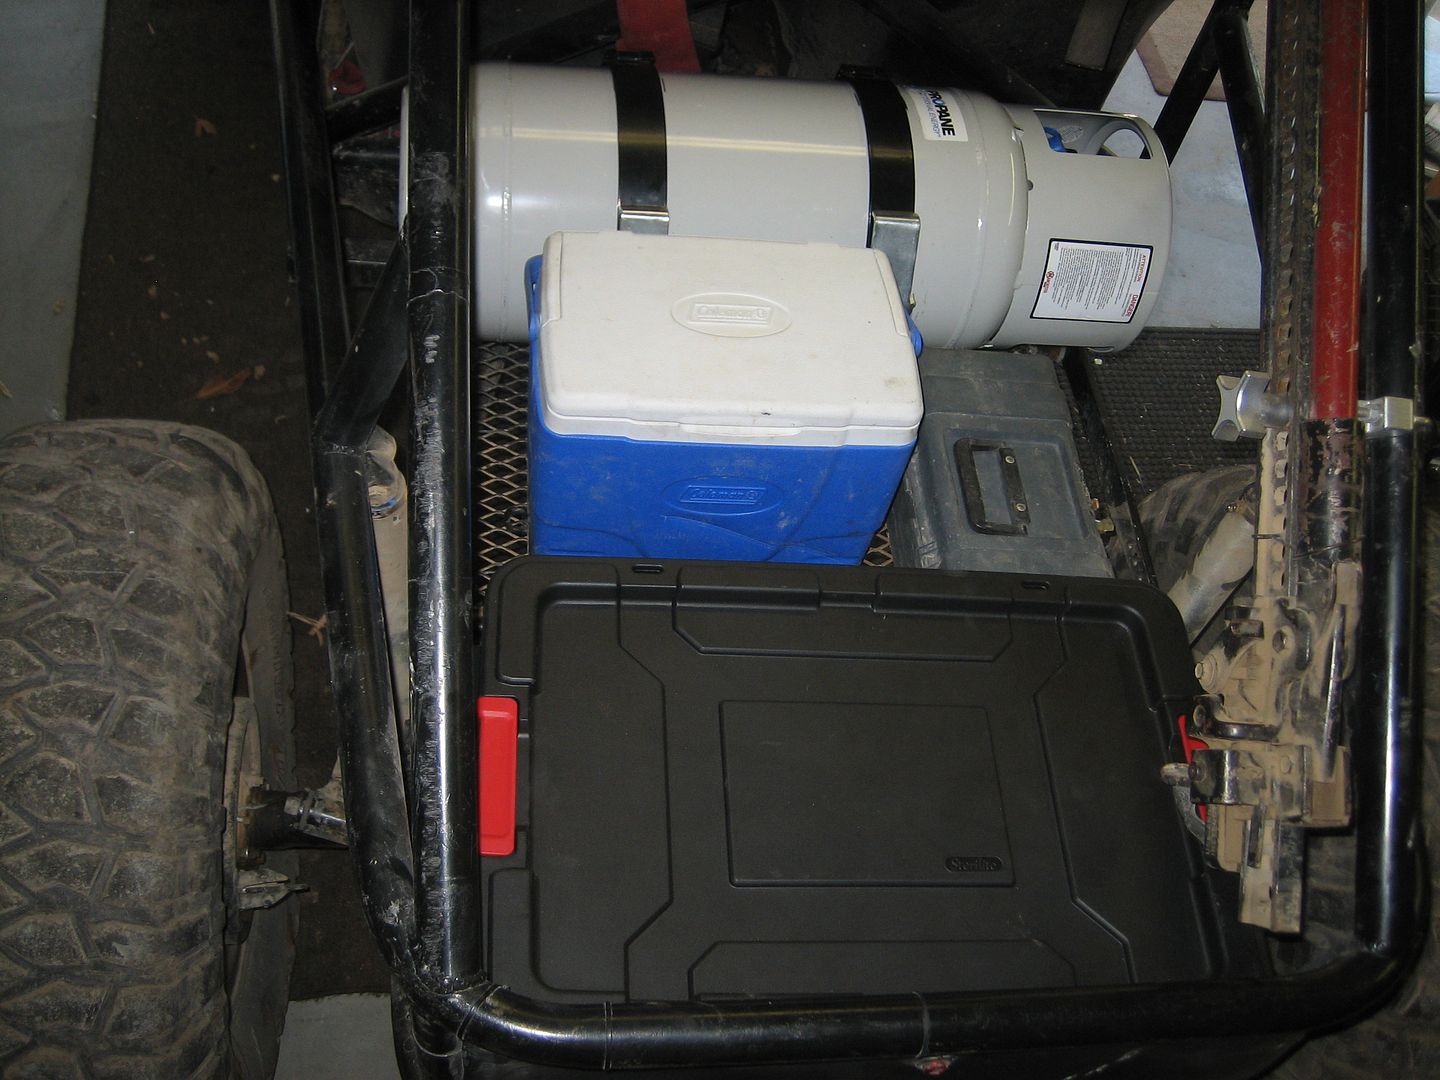
    I found some time today. Was able to test fire it. I can't praise this kit enough. GotPropane.com, check'm out. I flipped the switch, hit the ignition, The engine turned about 6 times, and it fired right up. I was ecstatic. Sorry the video is so rough, I shot it with my point and shoot camera. I have a few things to finalize, but hearing that 1.6 roar has got me excited again.

    Here's a vid of the 1st start up.
    http://vid1128.photobucket.com/album...psy0hgzerv.mp4
    Last edited by Tumbleweed13; 07-08-15, 06:20 PM.
    It was like that when I got here.

    Comment


    • #77
      Found some time to get a bit of work done.

      Got the throttle linkage all hooked up. Had to mod a couple pieces from the stock carb, to get it to work.


      Took out some unnecessary wires from the harness.


      Installed the new clutch cable. When I rolled over backwards, the cable got pushed into the fan. Eventually it ate thru the housing. The tie wire was my trail fix. to get me back to camp. Fortunately, it happened on the last day after the last trail.
      It was like that when I got here.

      Comment


      • #78
        How long till you fire it up?
        Nice fab work!
        Hint-carry spare nipple caps, as 1 back-fire can blow'em off-BTDT:wink:
        LG
        Hav'n you along, is like loose'n 2 good men....

        Comment


        • #79
          Originally posted by Lumpy Grits View Post
          How long till you fire it up?
          Nice fab work!
          Hint-carry spare nipple caps, as 1 back-fire can blow'em off-BTDT:wink:
          LG
          I just heard that the other day, about the nipple caps. I'll look into it.

          I started it up a couple weeks ago. Check out post #76, at the top of this page, and click the link.
          It was like that when I got here.

          Comment


          • #80
            Somehow(I'm OLD)I miss'd see'n that vid.
            Sounds like it will work very well.......
            LG
            Hav'n you along, is like loose'n 2 good men....

            Comment


            • #81
              Finally found some time to get back out in the garage, today. I got some electrical work done, that became necessary. My regulator location for my propane kit, took up some of my space for my battery. My original plan, was to relocate my battery between/behind my seats. Always weight conscious, I decided to go with a Braille 15lbs. race battery. Its the size of a motorcycle battery, but still has 450 CCA @ 0 degrees. After I got everything for the propane kit finalized, under the hood. I discovered I had room for the new battery, in the original location. It is a tight fit, and its tough to access the terminals. So, I decided to install a couple bulkheads, that are easier to get to. I used 1 gauge wire to connect the battery to the bulkheads. I made the custom length wires myself. What a PITA! I still need to clean up the birds nest of wires under the hood. But everything is in working order.

              Art I hope to be hitting you up for a night run in the next couple weeks. Hope your toy is good to go.

              Here's how it came out.


              Last edited by Tumbleweed13; 07-23-15, 08:44 PM.
              It was like that when I got here.

              Comment


              • #82
                Have you thought about a emergency disconnect for the pos(+)side of the battery?
                Are any of the cut wires above the POS(+) terminal 'hot'? I would shield them off and wrap.
                LG
                Hav'n you along, is like loose'n 2 good men....

                Comment


                • #83
                  Originally posted by Tumbleweed13 View Post
                  Finally found some time to get back out in the garage, today. I got some electrical work done, that became necessary. My regulator location for my propane kit, took up some of my space for my battery. My original plan, was to relocate my battery between/behind my seats. Always weight conscious, I decided to go with a Braille 15lbs. race battery. Its the size of a motorcycle battery, but still has 450 CCA @ 0 degrees. After I got everything for the propane kit finalized, under the hood. I discovered I had room for the new battery, in the original location. It is a tight fit, and its tough to access the terminals. So, I decided to install a couple bulkheads, that are easier to get to. I used 1 gauge wire to connect the battery to the bulkheads. I made the custom length wires myself. What a PITA! I still need to clean up the birds nest of wires under the hood. But everything is in working order.

                  Art I hope to be hitting you up for a night run in the next couple weeks. Hope your toy is good to go.

                  Here's how it came out.


                  After it survives my road trip aky sandy hollow, moab and some of the better Co trails it should pretty much handle anything we can throw at it. Provided it comes home in one piece. Look for a date with a full moon. Freddy should have Betsy dialed by then too

                  Comment


                  • #84
                    I got all of the, birds nest, wiring cleaned up.


                    With all the electrical connections finalized. As well as installing the air cleaner, and engine breather, I all done under the hood.


                    Finalized the location of the propane tank. This allowed me to finish up the rear of the buggy. I mounted a 16gal locking tote, and my ice chest mount. Toolbox will be ratchet strapped into place. Although, I haven't packed the tote, yet. Toolbox my go inside the tote. A couple more small items to finish up, and I'm ready for the trail, again.


                    It was like that when I got here.

                    Comment


                    • #85
                      VERY NICELY DONE:thumbs_up
                      Would you be able to 'green-sticker' this?
                      LG
                      Hav'n you along, is like loose'n 2 good men....

                      Comment


                      • #86
                        Originally posted by Lumpy Grits View Post
                        VERY NICELY DONE:thumbs_up
                        Would you be able to 'green-sticker' this?
                        LG
                        I could. There is no title So, it would be a chore. But I think I will work on it. I want to travel to Moad, and other distant places to wheel. So, I figured it would be the smart thing to do.
                        It was like that when I got here.

                        Comment


                        • #87
                          Keep all of your receipts and like documentation.
                          A photographic record helps also.
                          You will be deal'n with DMV and CHP on this.
                          Best of luck,
                          LG
                          Hav'n you along, is like loose'n 2 good men....

                          Comment


                          • #88
                            Originally posted by Tumbleweed13 View Post
                            I could. There is no title So, it would be a chore. But I think I will work on it. I want to travel to Moad, and other distant places to wheel. So, I figured it would be the smart thing to do.
                            For Colorado you need one of their visitor ohv stickers, in UT nobody seems to care

                            Comment


                            • #89
                              After my last trip, I realized it would be easier to add a couple of recovery points, instead of wrapping the strap, around the cage. That gets to be a PITA, after a while.

                              So I ordered a couple D-ring mounts, and some Zuk bling from BlueTorch Fab


                              The front mount was mated to the factory crossmember


                              Mounted the rear mount to the center of the chassis


                              I pitched the rear mount up a bit, to help with departure angle. The tires are about even with the rear of the buggy. So, it shouldn't hit very often.
                              It was like that when I got here.

                              Comment


                              • #90
                                Found a spot for my Zuk bling.
                                It was like that when I got here.

                                Comment

                                Working...
                                X