Announcement

Collapse
No announcement yet.

lil bit of tinkering

Collapse

Forum Thread First Post

Collapse
X
 
  • Filter
  • Time
  • Show
Clear All
new posts

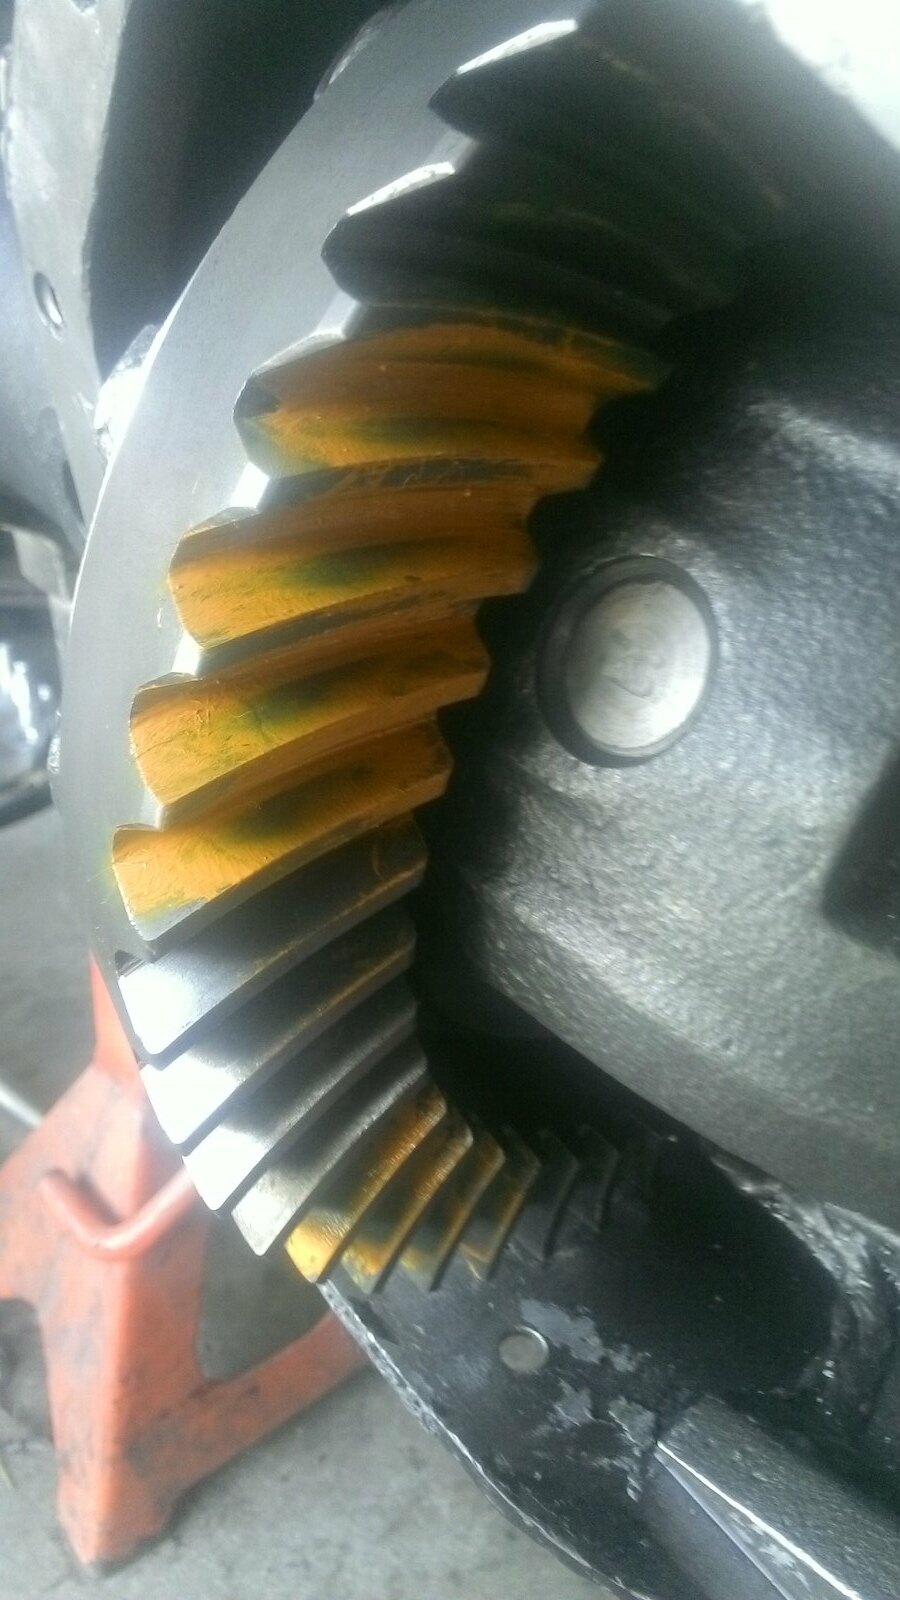
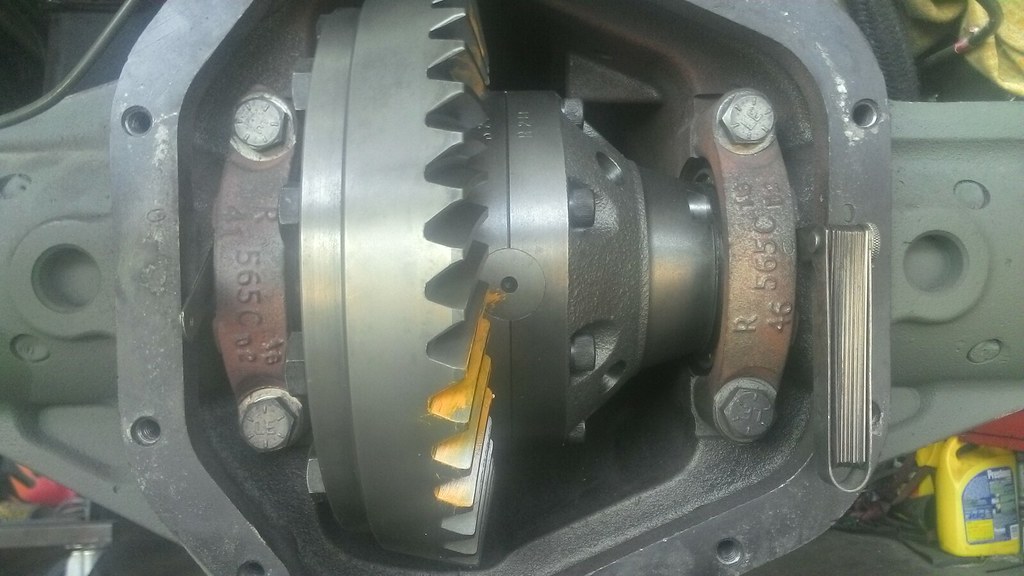
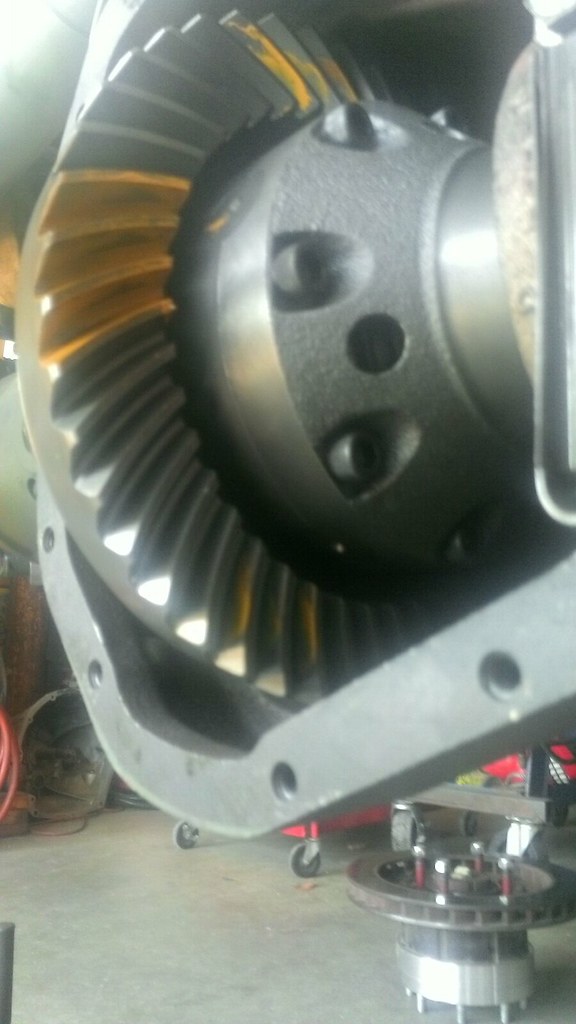
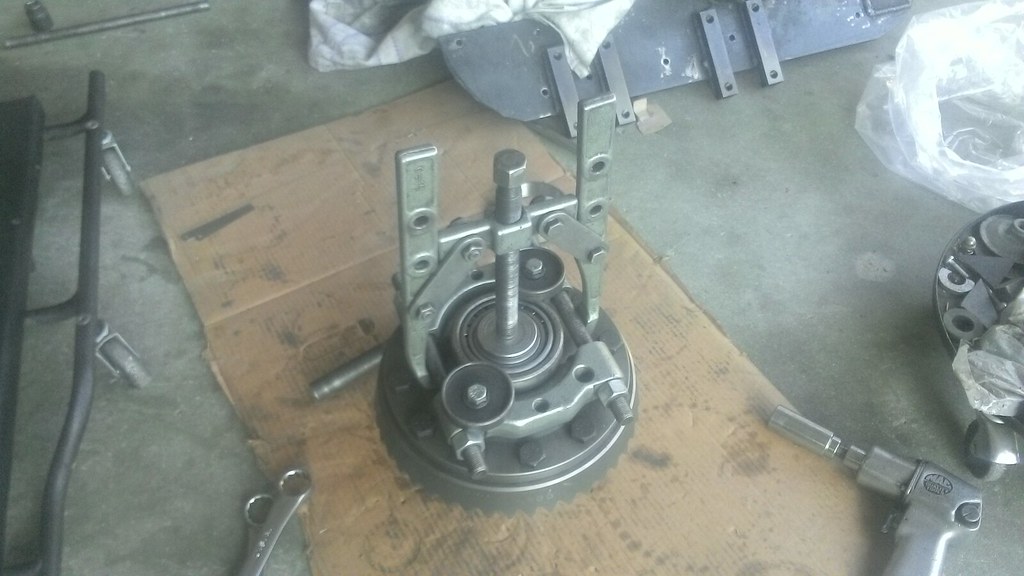
  • Scattering and splattering, gonna go Lincoln locker in the rear, need to swap a few shims on the carrier and I can get a pattern, numbers on the pinion are the same. Hope that pans out. Would make this quick and easy, just the way I like it.

    WIN_20140816_161624 by aartjestaartje, on Flickr

    Comment


    • My rinkidink pocketstyle bearing puller, works like a charm no more damaged bearing cages

      WIN_20140819_151623 by aartjestaartje, on Flickr

      Happy with this

      WIN_20140819_151743 by aartjestaartje, on Flickr

      And this

      WIN_20140819_151748 by aartjestaartje, on Flickr

      Comment


      • Originally posted by aw12345 View Post
        My rinkidink pocketstyle bearing puller, works like a charm no more damaged bearing cages

        WIN_20140819_151623 by aartjestaartje, on Flickr

        Happy with this

        WIN_20140819_151743 by aartjestaartje, on Flickr

        And this

        WIN_20140819_151748 by aartjestaartje, on Flickr
        Nothing like some nice even tooth patterns to make you smile... Sweet!
        [CENTER][COLOR=#ff0000]Resistance Off Road
        [/COLOR]Join the Resistance...
        http://www.resistanceoffroad.us[/CENTER]

        Comment


        • Put more Lincoln in the Lincoln locker cleaned it all up installed and torqued the ring gear down, cleaned the diff housin and reassembled the whole shebang. Came up with a better solution for my wheel spacers, bought some button head bolts and machined the heads down some pretty happy with that. Going to the front the same way.

          WIN_20140820_194918 by aartjestaartje, on Flickr

          Rear is all back together, just needs oil and a pipe plug in the top of the housing.
          Sold the ARB locker so got some cash for driveshafts. Fruitful day for sure

          WIN_20140820_200002 by aartjestaartje, on Flickr

          Comment


          • Got the front end all scattered and splattered.

            Cheater way to get an idea for the shim pack for the carrier and get backlash in the ballpark to check pinion depth.

            WIN_20140821_145209 by aartjestaartje, on Flickr

            Looks like a pretty lucky guess for pinion depth

            WIN_20140821_145136 by aartjestaartje, on Flickr

            WIN_20140821_145200 by aartjestaartje, on Flickr

            Comment


            • nice


              No photos of the booger locker!? :haha:
              [COLOR="#FF0000"]R[/COLOR]edneck [COLOR="#FF0000"]D[/COLOR]riveway [COLOR="#FF0000"]F[/COLOR]ab
              www.DanielBuck.net - www.DNSFAIL.com - www.FurnitureByBuck.com

              Comment


              • Originally posted by daniel_buck View Post
                nice


                No photos of the booger locker!? :haha:
                Welded 2 plates in between the spiders, nothing special

                Comment


                • Air shock tech
                  This is a interesting topic since these things can have some funny behavior.
                  My buggy wich is still in the building stages, behaved pretty well with only about 2-3" of shaft showing. Then I had the idea to get more belly height so added some nitrogen. Now this thing does some serious leaning. Seen this on a friend's XJ also, as soon as he let some nitrogen out it behaved a lot better.
                  Question is does adding shock oil improve this situation, don't really want to fudge with antirocks if I don't have too.
                  You got any input on this Jason M, I know you run air shocks on your rig.

                  Hey Art, suspensions are not my strong side but shocks from being around them in friends builds and of course my jeep I understand them, kinda lol.

                  I had set my rear shocks at 150 psi and I think a tea spoon of oil. The oil was in there when I got them from my friend. I had to bump my charge up 15 more psi. When I started I had two inch's of chrome but would bottom out just driving around the yard.
                  So now I'm happy with them not bottoming out but I was told to keep the the same two inch up travel I planed on instead of adding gas I should of added more oil as you can't compress a liquid.

                  Now maybe Blane or impead can jump in and we can all learn something as again this not my strong point only my experience with them.

                  Jason.

                  They do seem to behave a lot better with about 2" of shaft showing. With 5-6 " of shaft showing the ride is funky to say the least. If that's what it takes, I'' just redo the upper mounts.

                  Building several buggy's prior to doing my rear steer conversation we always had around two inch's of rod for ride height. The idea was/is to have more down travel than up as there is no ride quality needed. But again when it came to shocks Sean my good friend did that end. I was the build the axles, bend the tube, mostly design the chassis and weld it type of guy, lol.

                  Jason.

                  Just talked on the phone to a guy that bought my locker yesterday.
                  He had his on offroad fab shop in North Cal and he has built about 12 rigs with airshocks and his answer is pretty much like yours, No more than 2-3" of shaft showing at ride height. As low a nitrogen presure as possible and that's it. That should give the best compromise. So I have a little bracket fabbing to do. At 115" wheelbase the thing needs a bit of belly height. Nice to have a fairly definitive answer, so I know where to go with it. Thanks for your reply Jason.

                  Comment


                  • My hokey pocket style bearing puller, so nice to reuse old bearings and not have to fudge with setup bearings

                    WIN_20140821_172617 by aartjestaartje, on Flickr

                    Anyway try number 2 got carrier bearing preload and backlast pretty close. Going to add one shim for pinion depth, loose one shim on the ring gear side, install the axle shaft seals and buckle the whole shebang together. I love these gears, got very lucky setting the gears in both axles. Nice even patterns on both to boot.

                    Comment


                    • Fruitful day

                      Got the pinion depth changed, pinion preload set and axle shaft seals installed. Backlash set, ring gear bolts torqued.
                      Diff reassembled, steering ram installed, swapped the stub staft to a shorter axle shaft. Installed U joint in long axle shaft. Bought a chromolly pinion yoke, never knew they made such a thing, pretty sweet.
                      Installed axle shafts, figured out the hardware for the hubs. Reassembled hub, machined 12 bolts, installed one wheel. Got to drill out 2 allen bolts and stick the other wheel on and the ole Scrapper is back on all fours and ready for a front driveshaft.

                      WIN_20140822_190438 by aartjestaartje, on Flickr

                      WIN_20140822_190521 by aartjestaartje, on Flickr

                      Comment


                      • Lowered Scrappy, looks bada$$.

                        WIN_20140823_181441 by aartjestaartje, on Flickr

                        To bad I need 3" more belly height. So new upper mounts it's gonna be.
                        Took the rear driveline out replaced the front U joint with the correct one (1310/1330 combo joint). Then did some measuring, researching for a front driveshaft. That's gonna be an adventure, will have to start with a 5" diam 2" thick aluminum plug and go from there. From there I should be able to use a drive flange and a regular slip yoke. Going to call a new found bud and see if he can cook me up a driveshaft for it. The rear shafts are going to be redone also down the road with 1/4" wall dom tube. Going to have to dig into the wiring and gauges as well as fabbing up a bellypan. Need to start hunting for this recycled cutting block nylon crap, or whatever the correct nomer is for the stuff. Need to visit the junkyard would love to find a transmission controller and a stock instrument cluster

                        Comment


                        • I see you're going with an OD green color scheme, that's going to be a sweet sight on the trails
                          [COLOR="#FF0000"]R[/COLOR]edneck [COLOR="#FF0000"]D[/COLOR]riveway [COLOR="#FF0000"]F[/COLOR]ab
                          www.DanielBuck.net - www.DNSFAIL.com - www.FurnitureByBuck.com

                          Comment


                          • Just drove ole Scrappy down the street, pretty spunky in high range, going to have to try it on a sand hill sometime soon, since Bloody Mary is halfway up a loose sand hill. IMS is selling aluminum round bar, would be awesome if I can order a piece so I can make an adapter for the front drive shaft. Then the belly and some other good stuf! This thing might just make some of this fall winter wheeling season. :rofl:

                            Comment


                            • I have a few spicer drive shaft parts you can have if you want to make the drive out here to pick em up and shoot the breeze, I probably have a few other goodies for Scrappy also.
                              You can lead a horse to water, but it might drown

                              Comment


                              • I definitely want to get some good photos of that thing in action
                                [COLOR="#FF0000"]R[/COLOR]edneck [COLOR="#FF0000"]D[/COLOR]riveway [COLOR="#FF0000"]F[/COLOR]ab
                                www.DanielBuck.net - www.DNSFAIL.com - www.FurnitureByBuck.com

                                Comment

                                Working...
                                X