Announcement

Collapse
No announcement yet.

REV111 Flare Build

Collapse

Forum Thread First Post

Collapse
X
 
  • Filter
  • Time
  • Show
Clear All
new posts

  • REV111 Flare Build

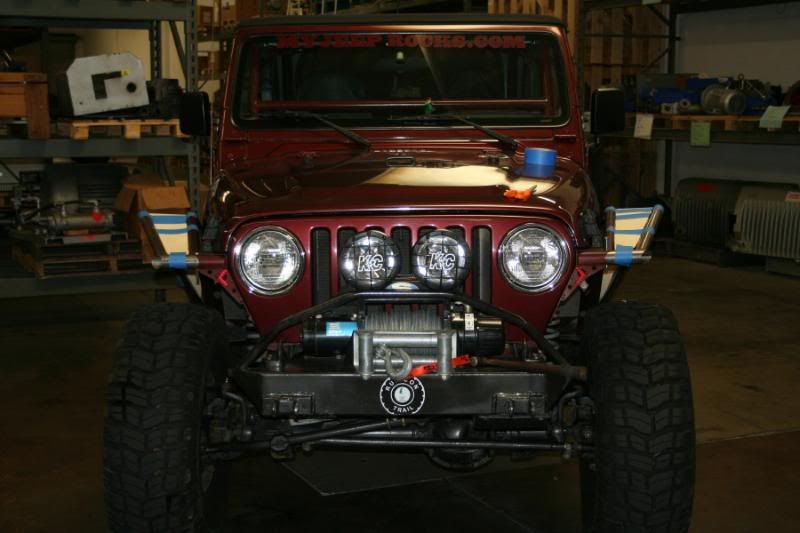
    Ok, I won the basic REV111 fender set up at FITD this year. But they didn't come with flares, which makes them NOT street legal. After getting pulled over 6 times, I figured it was time to stop being lazy and build the damn flares, since REV don't make 'em no mo.

    So here's a step by step (almost) procedure; I have to throw a big thank you to Chris (Duke) for the help he provided. Much appreciated dude.

    I installed the REV fenders a couple of months ago. I painted them; that was a mistake. Oh well.


    So into the shop for some more surgery.
    I started by making the attachment points for the tubes; one on each side down by the door. 1 1/2" .120 wall tubing was used, cut 2" long. I pressed heavy duty 1' washers into the tube and tack welded them in like this:


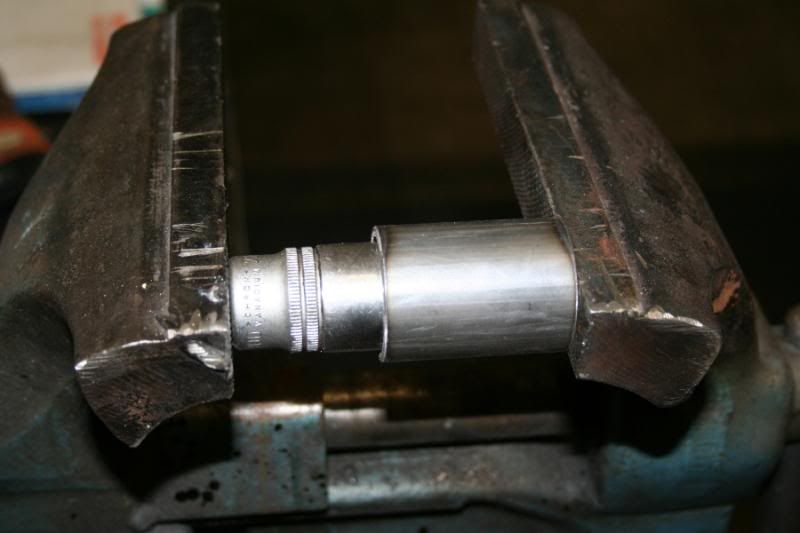
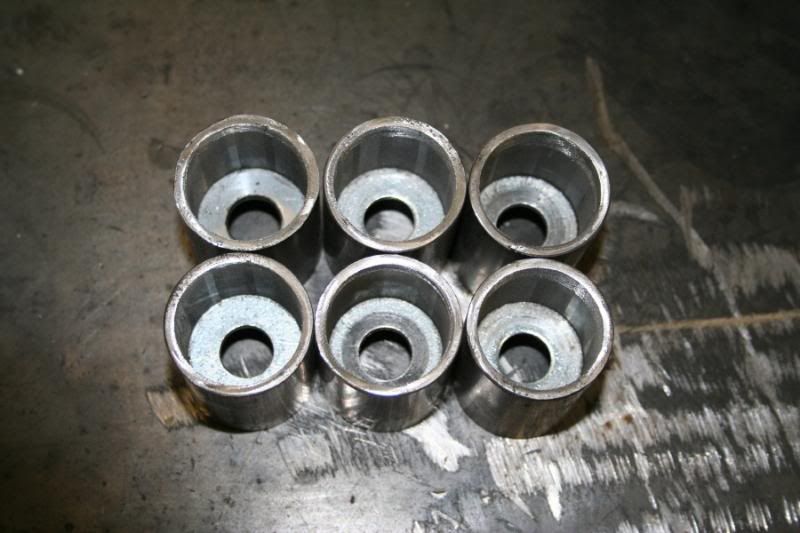
    I made enough of these for the rear fenders, which will come later on.

    These get attached to the rockers with 5/8" grade 8s.


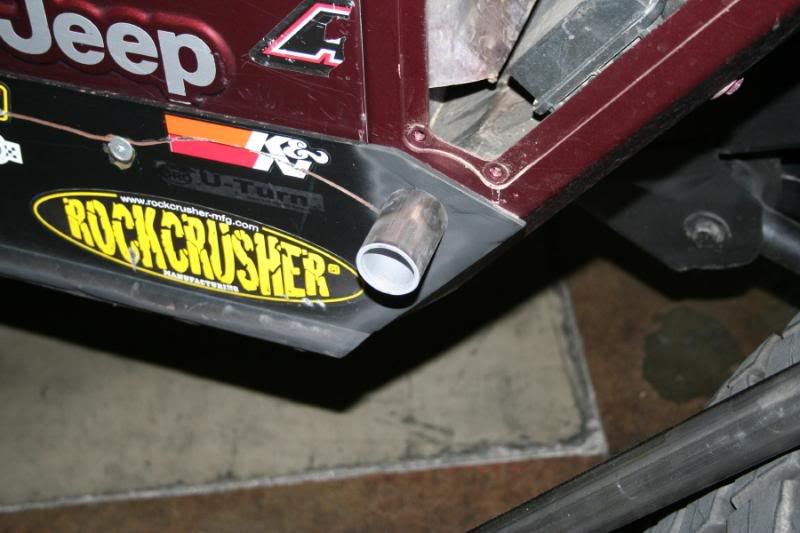
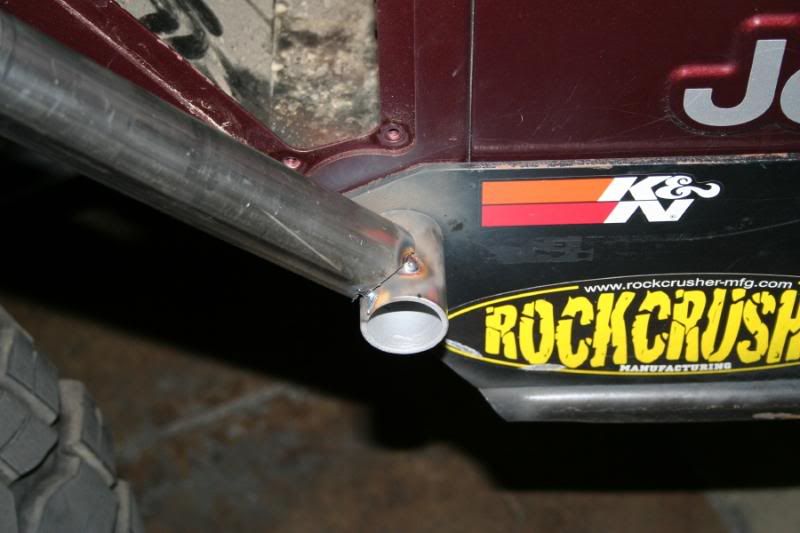
    The front upper attachments were kind of tricky because of the angles and the way they mount, but they came out real nice. There are 1 1/2" .120 x 6", with 1 3/4" .120 x 4" sleeve welded together.

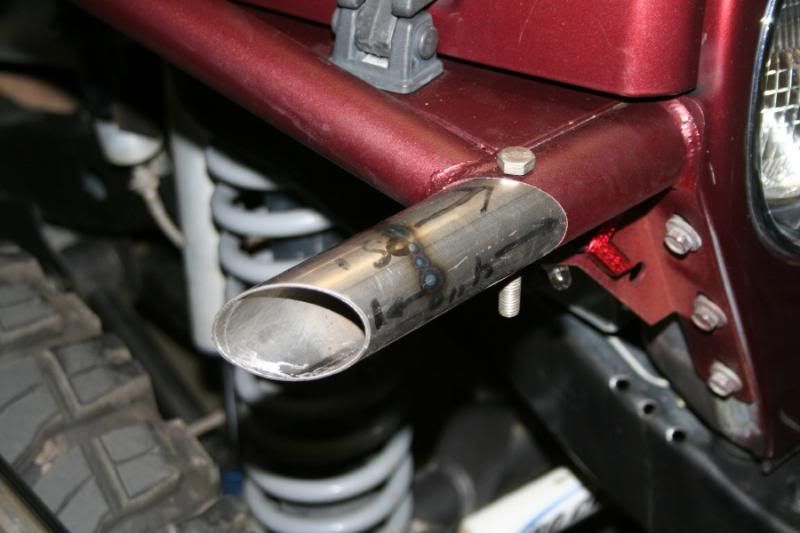
    There are also some holes to be drilled in these attachment points. One for the running light wire harness and two for the securing fasteners.

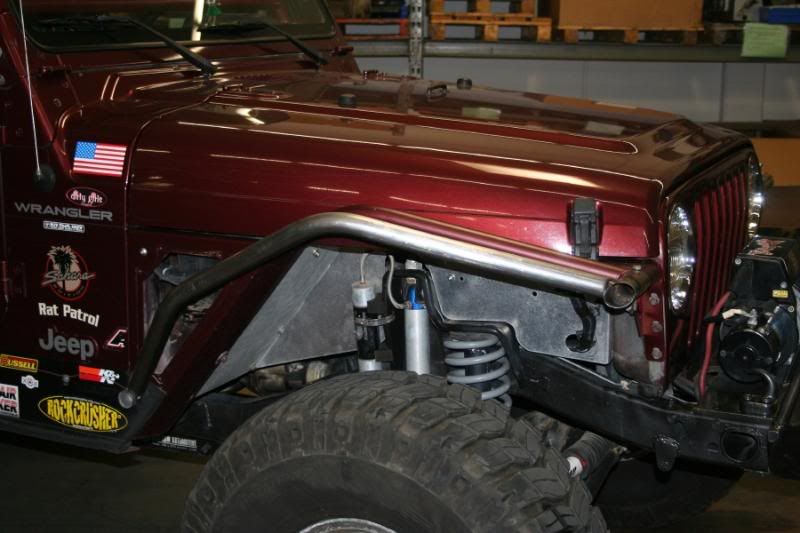
    Now it's time to take measurements for the tubing. The angle that the tubing is installed presented a few challenges; the compound angles are a little difficult to manage but the right tools make it easier (thanks again Chris)


    I'll get some pics uploaded of the notches being cut tomorrow.

    The tubing went together real nice. I'll have pics of the bending procedure tomorrow as well. Without any drawings to go by, I'm just using pictures of Stuart's Jeep (Jeep Virgin). I realized that I don't have any good pics of the sheet metal cloak that completes the fender; Stuart is sending me some next week. I tried to make some templates but they werent' up to snuff. Oh well, live and learn...


    Until I get those pics I'm going to stop. It took too much work to get to this point; don't want to go backwards. So far so good.

    Rat
    Last edited by RAT; 11-10-07, 08:31 PM.
    [CENTER][COLOR=#ff0000]Resistance Off Road
    [/COLOR]Join the Resistance...
    http://www.resistanceoffroad.us[/CENTER]

  • #2
    Lookin' pretty awesome!

    Comment


    • #3
      Lookin' good Kurt . . . you're the man!!! Can't wait to see em when they are all done.
      That which does not kill me postpones the inevitable.

      Comment


      • #4
        Looking good man. You always do nice work...
        |90 XJ|4.0|AX-15|NP231|RE H&T|TnT Y-Link|RE Coils|BOR Leaves|ACOS|D30/Aussie|8.8/ARB|35" Kevlar MTRs|Custom Exo,Sliders,Bumpers|

        !!! outdoorlogic.net !!!

        Comment


        • #5
          Looks good! givin me ideas...

          Comment


          • #6
            Kurt, they look great. I guess you won't be needing the tube bender. I'll be starting on mine when I get back from Chicago.
            Check out .

            Comment


            • #7
              look like bat wings! its going to look pretty mean

              hey Kurt you said your driving this around town? wha about sway bars and turn signals? man your jeep is turning into a trail on Jeep.

              also if your looking for somewere to go wheeling for thanksgiving, were going to JV and testing out a buddys new TJ rock buggy on 60s and 39inch Krawlers
              Last edited by miguelitojeep97; 11-11-07, 11:43 PM.
              [COLOR="Sienna"]97 TJ, 4.0 5spd, 3.5" Rock Krawler 5 inch stretch long arm, 30/44 locked with 48s, 35 inch MTRs, Warn 9k rock track 4:1, Vanco Big Brake Kit![/COLOR]

              Comment


              • #8
                looks good kurt.
                myJeeprocks.com

                "in the end... the rocks always win."

                Comment


                • #9
                  Originally posted by miguelitojeep97 View Post
                  hey Kurt you said your driving this around town? wha about sway bars and turn signals? man your jeep is turning into a trail on Jeep.
                  Mike,
                  I still drive it 'round town. There is nothing better than driving a vehicle that runs freeways during the week, and then goes out and plays in the rocks on the weekends... Sway bars, I don't need no stinking sway bars...

                  And if you look real close, the turn signals are there. Little arrow shaped lights made to stick on to the side view mirrors. LEDs and they work real nice. And they're different. All about being different.
                  [CENTER][COLOR=#ff0000]Resistance Off Road
                  [/COLOR]Join the Resistance...
                  http://www.resistanceoffroad.us[/CENTER]

                  Comment


                  • #10
                    hahah awesome. well i hear ya on the streetable trail rig. I am still hitting those trails as hard as I can and taking my butt to school down here in SD. I NEED SOME 35s!!!
                    [COLOR="Sienna"]97 TJ, 4.0 5spd, 3.5" Rock Krawler 5 inch stretch long arm, 30/44 locked with 48s, 35 inch MTRs, Warn 9k rock track 4:1, Vanco Big Brake Kit![/COLOR]

                    Comment


                    • #11
                      Nice work. Wanna borrow my rears to take measurements? Id take them apart so you could get what you need. They are removeable as well.


                      Comment


                      • #12
                        i need some of thoes!!!
                        starvin student...

                        Comment


                        • #13
                          Gunny, what I really need is a description of how the cloak is fastened. Are the fasteners screwed into the tubing, or are there tabs welded on the tubes? But, I may just take you up on the offer of some measurements on the rears. I'll let you know when I get to them later this month. Thanks for the offer...

                          Rat
                          [CENTER][COLOR=#ff0000]Resistance Off Road
                          [/COLOR]Join the Resistance...
                          http://www.resistanceoffroad.us[/CENTER]

                          Comment


                          • #14
                            Rat,

                            It's kinda all of the above. There is a base plate that bolts to the tub and reinforces the wheel well. The actual fender has 2 brackets at the 10 and 2 positions right in the corners that have 2 slots each to attach to the tub. Then mounting bolts just like the one you made for the back of your front fender. 6 bolts and they slide off leaving the reinforcing plate to protect the well.

                            Since you already have corner guards..the two big holes are already there on the bottom. And it looks like you already have enough random holes up top to make them work.

                            It's really quite ingenious how they did it. I can completely take one apart for you in about 10 minutes so. I'll get some close up pictures for you tomorrow.

                            Comment


                            • #15
                              Originally posted by Gunnys TJ View Post
                              Rat,

                              It's kinda all of the above. There is a base plate that bolts to the tub and reinforces the wheel well. The actual fender has 2 brackets at the 10 and 2 positions right in the corners that have 2 slots each to attach to the tub. Then mounting bolts just like the one you made for the back of your front fender. 6 bolts and they slide off leaving the reinforcing plate to protect the well.

                              Since you already have corner guards..the two big holes are already there on the bottom. And it looks like you already have enough random holes up top to make them work.

                              It's really quite ingenious how they did it. I can completely take one apart for you in about 10 minutes so. I'll get some close up pictures for you tomorrow.
                              Gunny,
                              What I meant is how does the sheet metal cover (?) bolt to the tubes? I must have looked at Stuart's a hundred times but never paid attention to how they attached the sheet metal part of the fender to the tubes. Did they do the zip nut inserts in the tubing, drill and tap the tubing, or weld on gussets with threaded holes for the attachement? I've called REV and emailed them numerous times but that info they ain't givin up.

                              Hey, thanks for tearing your Jeep apart for me. Maybe I can return the fav sometime!
                              [CENTER][COLOR=#ff0000]Resistance Off Road
                              [/COLOR]Join the Resistance...
                              http://www.resistanceoffroad.us[/CENTER]

                              Comment

                              Working...
                              X