Announcement

Collapse
No announcement yet.

Clayton Long arm install

Collapse

Forum Thread First Post

Collapse
X
 
  • Filter
  • Time
  • Show
Clear All
new posts

  • Clayton Long arm install

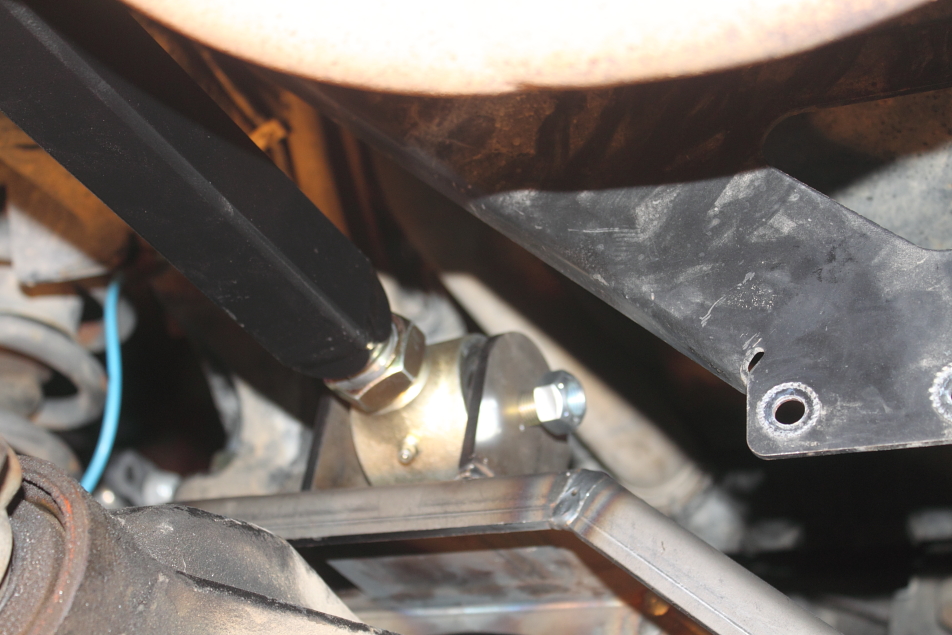
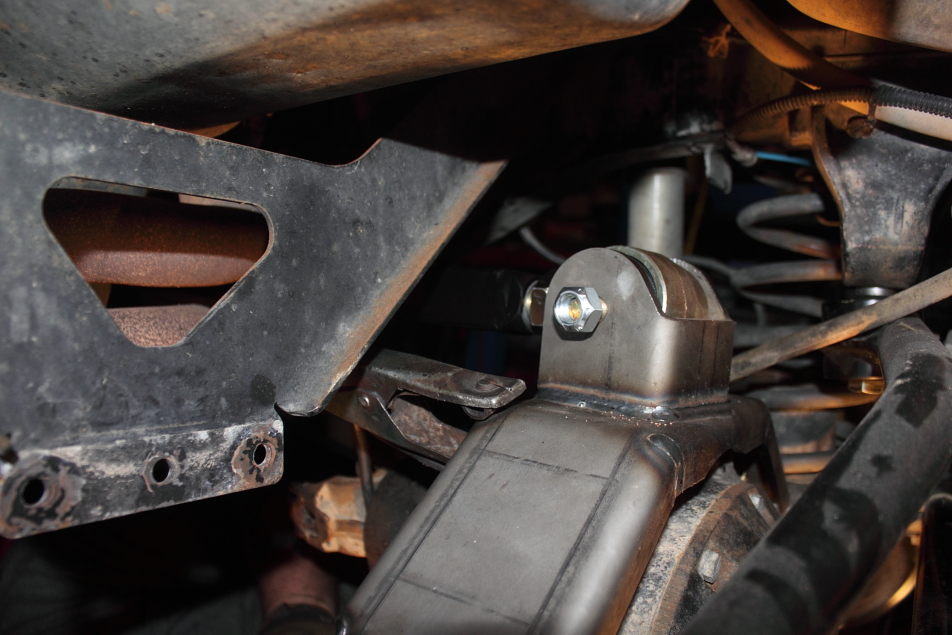
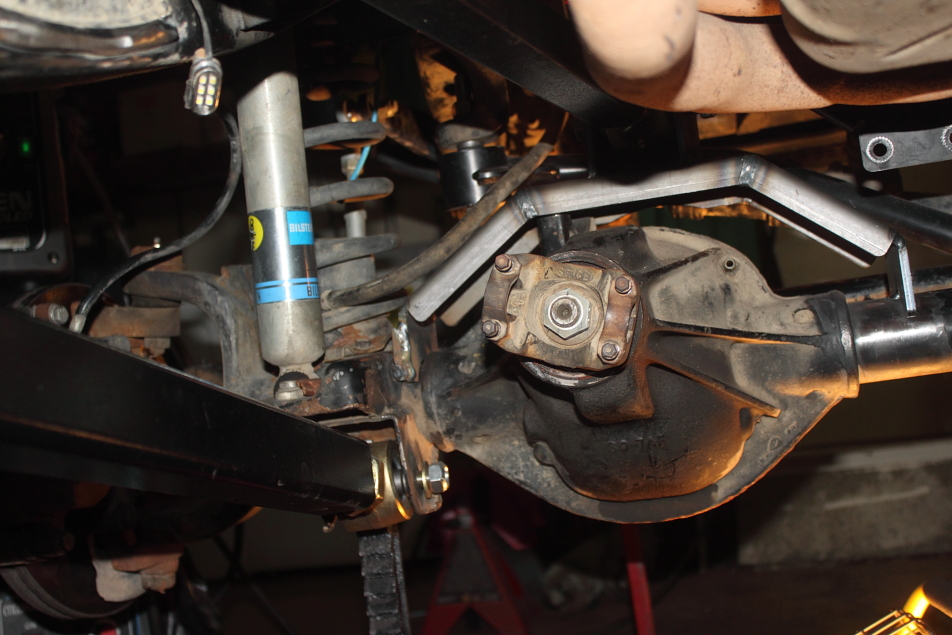
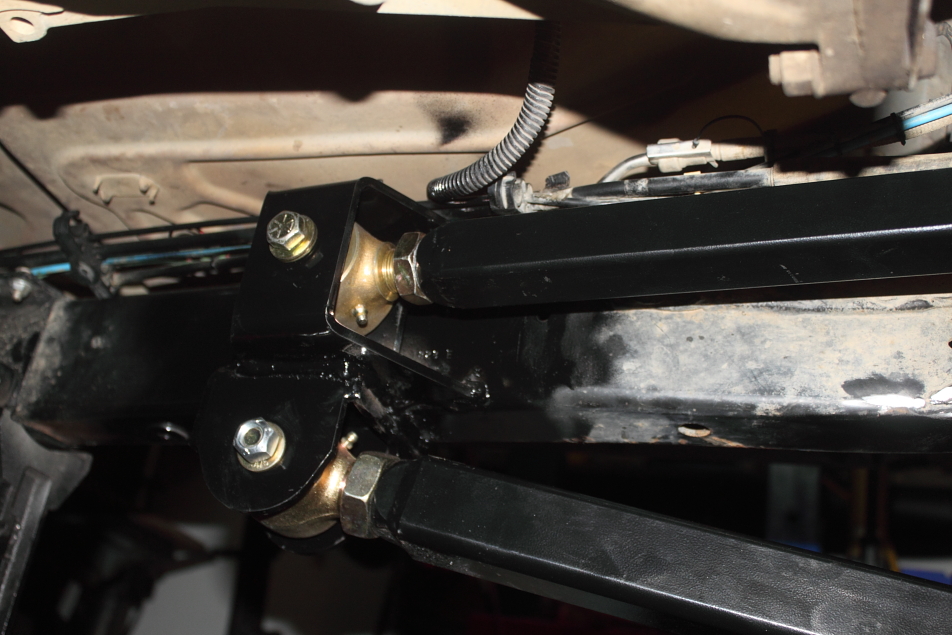
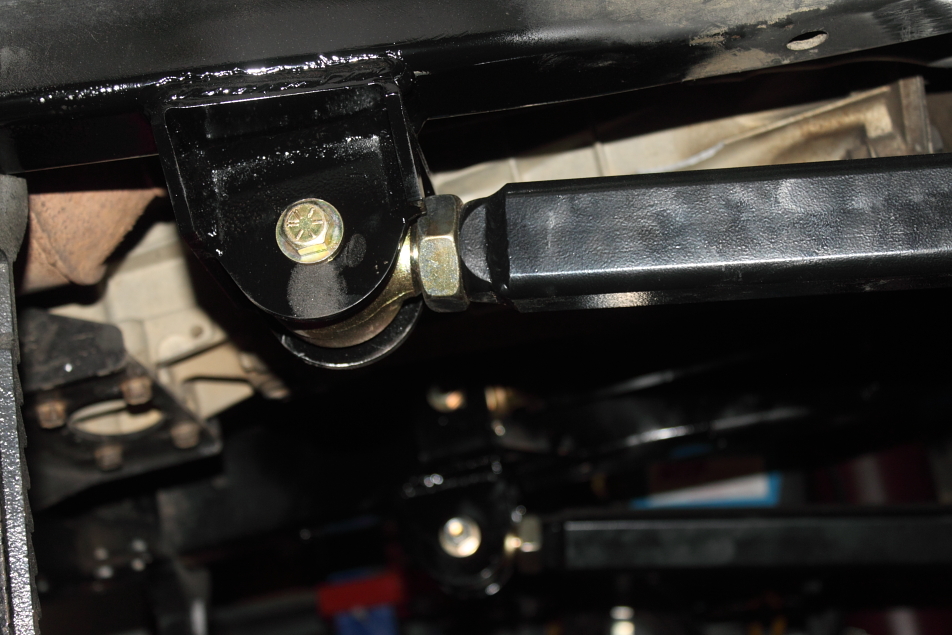
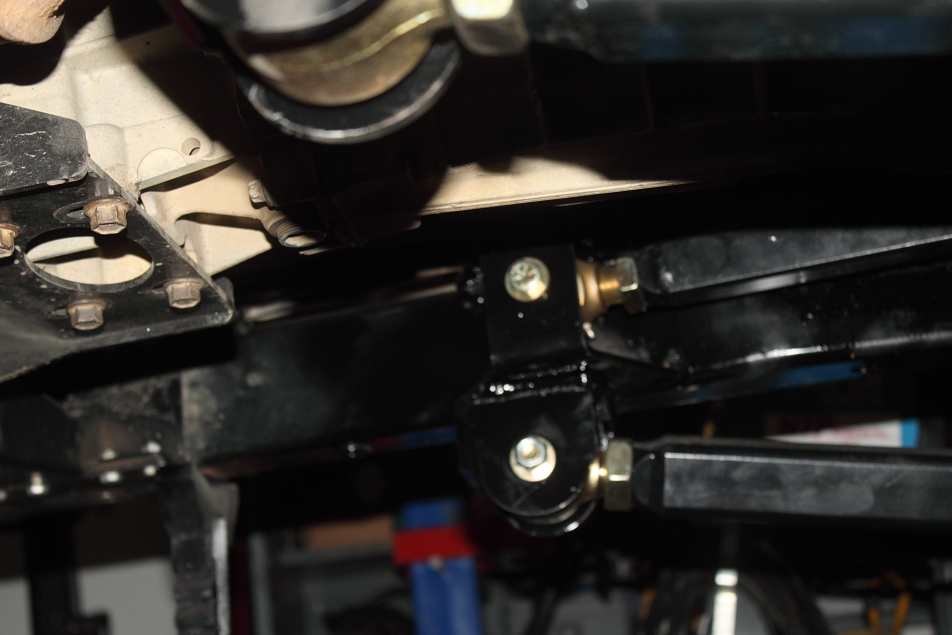
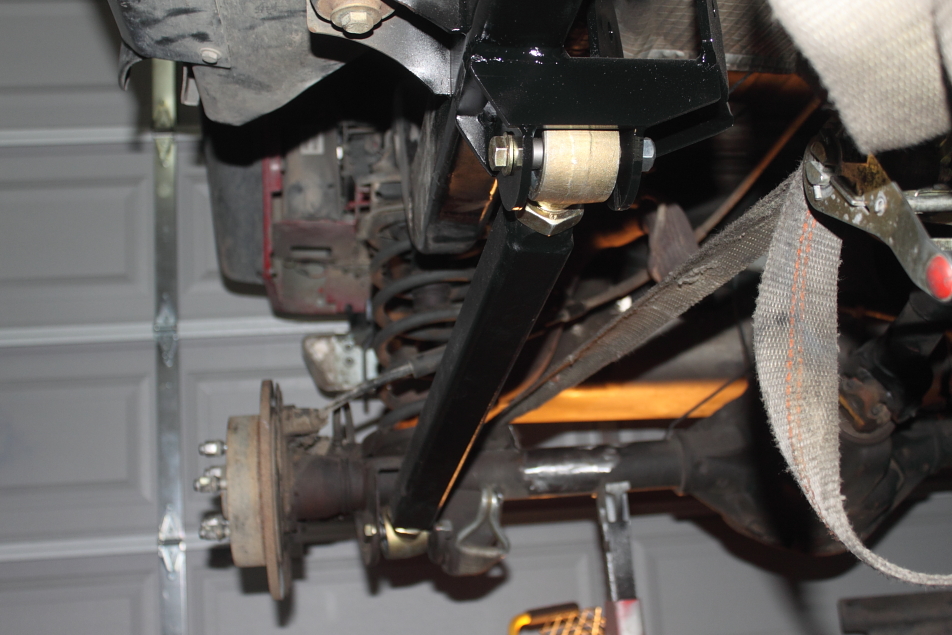
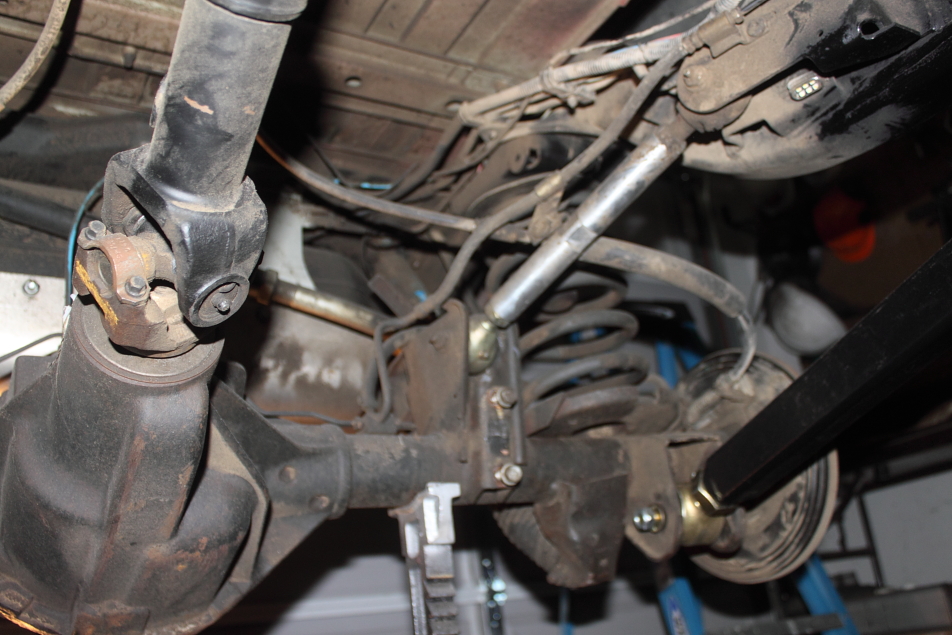
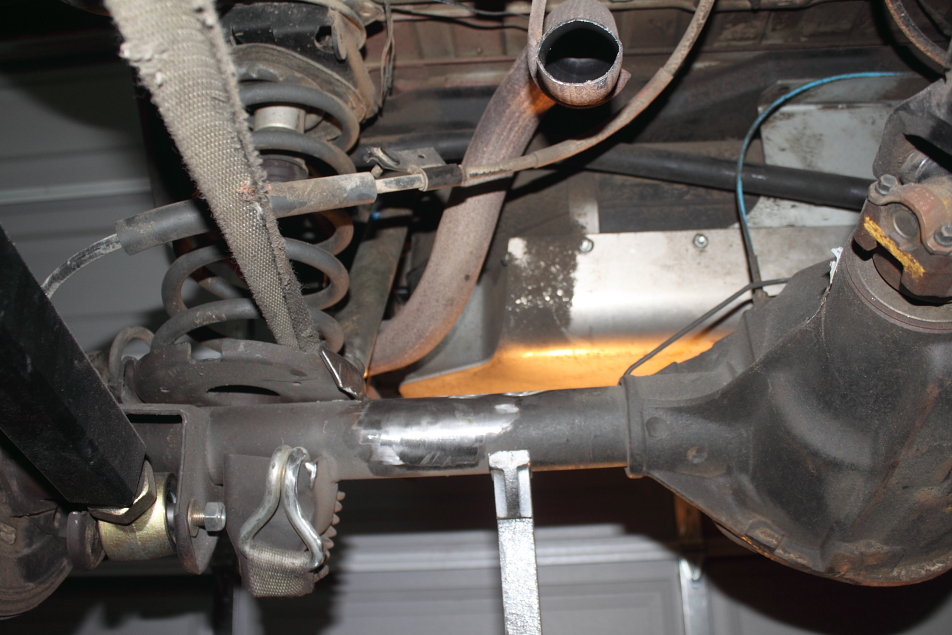
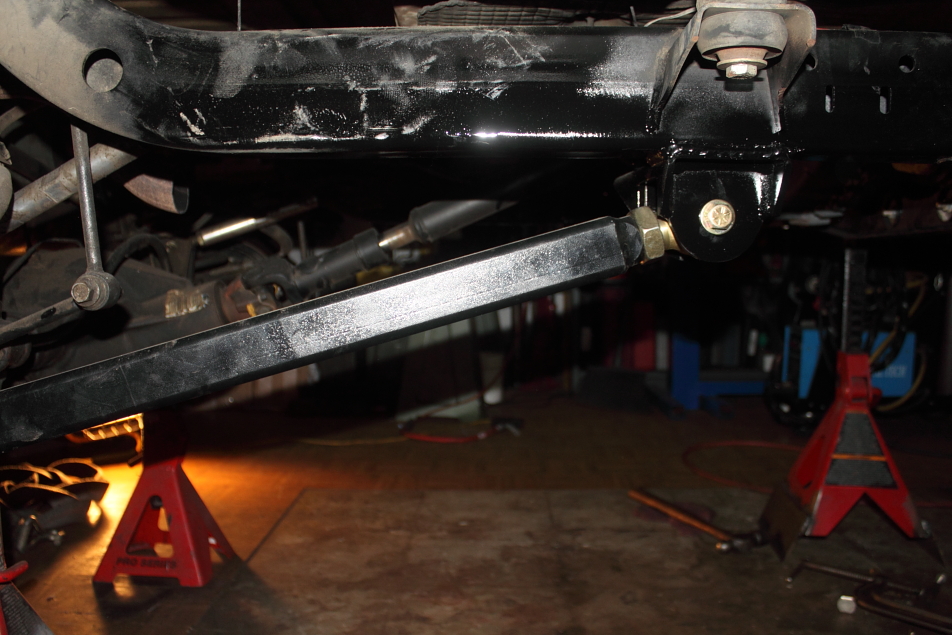
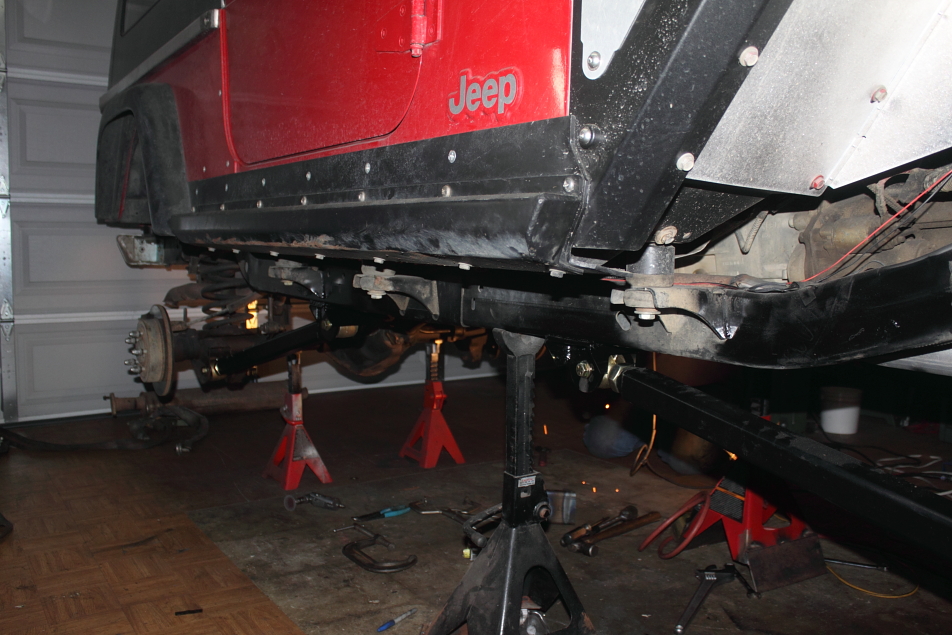
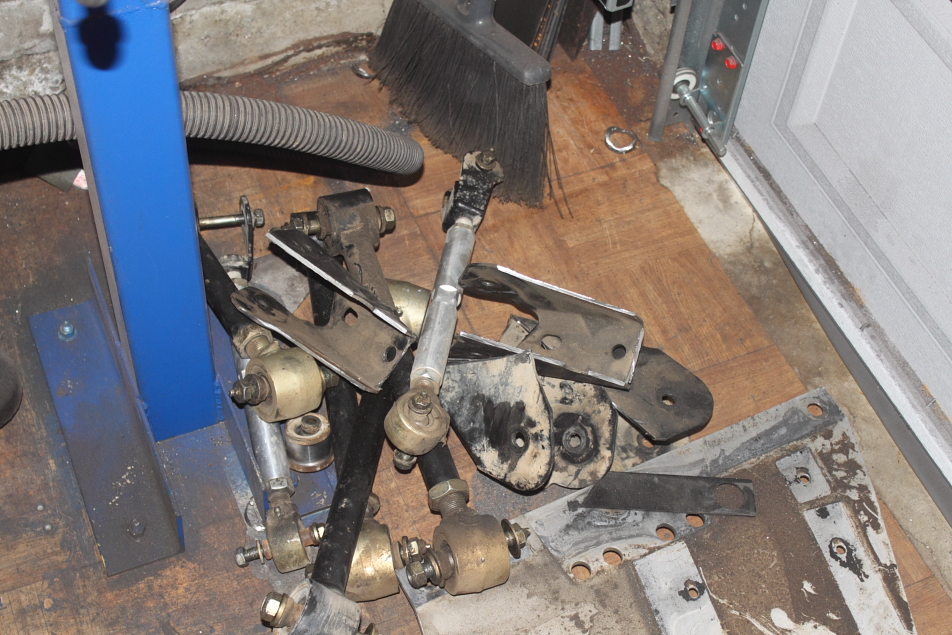
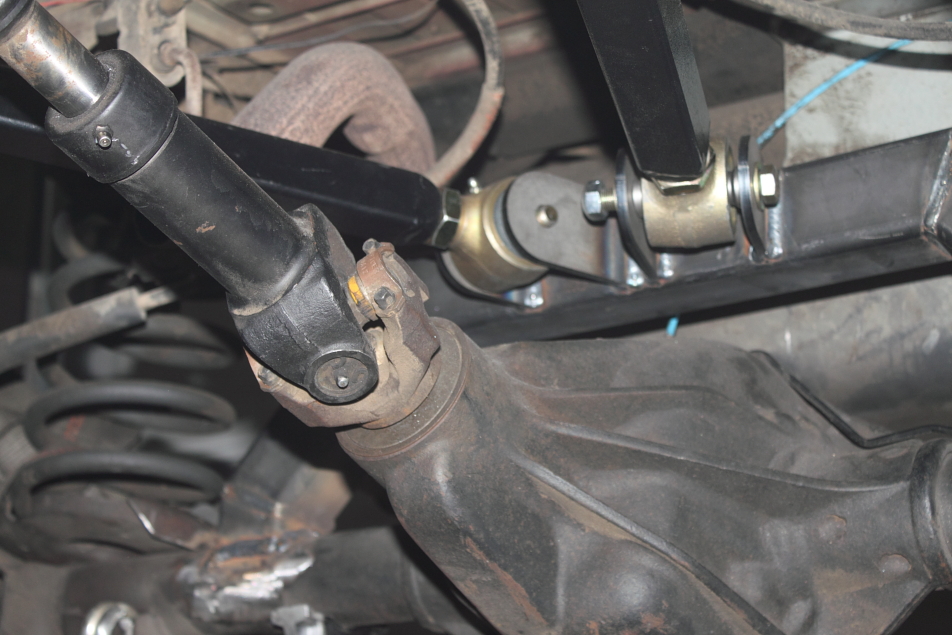
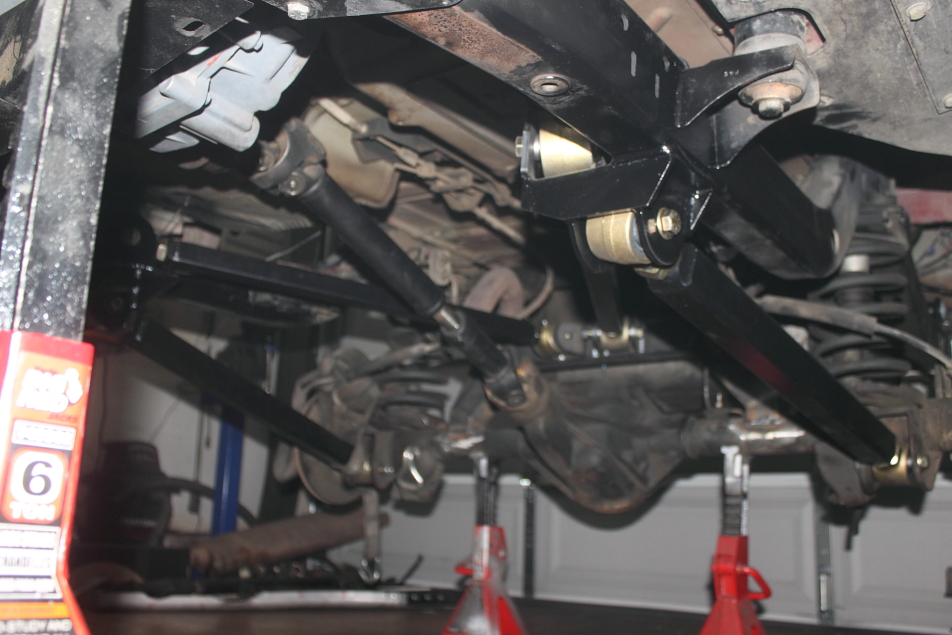
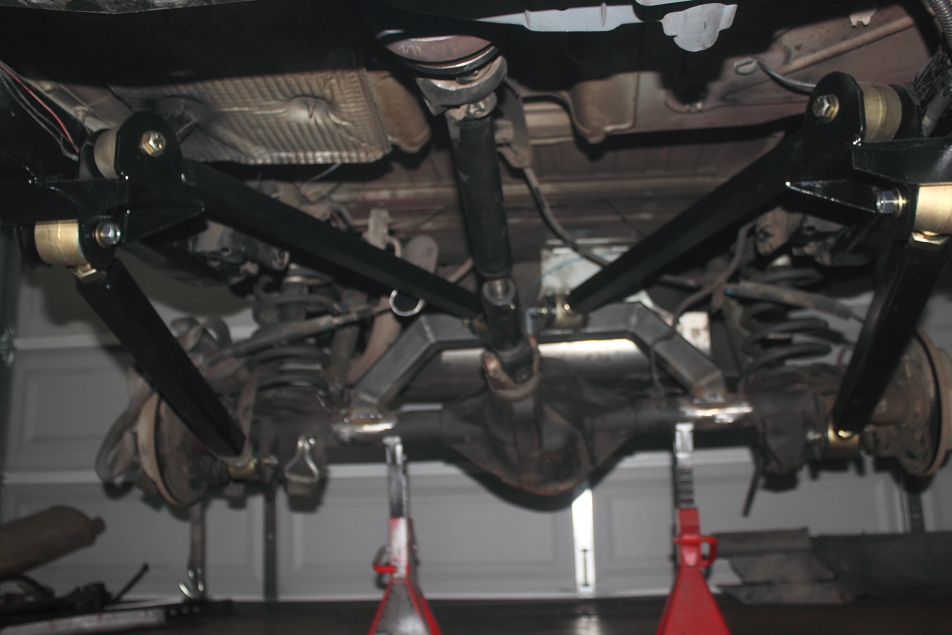
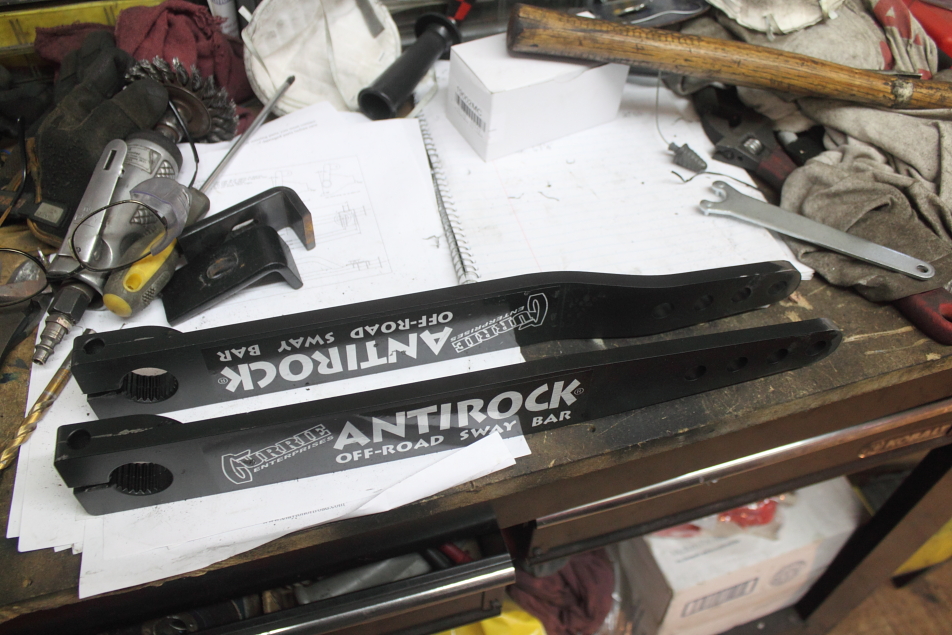
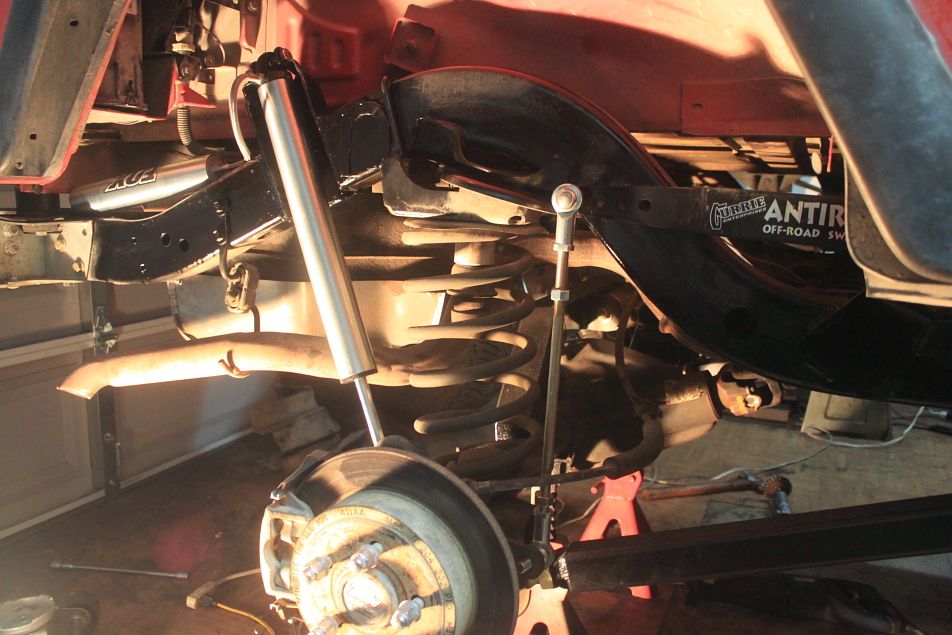
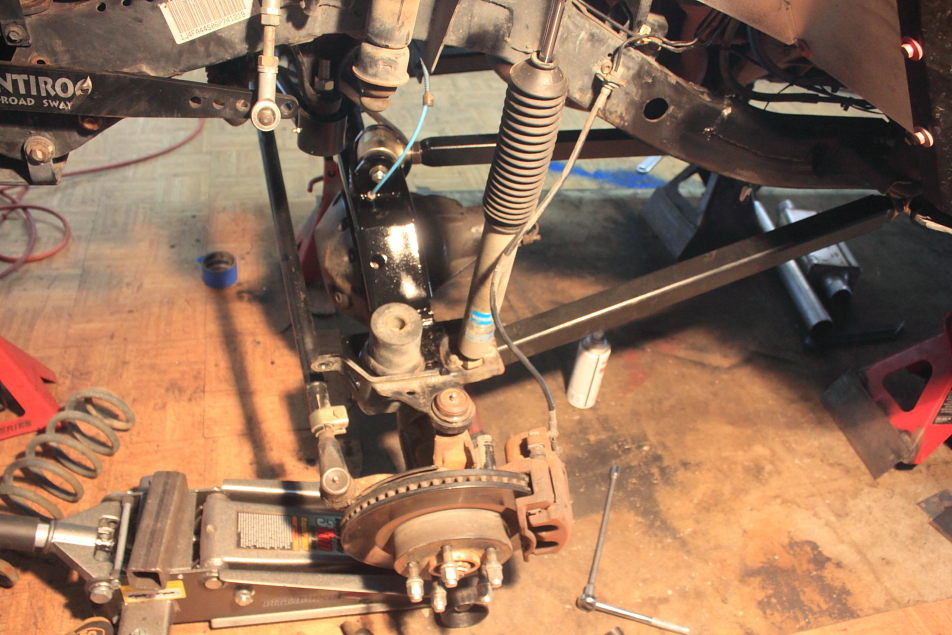
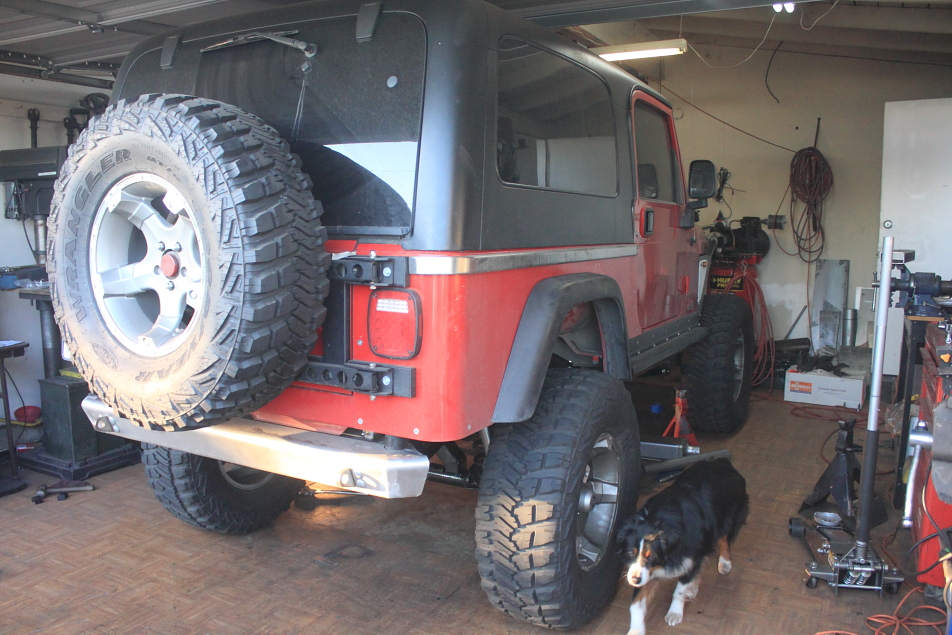
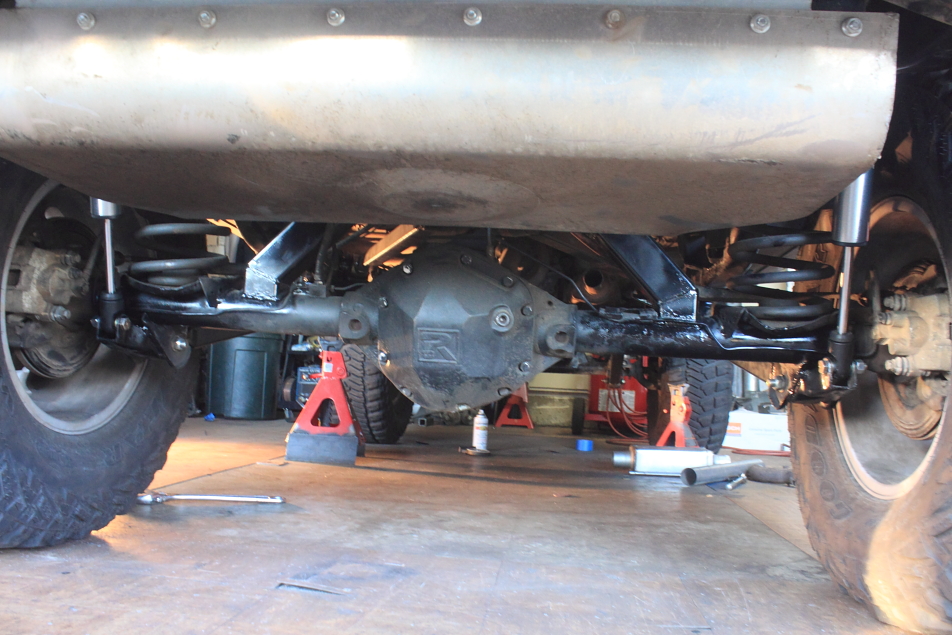
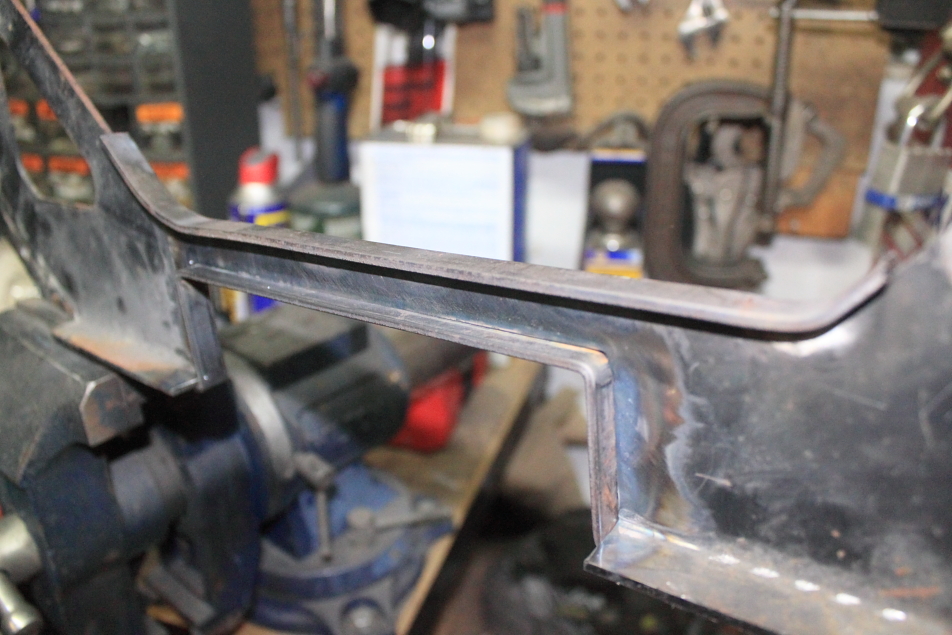
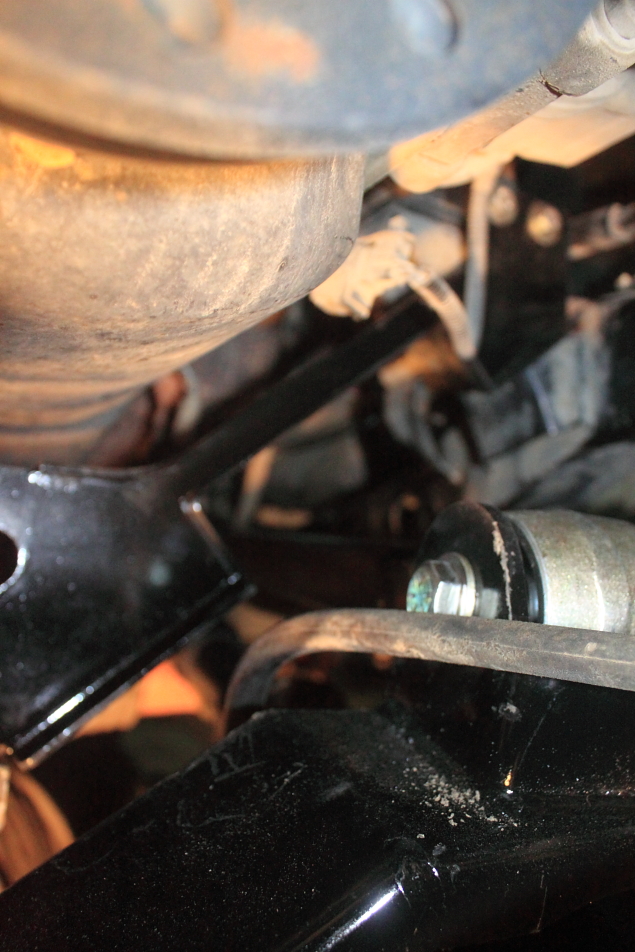
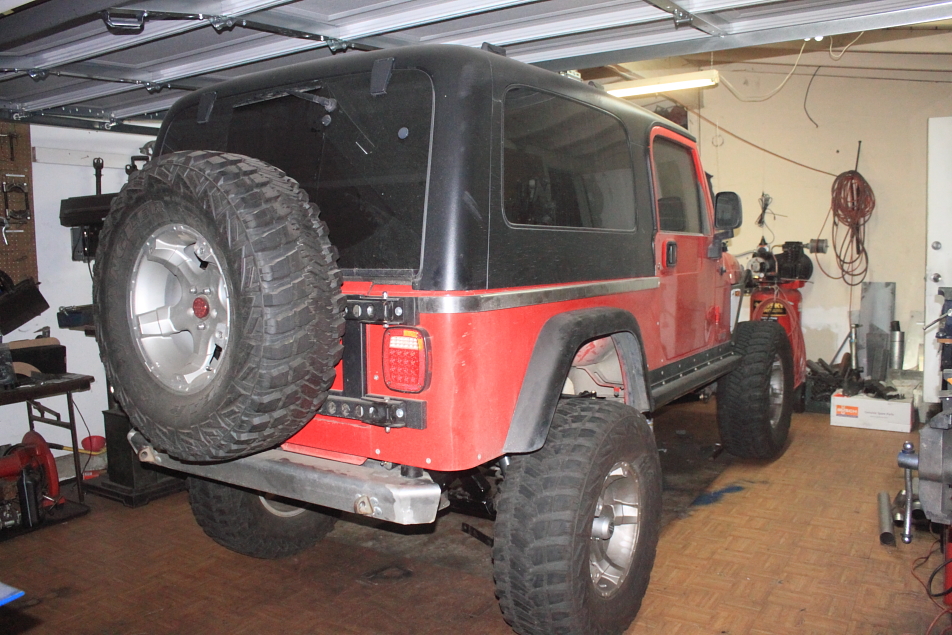
    Ahole Fab is at it again. Making a mess and having fun. Got a LJ here that's gittin new legs and a few other thingies. Installing a Clayton long arm suspension and new Fox shocks, going outboard on the rear shocks, new Currie anti rock in the rear, new Spin Tec muffler ( I love these things), repairing some trail damage and tuning the suspension. Should be a fun time in the garage this weekend...

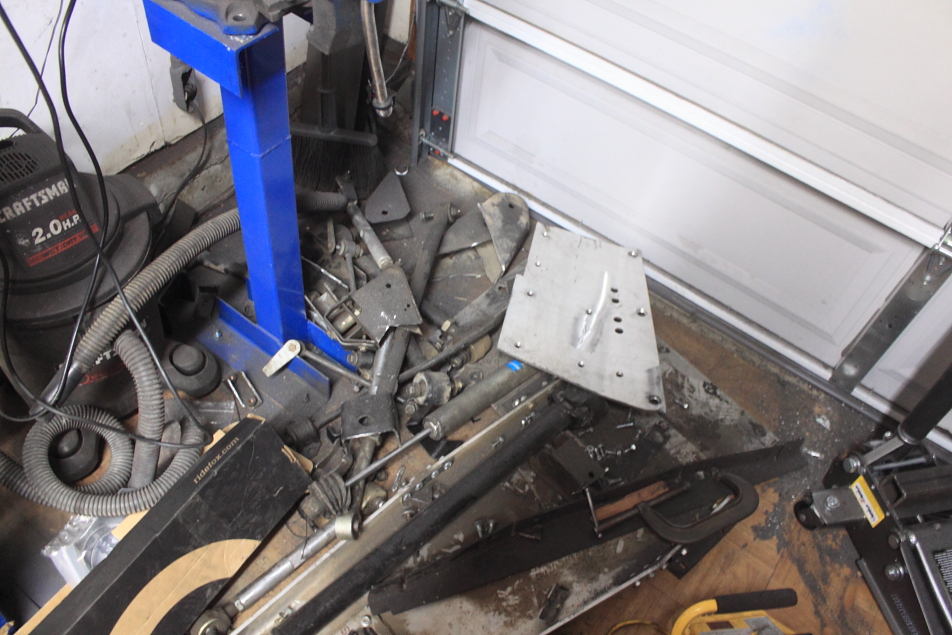
    I'll post the first pics tomorrow (had to clean up the garage tonight, it was embarrassing)...
    [CENTER][COLOR=#ff0000]Resistance Off Road
    [/COLOR]Join the Resistance...
    http://www.resistanceoffroad.us[/CENTER]

  • #2
    OK. The Gods are conspiring against me right now. I downloaded 70+ photos from the camera to my laptop. I did what rarely do and deleted the pics on the camera as soon as they downloaded. Then my laptop decides to fritz in the middle of processing the photos for Flickr. Now I only have 40 pics to post tonight and they are in the middle of the install. Freakin Mayans...

    So anyway, Nick came up to help out today and man we got a ton accomplished. The front three link is pretty much done, I just have to finish a few welds on the truss. The Clayton kit seems to be pretty well thought out but there are some things I would, and did do different from the way they do it. On the upper control arm mount on the front, it is assembled as it is welded into the Jeep which makes for some interesting angles to get into. They also route all the fuel and brake lines through the upper mount, but it makes it damn near impossible to install the nut on the back side of the bracket for the bolt through the JJ. So I pre-assembled the whole mess and tack welded the nut to the back of the mounting plate. Problem solved. Unfortunately the Clayton kit and the Savvy under armor are not as compatible as I'm sure the two companies were hoping. The front skid plate mount that bolts to the engine mounts is less than three inches from the upper JJ on the differential. So up travel is nill. So a big modification is needed to get this set up to work.
    There are more issues but here are some pics to look at and I'll whine some more tomorrow...
    Upper JJ on Diff. Tight, tight, tight.


    Clayton LS 023 by MJR RAT, on Flickr


    Clayton LS 022 by MJR RAT, on Flickr

    Truss is welded to axle at this point, and to the coil bucket and axle on the driver side

    Clayton LS 017 by MJR RAT, on Flickr

    Another view of the clearance issue

    Clayton LS 015 by MJR RAT, on Flickr


    Clayton LS 012 by MJR RAT, on Flickr

    New upper and lower driver side frame mounts. The upper is the one I mentioned earlier about the nut being a bitch to get to. I rerouted the fuel and brake lines over the mount and made brackets to secure them to the frame.

    Clayton LS 009 by MJR RAT, on Flickr

    The front truss did not fit as snug as I liked it to so I made a spacer that is welded to the end of the truss where it welds to the coil bucket, to get a tighter fit and better welds.

    Clayton LS 008 by MJR RAT, on Flickr

    The Clayton kit truss does not make allowances for ARB air line fittings, so Nick popped a hole in the truss to pass the line through. It's a little tight but the air line can be reattached and tightened without too much much effort.

    Clayton LS 006 by MJR RAT, on Flickr

    Again, how close can this get?

    Clayton LS 004 by MJR RAT, on Flickr

    In this pic you can see the old UCA mount that is cast in the differential is cut away to fit the truss. The stub that is left is used to locate the truss, but that didn't work so well as the slot cut in the truss was off center a bit to the passenger side so the truss wouldn't fit flush to the axle. More cutting and grinding...

    Clayton LS 003 by MJR RAT, on Flickr

    But, the front is pretty much done. Tomorrow we'll tackle the rear suspension. Then on to the out board shock conversion. More pics tomorrow.
    [CENTER][COLOR=#ff0000]Resistance Off Road
    [/COLOR]Join the Resistance...
    http://www.resistanceoffroad.us[/CENTER]

    Comment


    • #3
      Looking good!!!
      [COLOR="YellowGreen"]"You cant fit 2 fingers in my tailpipe"[/COLOR]

      Comment


      • #4
        "...I pre-assembled the whole mess and tack welded the nut to the back of the mounting plate. Problem solved." The simple things that work and take hours of grief out of your life. Nothing like fumbling with your nuts in the cold... Nice work!
        "Democracy is two wolves and a lamb voting on what to have for lunch. Liberty is a well-armed lamb contesting the vote!" - Benjamin Franklin

        Comment


        • #5
          Looks like you guys are having some fun up there!

          That skid mount is definitely going to need a chunk removed...

          Comment


          • #6
            Today was another productive day. The front 3 link is complete with only the front Savvy skid bracket needing to be modified. The rear LCA mounts are welded in and the LCAs installed. The UCA mounts cut off and the axle shaved and clean, ready for the truss. Started the Currie Anti Rock in the rear. Modification required here. The Savvy gas tank skid has the tank sitting higher than normal so the anti rock torsion bar hits the top of the tank with the anti rock frame mounts in the recommended location. So I get to move the brackets and drill new holes.


            Taphorns LJ0021 by MJR RAT, on Flickr


            Taphorns LJ0018 by MJR RAT, on Flickr


            Taphorns LJ0017 by MJR RAT, on Flickr


            Taphorns LJ0016 by MJR RAT, on Flickr

            From this...

            Taphorns LJ0015 by MJR RAT, on Flickr

            To this...

            Taphorns LJ0014 by MJR RAT, on Flickr

            This is where the anti rock is supposed to fit, but I have to move it back and up 4 inches

            Taphorns LJ0011 by MJR RAT, on Flickr


            Taphorns LJ0009 by MJR RAT, on Flickr


            Taphorns LJ0007 by MJR RAT, on Flickr

            The carnage pile so far, and I ain't done. But don't think this LJ is gonna be any lighter; those control arms weigh a ton!

            Taphorns LJ0012 by MJR RAT, on Flickr

            More tomorrow. Looks like I'll be done with the suspension by Wednesday, and the shock outboard and anti rock by Friday.
            [CENTER][COLOR=#ff0000]Resistance Off Road
            [/COLOR]Join the Resistance...
            http://www.resistanceoffroad.us[/CENTER]

            Comment


            • #7
              Nice work
              06 UNL RUBI 4.5 LA,KM 2-35's/ 4.88 BEADLOCKS/SKIDS/WINCH
              07 AT CHASER TRAILER

              Comment


              • #8
                Is that a pile of johnny joints? I thought that was the good stuff! :-D haha

                I'm interested to know how easy the rear anti-rock is to install. I've been thinking about putting one on my TJ in the rear, but I wonder how much difference it is from the factory swaybar in the rear. I already have an AR up front. I wonder if there's any noticable difference by putting an AR in the rear? Does the factory gas tank get in the way at all?
                [COLOR="#FF0000"]R[/COLOR]edneck [COLOR="#FF0000"]D[/COLOR]riveway [COLOR="#FF0000"]F[/COLOR]ab
                www.DanielBuck.net - www.DNSFAIL.com - www.FurnitureByBuck.com

                Comment


                • #9
                  Looks great Kurt!

                  Comment


                  • #10
                    Rear four link is in. Final touches are needed but it is supporting the weight of the LJ. Next project is to finish installing the anti rock, then outboard the shocks.

                    All UCA mounts removed and axle tubes cleaned for fit up

                    Taphorns LJ 10001 by MJR RAT, on Flickr

                    Don't know if it was me, the day or the kit but this bridge did not want to play nice nice. It was a bitch to get it fit right, but it's home now.

                    Taphorns LJ 10003 by MJR RAT, on Flickr

                    She's got legs, hopefully she knows how to use them...

                    Taphorns LJ 10004 by MJR RAT, on Flickr


                    Taphorns LJ 10005 by MJR RAT, on Flickr

                    More later today...
                    [CENTER][COLOR=#ff0000]Resistance Off Road
                    [/COLOR]Join the Resistance...
                    http://www.resistanceoffroad.us[/CENTER]

                    Comment


                    • #11
                      [COLOR="#800000"]Lookin good man! You're really moving along on this install.[/COLOR]
                      [COLOR="darkred"]"Death Smiles at Everyone... Marines Smile Back."
                      Adopt-a-Trail Member.[/COLOR]

                      Comment


                      • #12
                        Originally posted by USMC 0369 View Post
                        [COLOR="#800000"]Lookin good man! You're really moving along on this install.[/COLOR]
                        Thanks for the help buddy! I ran into the first real snag. The Currie Anti Rock isn't fitting up like I want it to. Got issues with the arms being bent vs. straight. Dan is going to call Currie tomorrow and see if they will swap bent for straight. If so I can have this whole project completed this week. Working on the shocks now...
                        [CENTER][COLOR=#ff0000]Resistance Off Road
                        [/COLOR]Join the Resistance...
                        http://www.resistanceoffroad.us[/CENTER]

                        Comment


                        • #13
                          Found some issues with clearancing the Anti rock and the Shocks. Looks like the wheels have a 2 inch offset and to clear all the stuff going into the wheel wells they should be 4.5 inch offset. Sooo... some 1.25" Spydertrax spacers, some creative modification and some colorful expletives gives us what we need...
                          I have been making tools for use with the press I made. I made some bending dies, and a small press brake. It came in handy today for modifying the currie 17" bars for the anti rock. The ones that come with the standard TJ/LJ kit did not work for a few reasons already mentioned. So I went to Currie and traded out the pre bent 16" arms for 17" straight. Then bent them to get enough clearance for the bolts on the links and still keep them inboard enough to clear the tires. This will still need the wheel spacers but there will be enough room to keep things from bumping into each other.

                          Press brake

                          Taphorns LJ 1a0004 by MJR RAT, on Flickr

                          Straight vs. bent

                          Taphorns LJ 1a0002 by MJR RAT, on Flickr

                          Doing the deed

                          Taphorns LJ 1a0006 by MJR RAT, on Flickr

                          Installed for clearance check

                          Taphorns LJ 1a0003 by MJR RAT, on Flickr

                          Then on to the shock towers. From this...

                          Taphorns LJ 1a0007 by MJR RAT, on Flickr

                          To this with the flick of an angle grinder.

                          Taphorns LJ 1a0008 by MJR RAT, on Flickr

                          The lower shock mount isn't bolted in this pic so it looks off. But it actually fits nicely. I reused the lower shock mounts relocated up and out of the way. They fit like they were made to go where I put 'em.

                          Taphorns LJ 1a0009 by MJR RAT, on Flickr

                          My HF grinder kicked this 1" CRS plate's ASS! 20 minutes of steady grinding... Geez I need a life.

                          Taphorns LJ 1a0010 by MJR RAT, on Flickr
                          [CENTER][COLOR=#ff0000]Resistance Off Road
                          [/COLOR]Join the Resistance...
                          http://www.resistanceoffroad.us[/CENTER]

                          Comment


                          • #14
                            A little more done. Should finish this up tomorrow. The spacers won't be here till next week, but everything wlse will be finished.

                            Finished shock tower and Anti rock.

                            Taphorns LJ 1b0002 by MJR RAT, on Flickr

                            The "pile" keeps growing

                            Taphorns LJ 1b0003 by MJR RAT, on Flickr

                            More tomorrow...
                            [CENTER][COLOR=#ff0000]Resistance Off Road
                            [/COLOR]Join the Resistance...
                            http://www.resistanceoffroad.us[/CENTER]

                            Comment


                            • #15
                              Finally! On all fours again. Still have the exhaust to complete, adjust the caster a bit, toe in and center the steering wheel. It sits nice, I hit all the dimensions bang on (ride height, wheel clearance). Had to do some more modificating on the SAVVY skid up front.

                              Finishing the welds on the front bridge and checking droop

                              Taphorns LJ 1c0001 by MJR RAT, on Flickr

                              Had to pull the shock and spring to get to this last weld

                              Taphorns LJ 1c0002 by MJR RAT, on Flickr

                              On all fours. Ozz approves

                              Taphorns LJ 1c0003 by MJR RAT, on Flickr

                              Took the old shock mounts, cut them down and made the pull double duty as rear LCA mount skids. Bottom shock mount is 6 inches higher and behind the axle for protection.

                              Taphorns LJ 1c0005 by MJR RAT, on Flickr

                              The SAVVY under armor front skid mount. The upper control arm mount and JJ winds up less that one inch below this mount at ride height. One good bump and things get ugly. So... cut out the offending section

                              Taphorns LJ 1c0007 by MJR RAT, on Flickr

                              Added ribbing for strength

                              Taphorns LJ 1c0008 by MJR RAT, on Flickr

                              And badda bing! It's stiffer now that it was.

                              Taphorns LJ 1c0014 by MJR RAT, on Flickr

                              Painted and installed

                              Taphorns LJ 1c0015 by MJR RAT, on Flickr


                              Taphorns LJ 1c0019 by MJR RAT, on Flickr


                              Taphorns LJ 1c0020 by MJR RAT, on Flickr

                              Crappy picture time...

                              Taphorns LJ 1c0026 by MJR RAT, on Flickr

                              Started it without the muffler. Sounds pretty mean...
                              [CENTER][COLOR=#ff0000]Resistance Off Road
                              [/COLOR]Join the Resistance...
                              http://www.resistanceoffroad.us[/CENTER]

                              Comment

                              Working...
                              X