 Tweet
Tweet
Well, last yr at the Superstition Mt run I simply couldn't get up Broken mirror. My TJ wheel base just wouldn't let me do it. It irked me enough that I decided to give er a stretch. That was a can of worms.
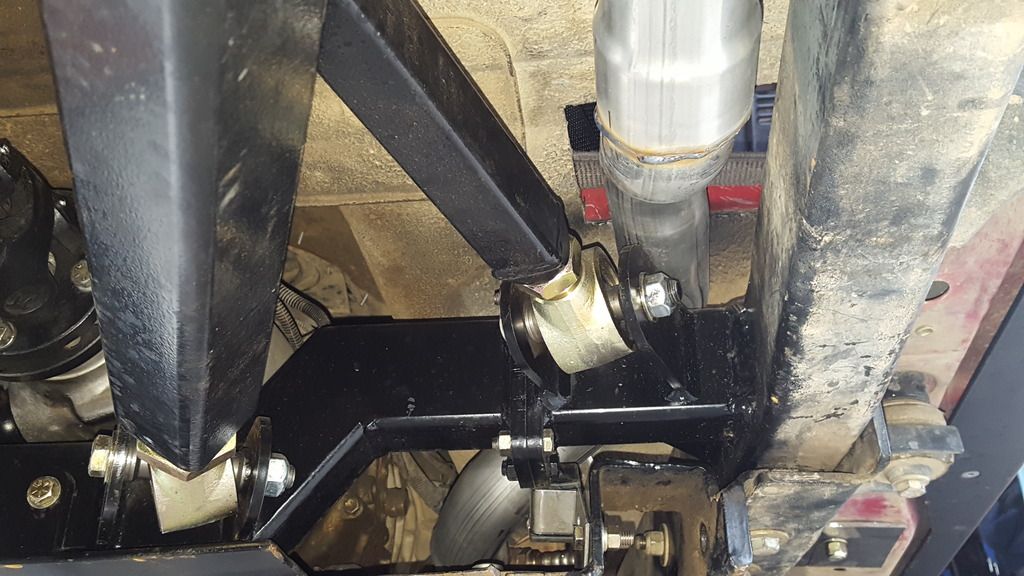
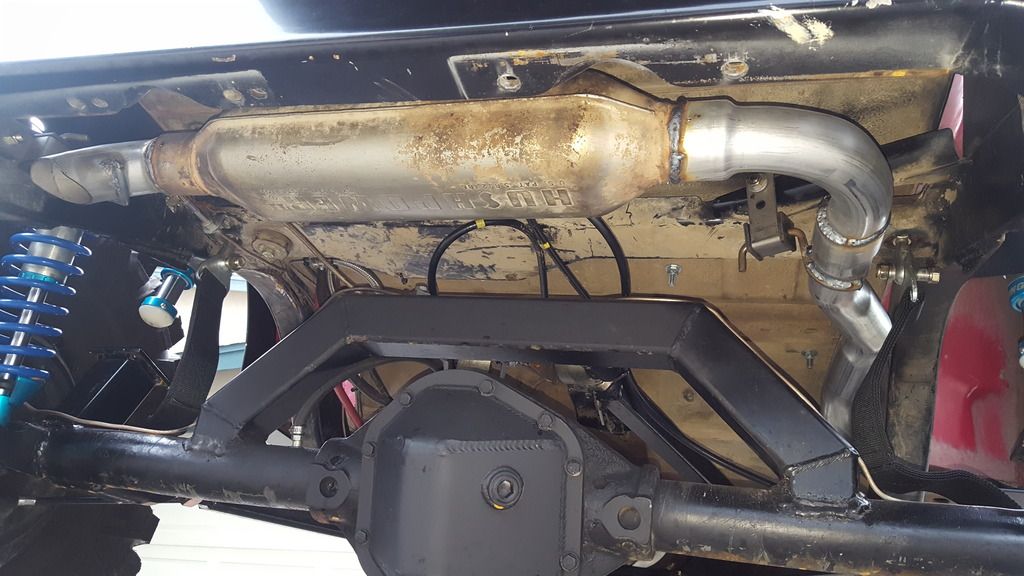
I bought and installed an Atlas II 4.3 (no pix) went with the Clayton 7" long arm kit (that's 7" minimum) and pushed it to about 9 inches . I went with King 14" coil overs with 150/150 springs, king 2.0 airbumps, and a fuel cell. I threw on some Genright coil over towers and ended up having to add about 200 lbs of weight to the rear to get it to sit right because I moved so much weight forward with the stretch. I got a TnT tire carrier and a matching Monster beadlock rim with a matching 37" tire. Also added a 10 gauge storage box, a Poison Spyder full cage, some 5 pt racing seats, harness', Genright stretch rockers and corners, PSC stage 5 hydro assist, customed my exhaust, and that's pretty much it... I guess I got a lil carried away.
I learned ALOT about this project. Mostly, it was a PITA. I did everything by myself other than the exhaust re-routing. Ended up buying a Hobart 230 mig as well. Got a piece of metal stuck 1/2 way in my cornea DEAD CENTER... That was lovely! Had to have it sliced out by an Opthalologist and I'm still about 20/35 where I was 20/20 prior... Good times. And yes I was wearing safety glasses. Anyway's, here's some pix.
Before: (Rack was almost never on btw)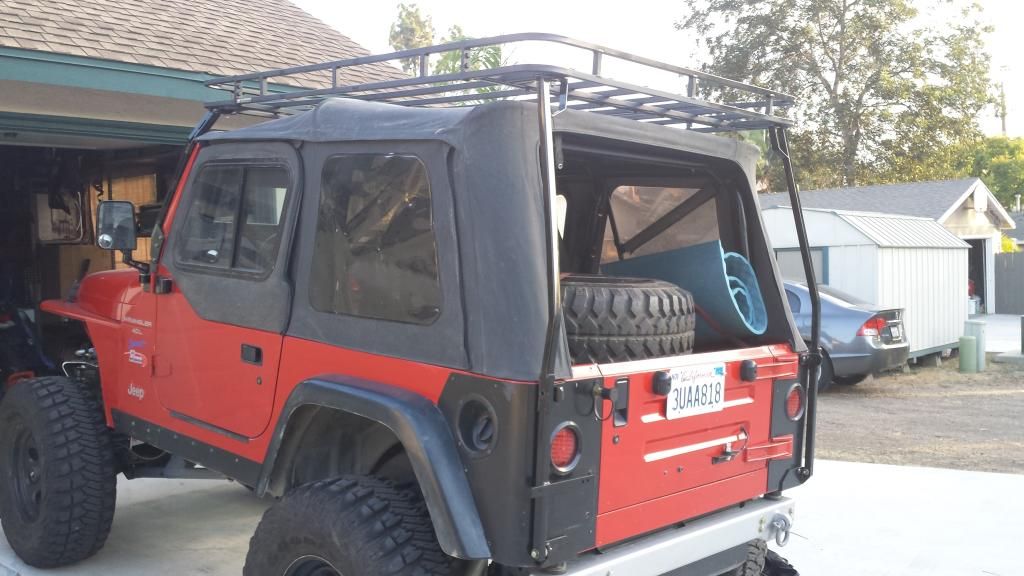
Before tear-down
fuel cell installed with Genright sending unit adapter
Modified sending unit. Normally it presses and "crushes" down at the bottom of the stock tank. This cell is taller so it had to be secured. Notice the brackets...
clayton double tai-link x-member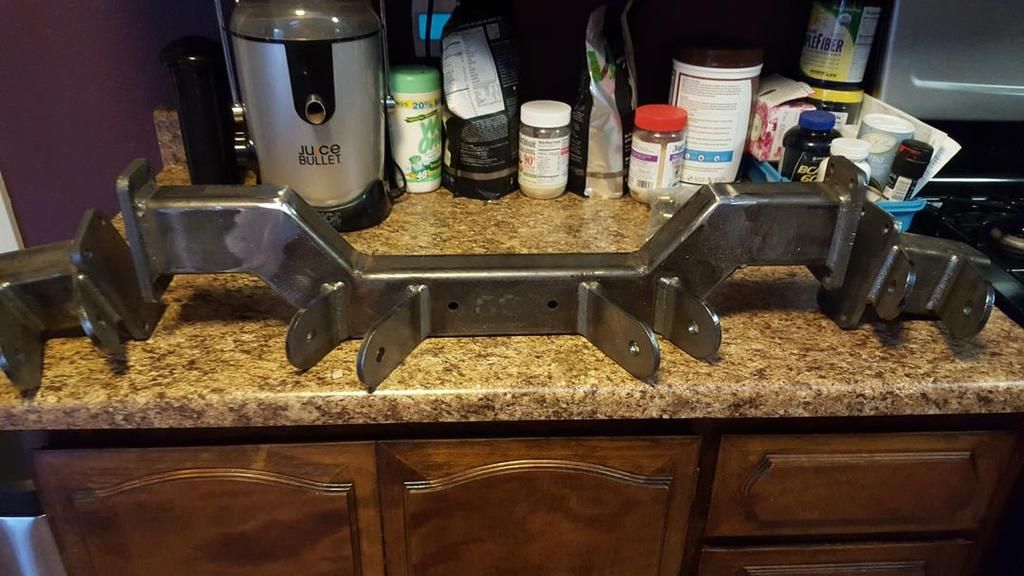
Rear end is out and frame brackets are nearly gone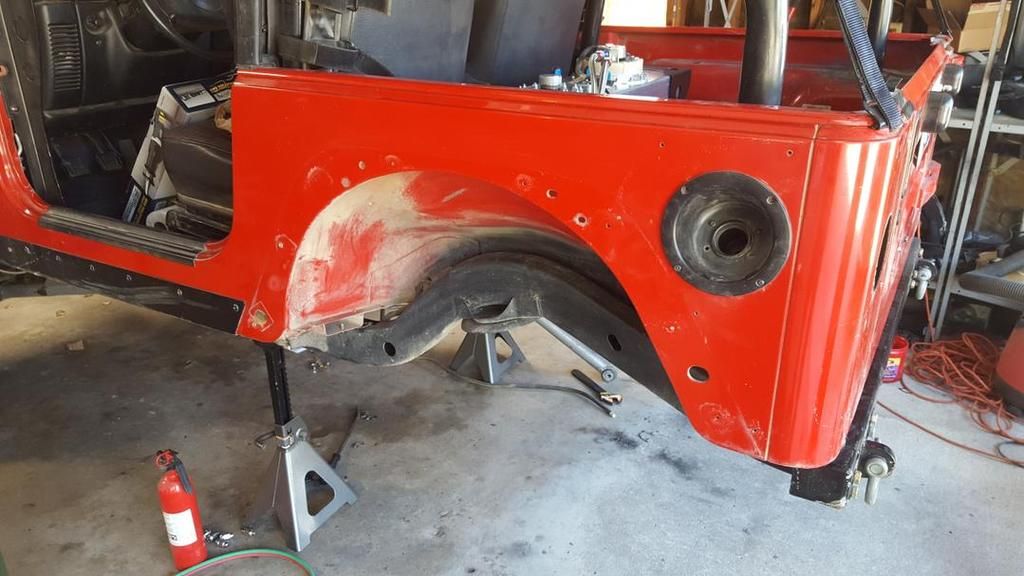
No turning back after this one!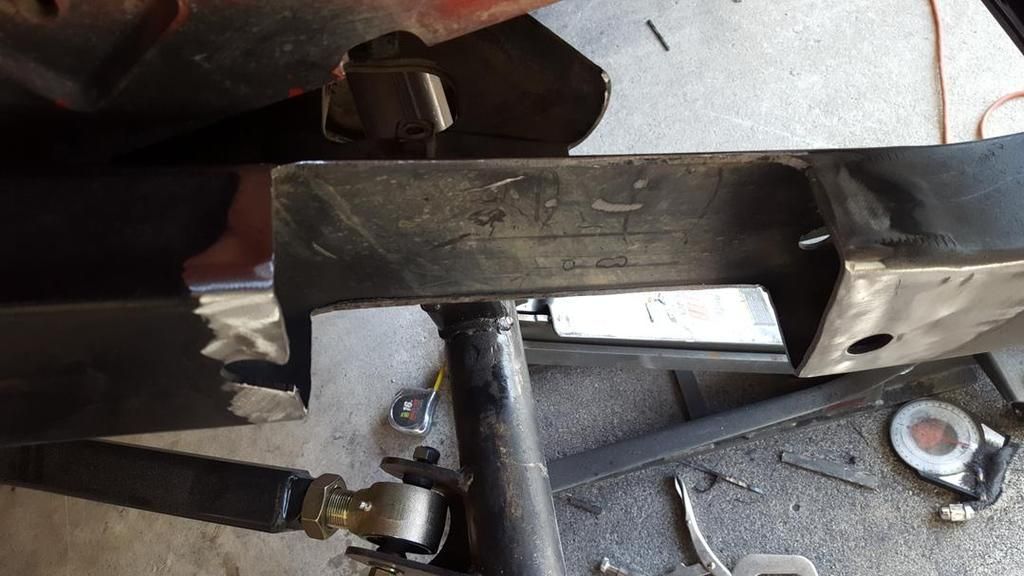
Figuring out and fitting/welding the Genright Towers.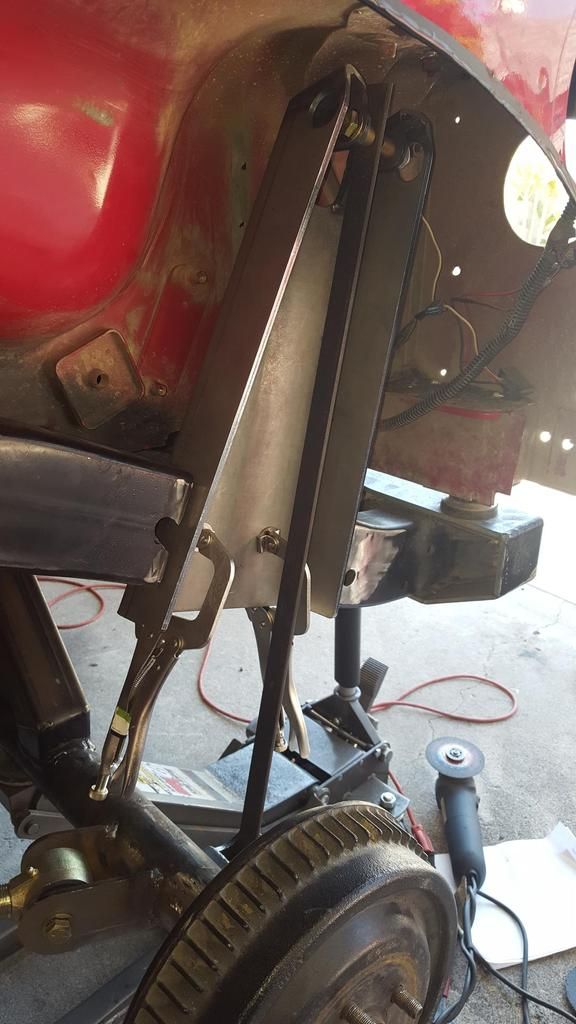
Burning in the King bump cans. (major PITA trying NOT to warp them and they both did just that....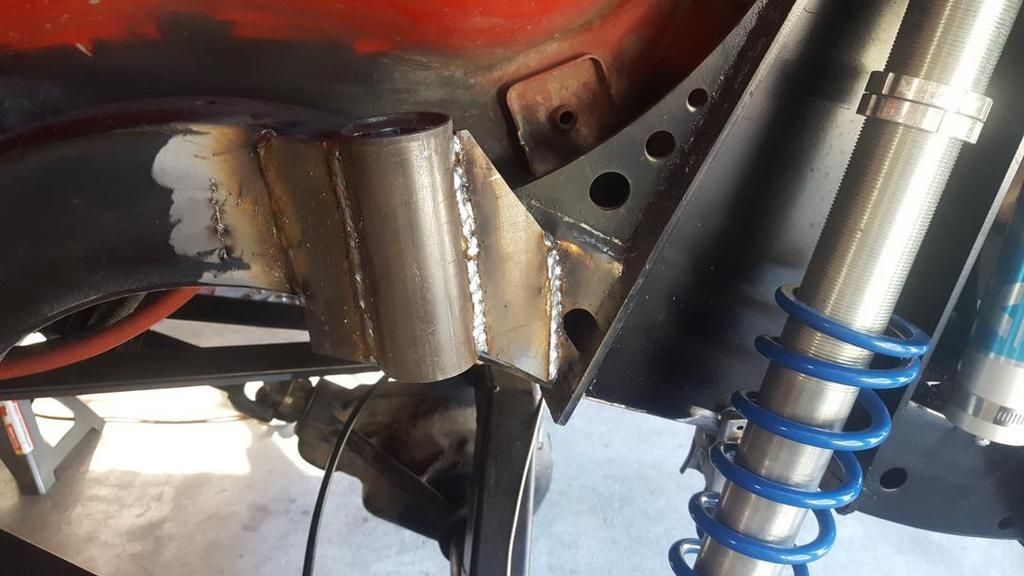
Installed and painted up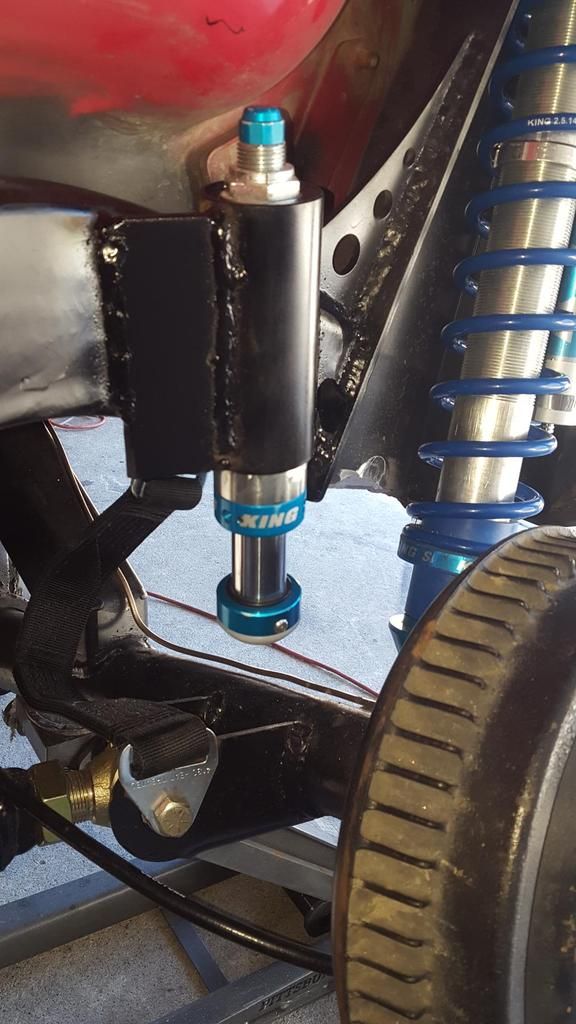
Mounts for stops at full compression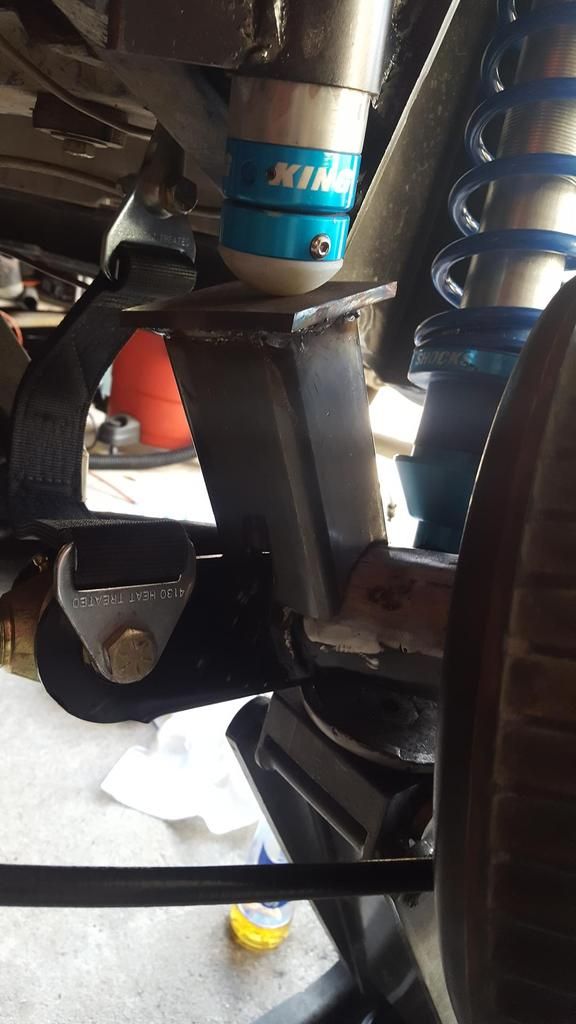
Stretch corners before trimming and powder coating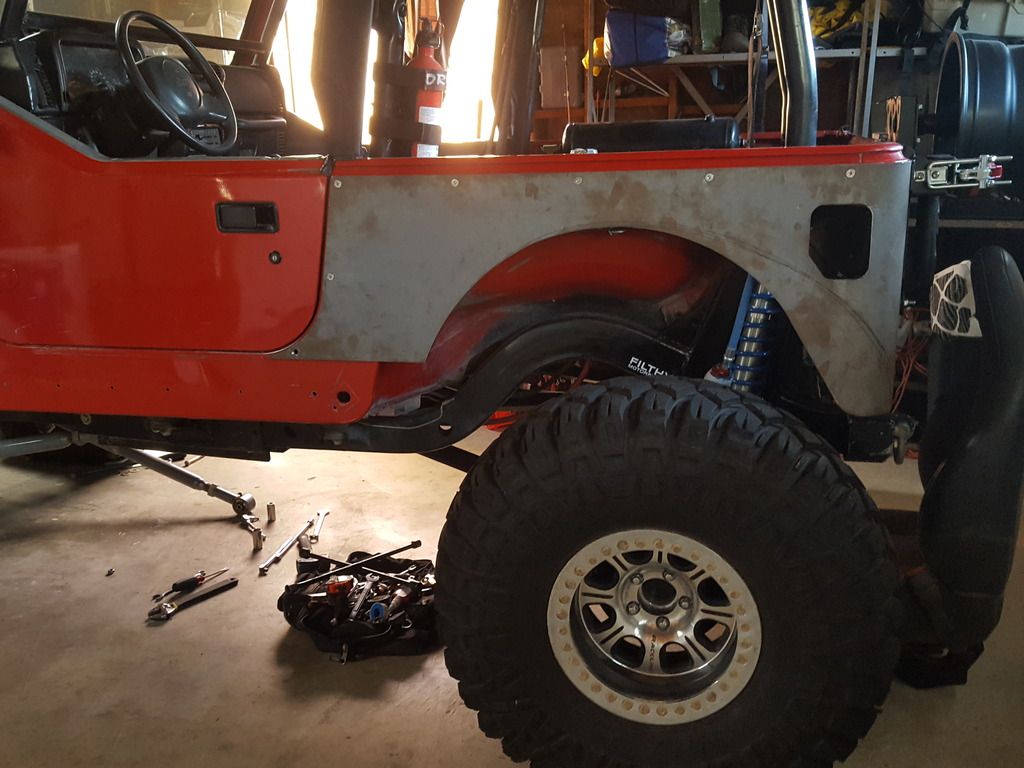
corners done and installed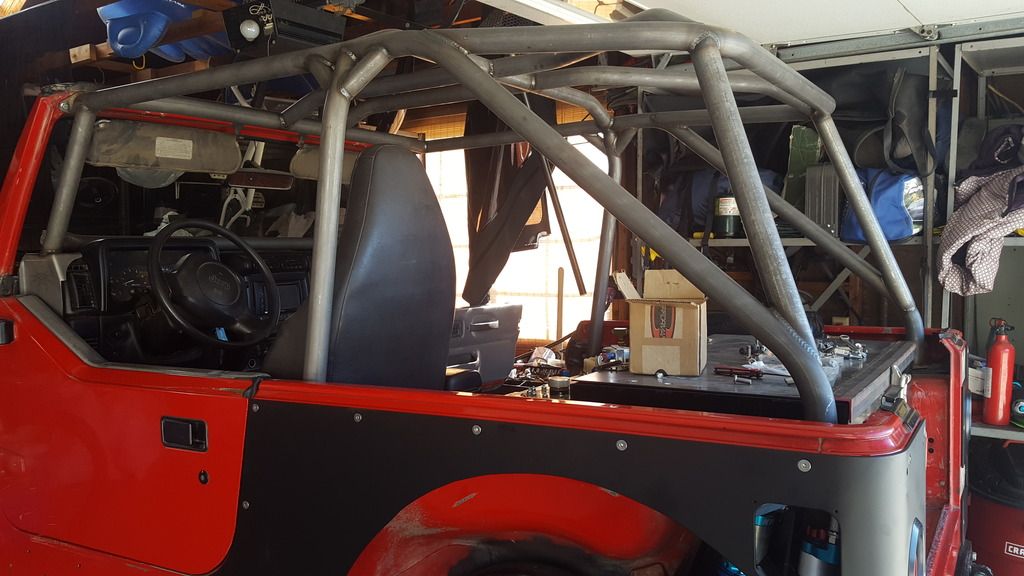
coil overs installed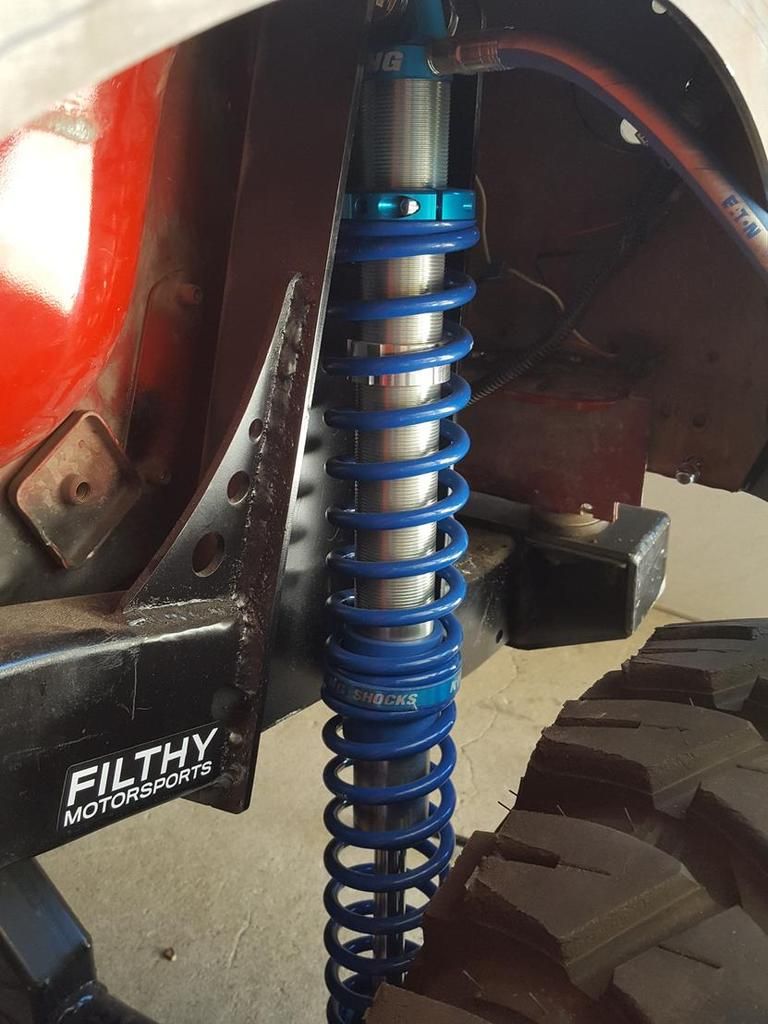
steering stabilizer mount needing to GO AWAY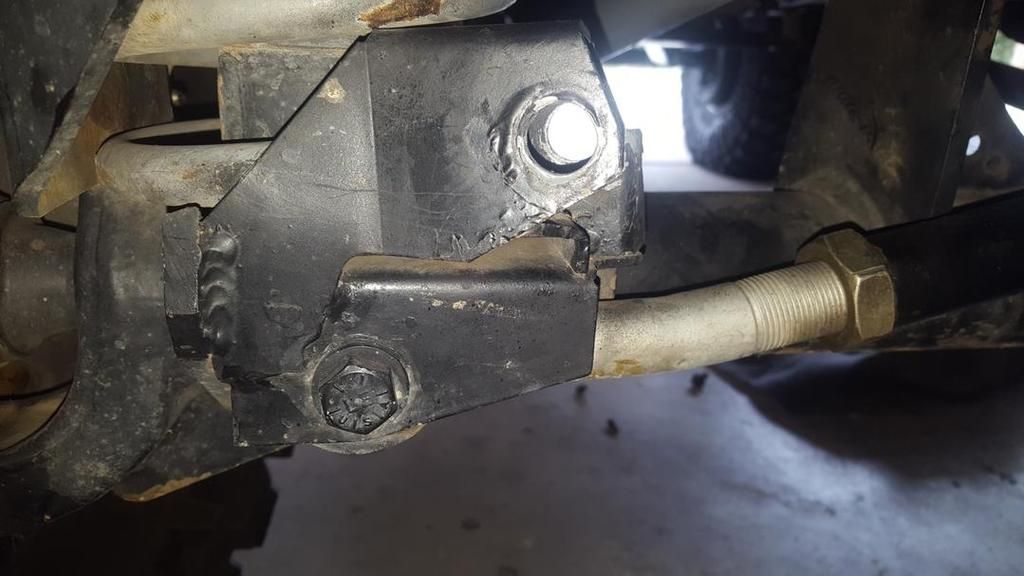
Fab'd mount installed and cylinder installed
Slightly out of order, but limiting straps installed and full droop checked out.
Out with the old cage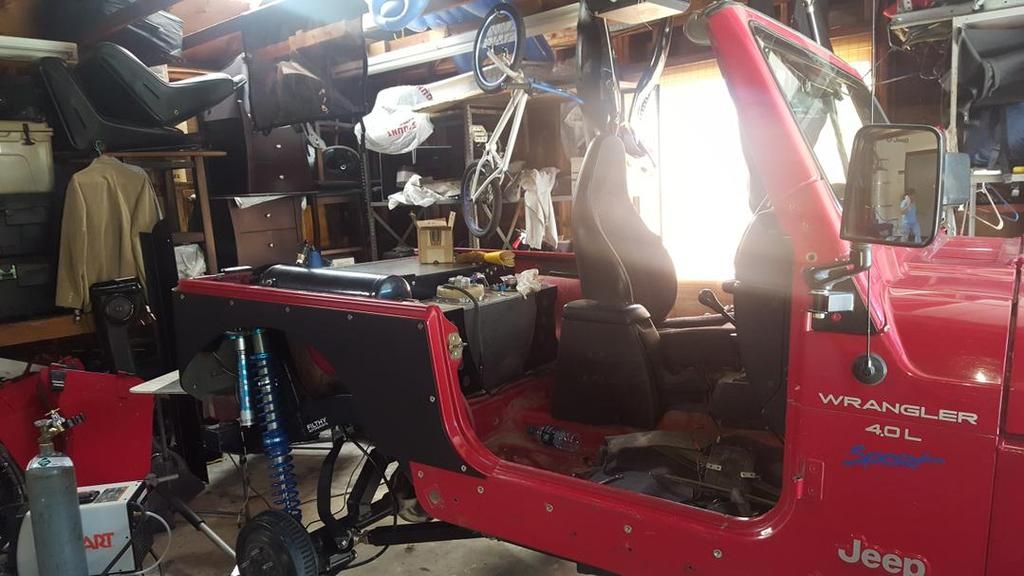 and in with the new
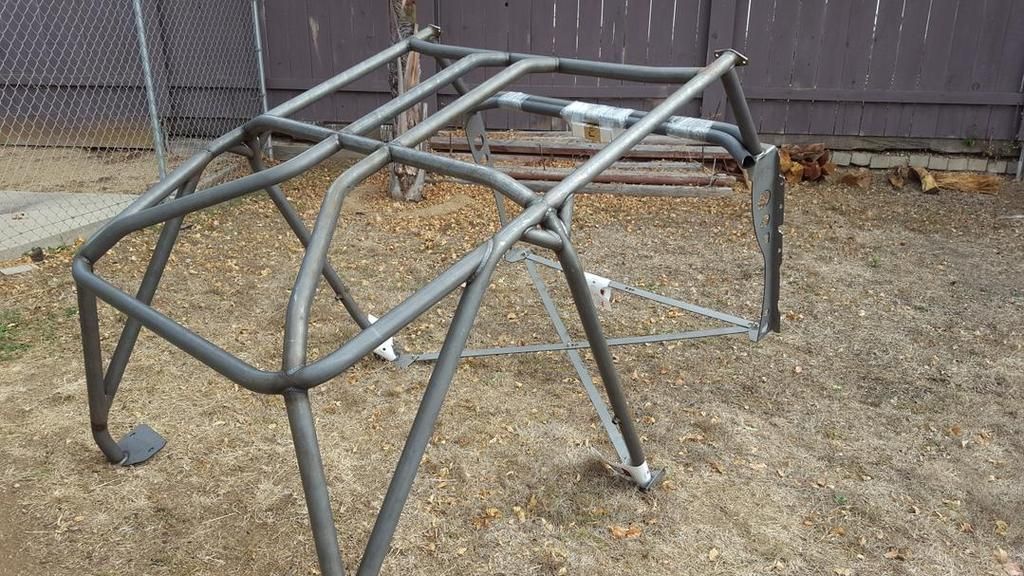
seats installed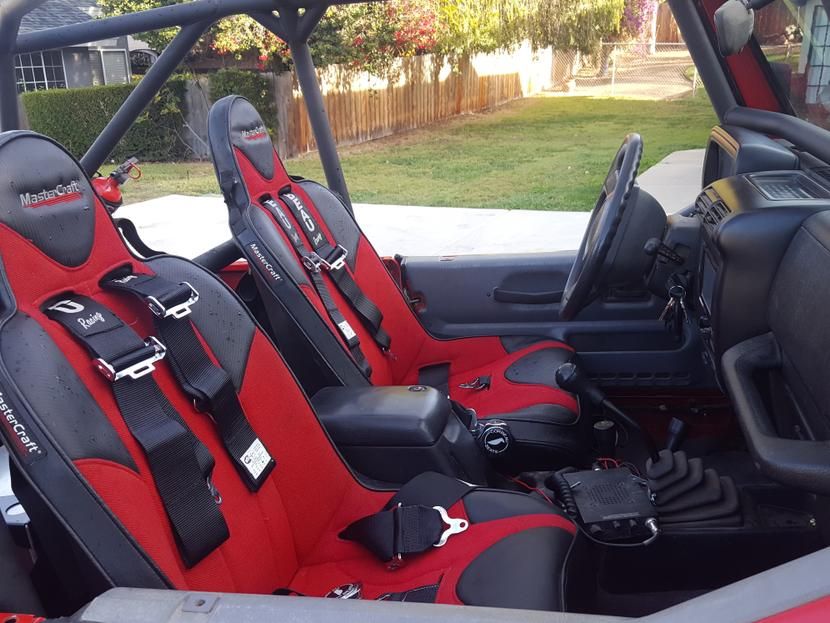
exhaust was going to be tight and I wanted it to be dumped just aft of the skid but w/o buying a new cat and muffler AND having it all fab'd I opted to keep my hardware and ended up having a shop do it up like a JK and it turned out rather nice actually.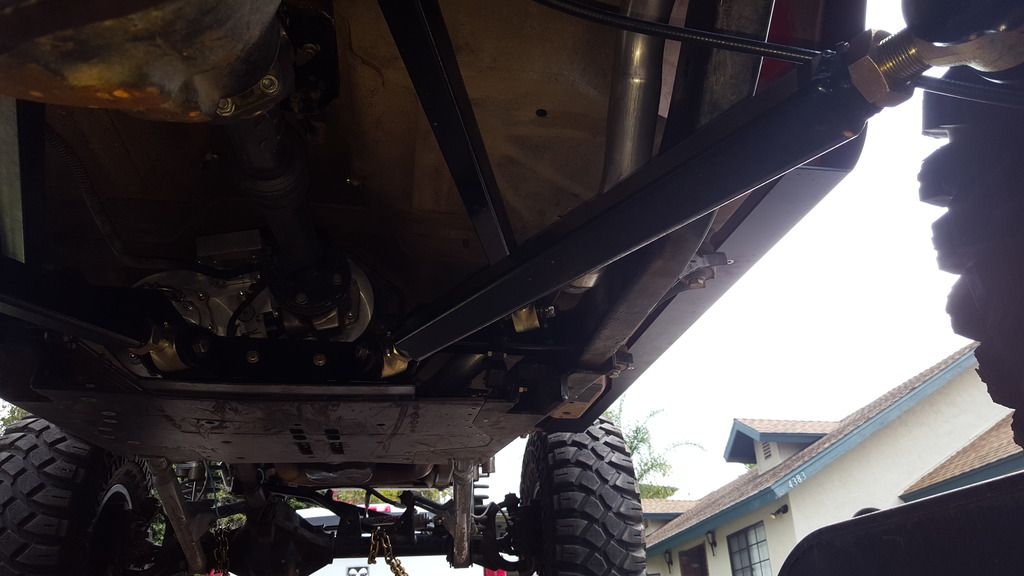
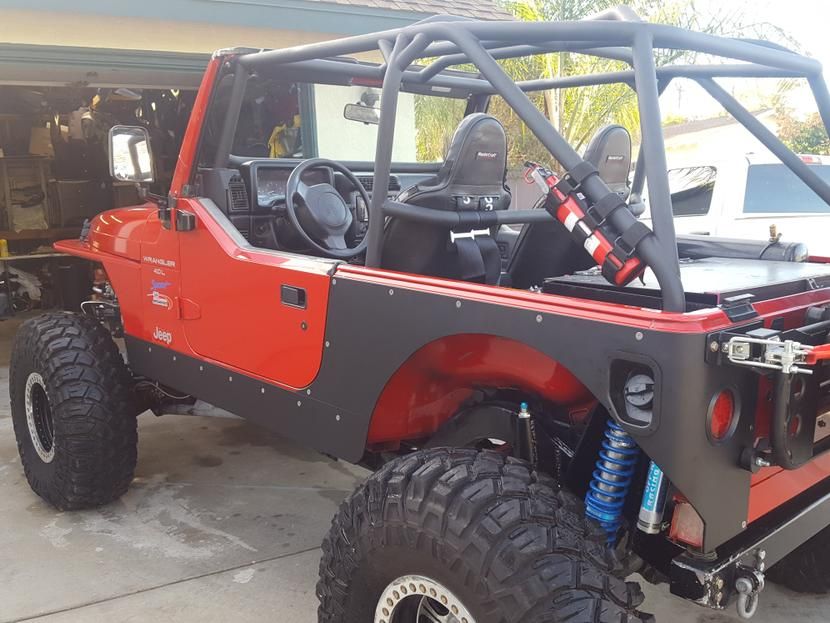
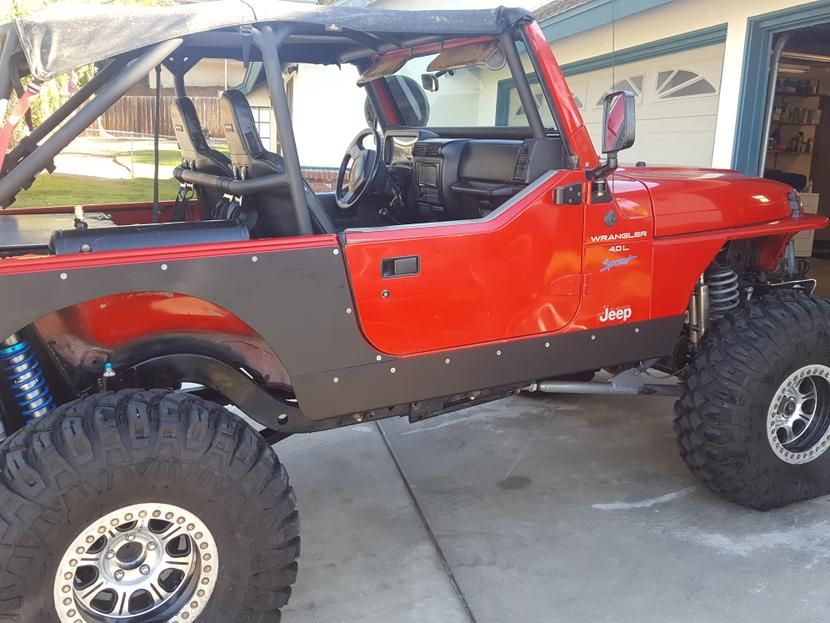
Pretty much done!!!!!!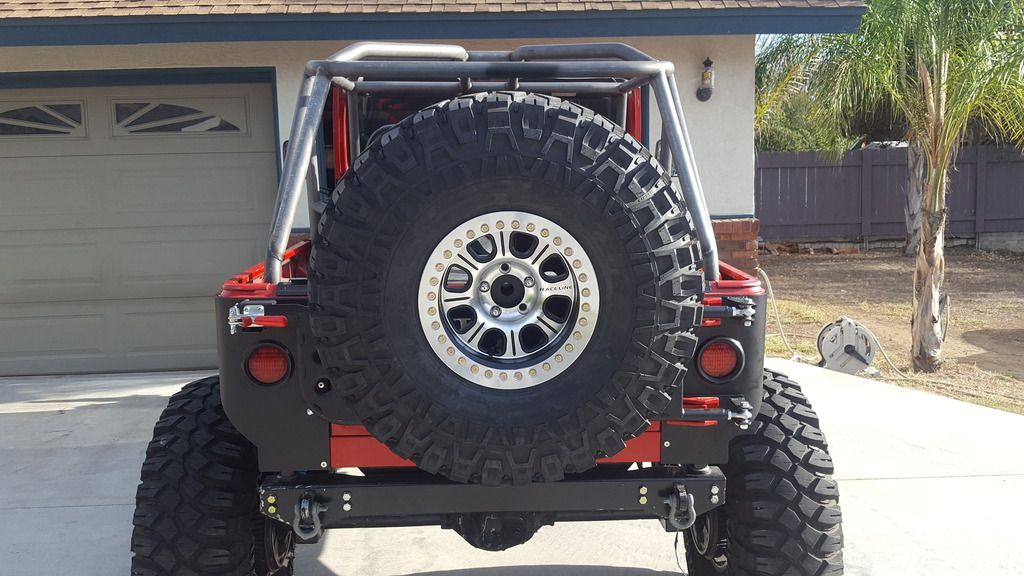
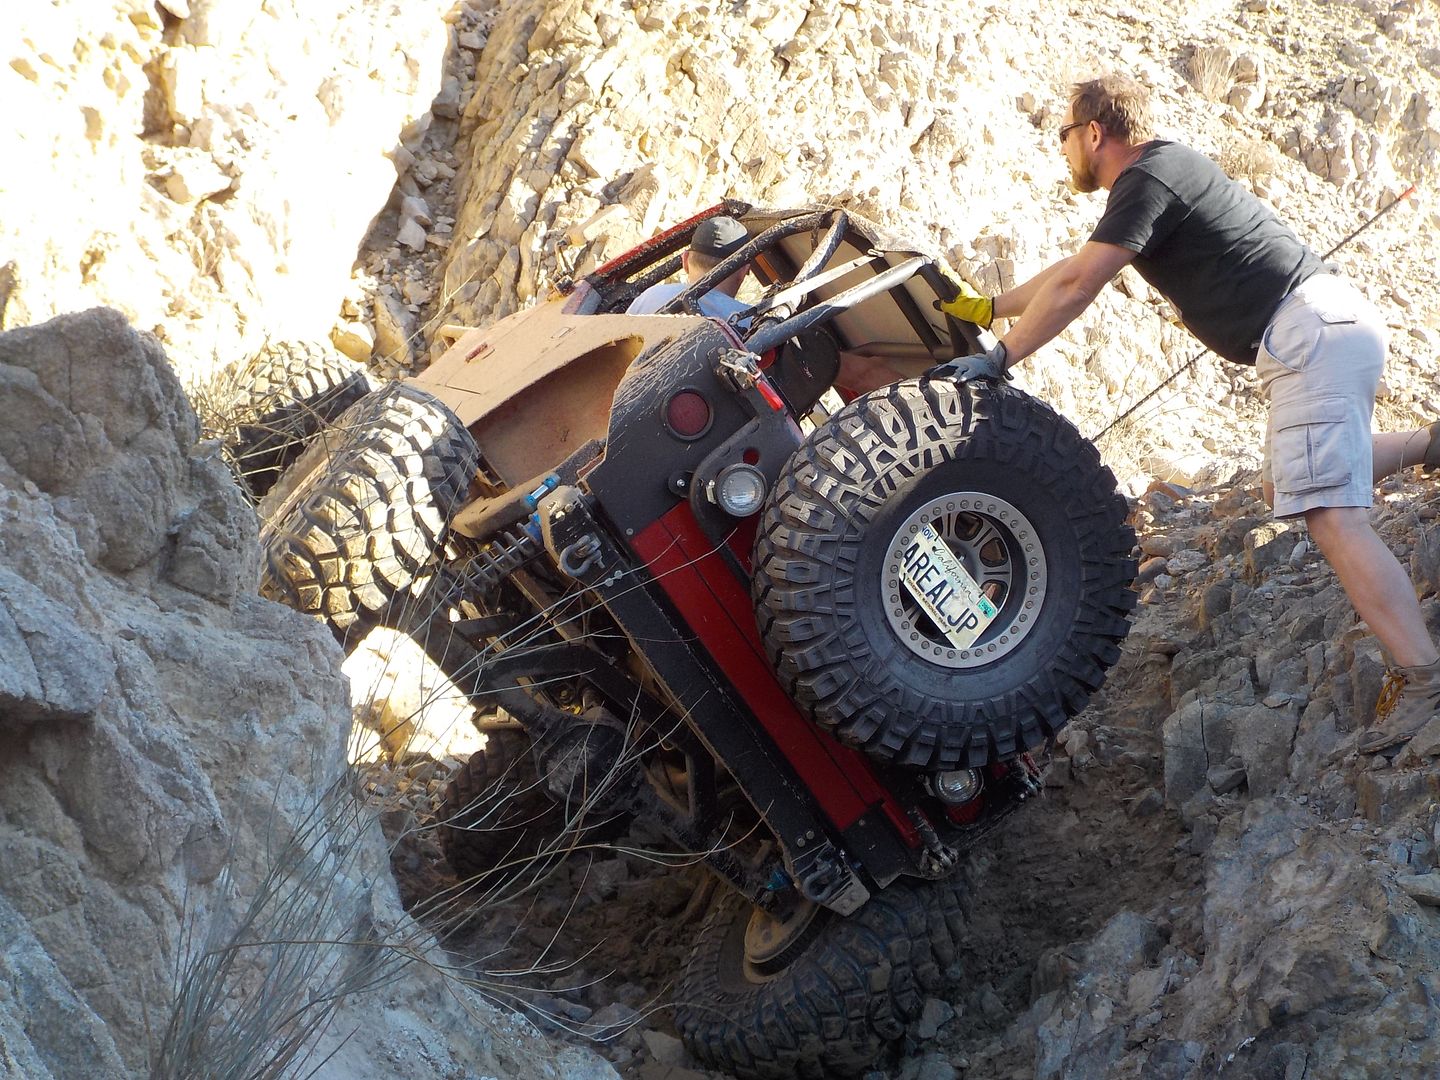
Now I just need to do a shake down and fix whatever comes up.....
I bought and installed an Atlas II 4.3 (no pix) went with the Clayton 7" long arm kit (that's 7" minimum) and pushed it to about 9 inches . I went with King 14" coil overs with 150/150 springs, king 2.0 airbumps, and a fuel cell. I threw on some Genright coil over towers and ended up having to add about 200 lbs of weight to the rear to get it to sit right because I moved so much weight forward with the stretch. I got a TnT tire carrier and a matching Monster beadlock rim with a matching 37" tire. Also added a 10 gauge storage box, a Poison Spyder full cage, some 5 pt racing seats, harness', Genright stretch rockers and corners, PSC stage 5 hydro assist, customed my exhaust, and that's pretty much it... I guess I got a lil carried away.
I learned ALOT about this project. Mostly, it was a PITA. I did everything by myself other than the exhaust re-routing. Ended up buying a Hobart 230 mig as well. Got a piece of metal stuck 1/2 way in my cornea DEAD CENTER... That was lovely! Had to have it sliced out by an Opthalologist and I'm still about 20/35 where I was 20/20 prior... Good times. And yes I was wearing safety glasses. Anyway's, here's some pix.
Before: (Rack was almost never on btw)

Before tear-down

fuel cell installed with Genright sending unit adapter

Modified sending unit. Normally it presses and "crushes" down at the bottom of the stock tank. This cell is taller so it had to be secured. Notice the brackets...

clayton double tai-link x-member

Rear end is out and frame brackets are nearly gone

No turning back after this one!

Figuring out and fitting/welding the Genright Towers.

Burning in the King bump cans. (major PITA trying NOT to warp them and they both did just that....

Installed and painted up

Mounts for stops at full compression

Stretch corners before trimming and powder coating

corners done and installed

coil overs installed

steering stabilizer mount needing to GO AWAY

Fab'd mount installed and cylinder installed

Slightly out of order, but limiting straps installed and full droop checked out.

Out with the old cage
 and in with the new


seats installed

exhaust was going to be tight and I wanted it to be dumped just aft of the skid but w/o buying a new cat and muffler AND having it all fab'd I opted to keep my hardware and ended up having a shop do it up like a JK and it turned out rather nice actually.


Pretty much done!!!!!!

Now I just need to do a shake down and fix whatever comes up.....


Comment