 Tweet
Tweet
So after breaking 2 steering boxes, in a relatively short amount of time, my friend John dropped off his jeep with me and said fix it . . . cost be dammed! Well not really.
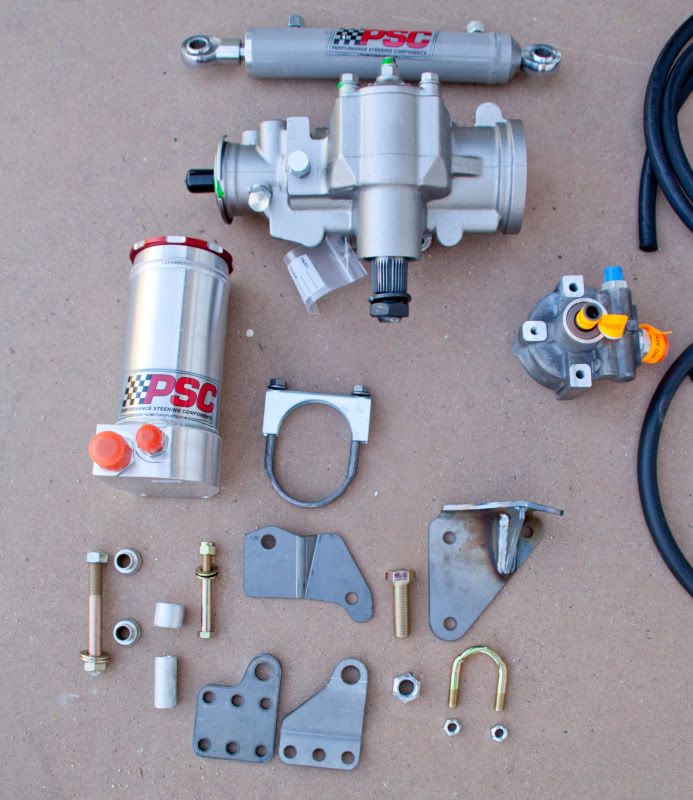
Blaine from blackmagicbrakes.com has made quite a nice, practically bolt-in kit, for the Currie HD steering. Goto: Black Magic Brakes.com for the bolt in kit, then call Lance at PSC and ask for the following part numbers:
SG061R-N ~ Steering box ported for ram assist
SC2206K ~ 1.5" bore x 6" stroke ram
SR146-8-12 ~ Gen IV 8.25" Reservoir w/ -8 return & -12 Feed
SP1800-33332 ~ TJ CBR P/S pump & pulley, drilled -6 and -12
Plus a handful of fittings and hose. If you tell Lance your doing the Savvy Ram set up, he should know how to set you up properly.
I kinda did a step by step to show how I went about making this happen on John's 97. Your mileage may vary, but installation should pretty much be the same on most TJ's. Installation should only take about a weekend.
Step one: Jack stand the rig at ride height on the frame. Remove tires and old parts. Figure out a way to get the springs out of there with out hurting your silly self. Just do it, you'll need to cycle the suspension to make sure nothing runs into anything else, so do it. Put the axle on stands at ride height and point the wheel straight.
Step two: Look at the pile of mess you have on the floor and decide where you want to start. I would suggest taking the front bumper/winch/steering box skid off to allow for easier access to stuff. Plus you're less likely to hit your head on it when its over in the corner.

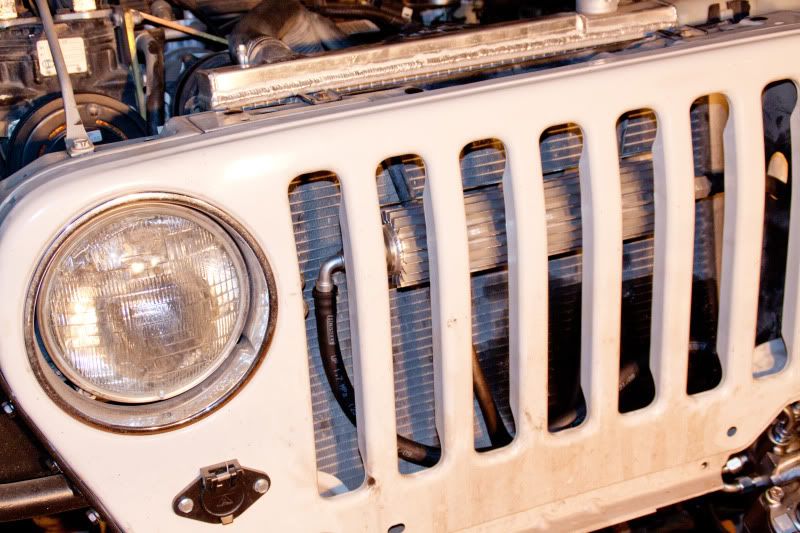
Step three: I started by installing the cooler. Remove the fan shroud bolts and all the radiator bolts, except the bottom 2 . . . just loosen those up a fair bit. We just need to push the radiator and condenser back to allow the cooler to squeeze in there. Also remove the 2 bolts holding the A/C condenser in place.
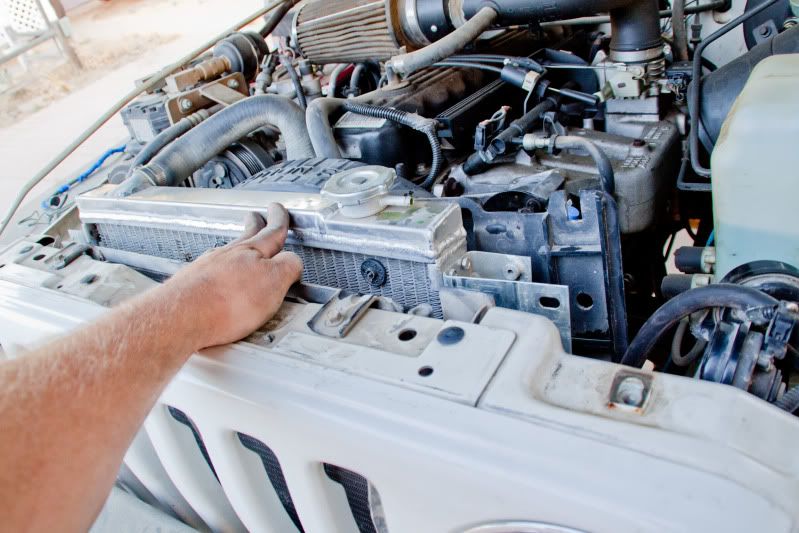
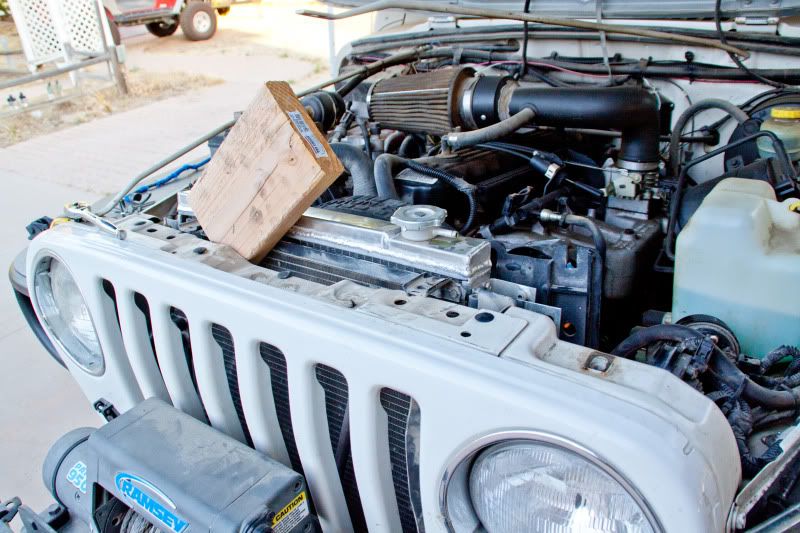
I jammed a block of wood in there because I only have 2 hands.
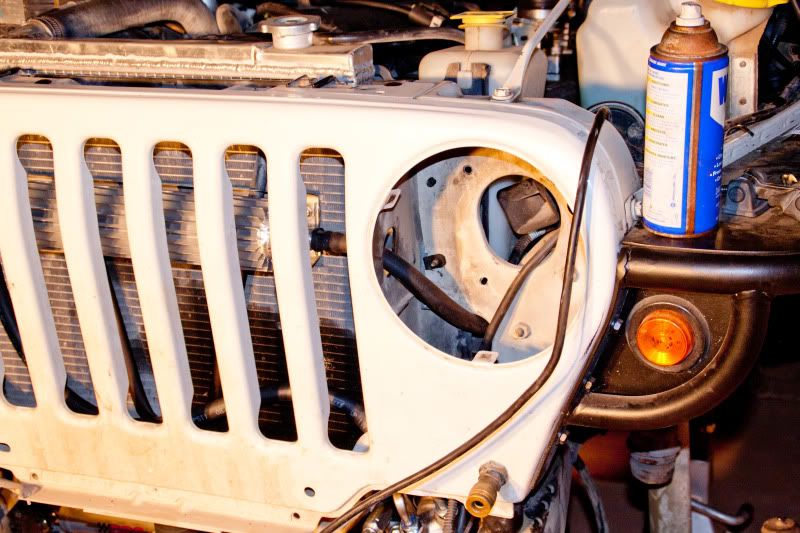
Step four: Remove driver side headlight and bucket. If you cant figure this part out . . .
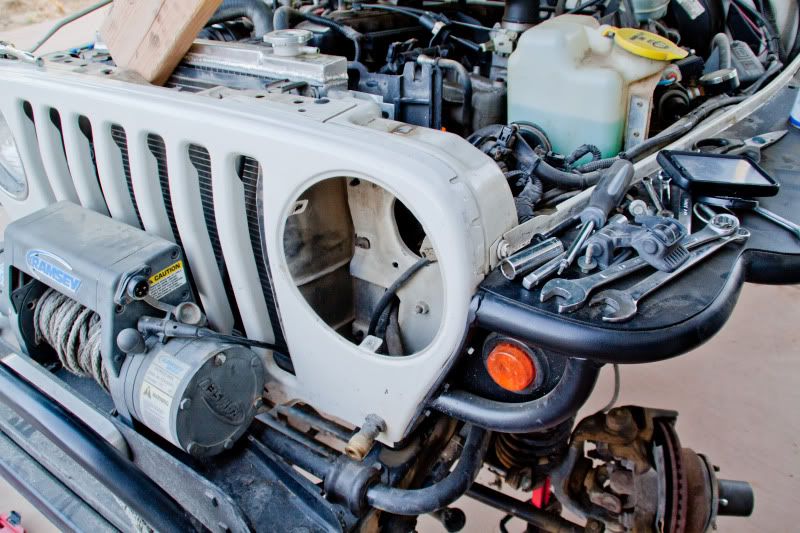
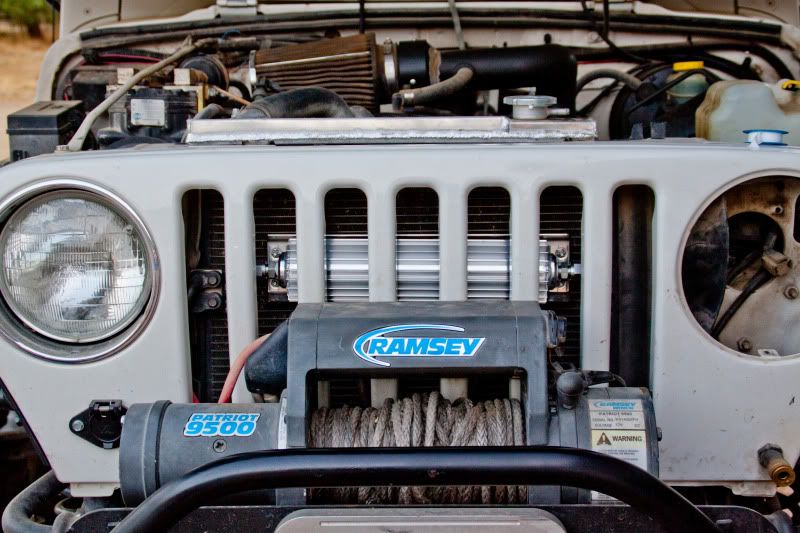
Step five: Get the cooler mount, cooler and hardware ready. Install the mount, it'll rest on the "V" bar. Cram the cooler through the driver headlight hole being sure to drag it across the condenser with the sharp, pokey bits. With the cooler in place, slip the flat holdy-in-place things where they go, insert the stud plate through the back and nut it up.
  It's really easyish.
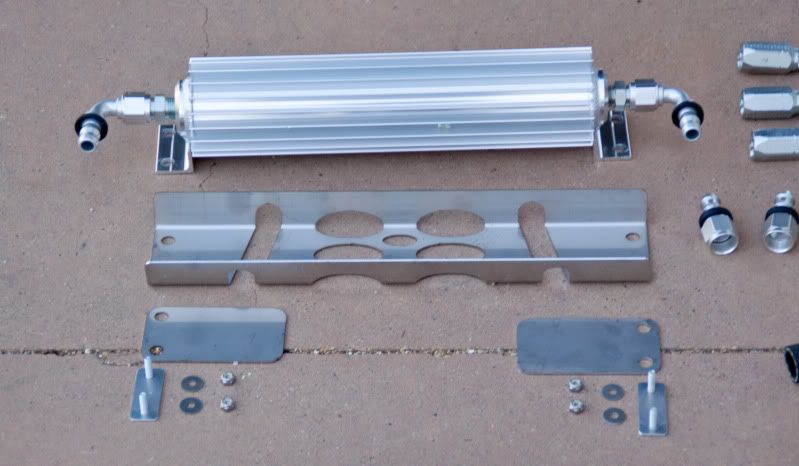
Boom
Step six: I don't remember what I did next, so here are some pictures.
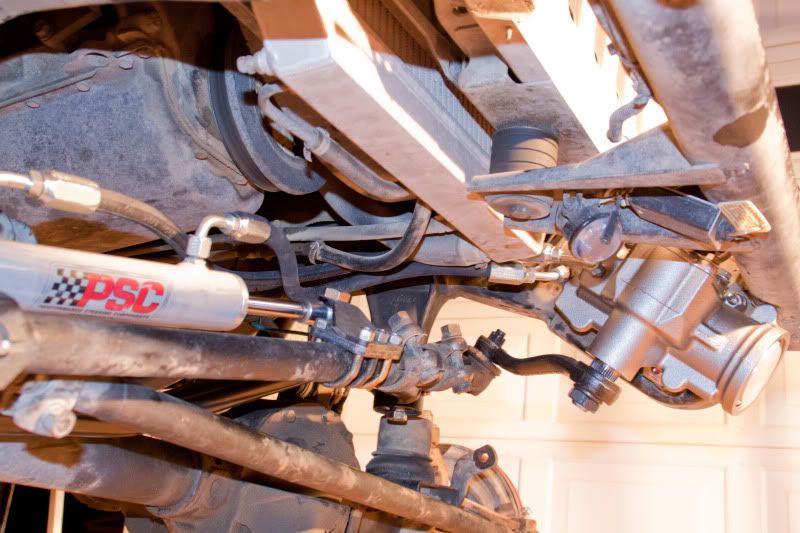
Oh, install steering box


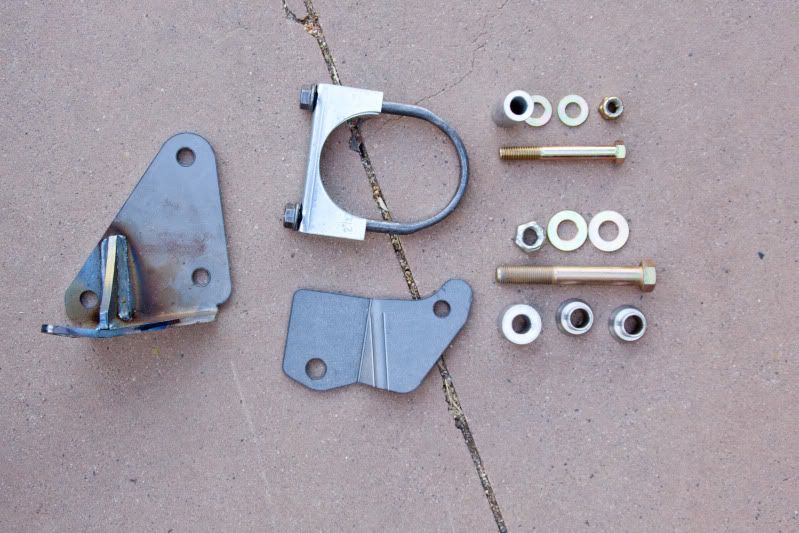
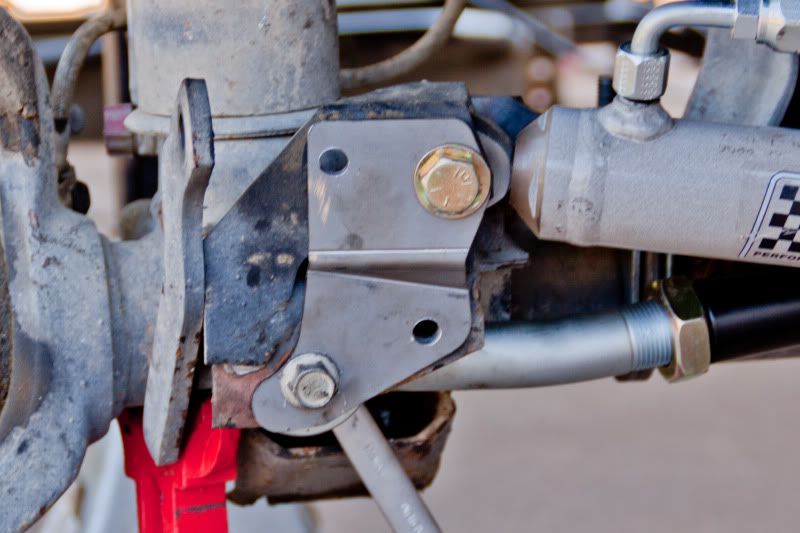
Axle brackets. Pretty self explanatory. Assemble it all loose otherwise it doesn't fit very well. Don't tighten til you're damn near done.
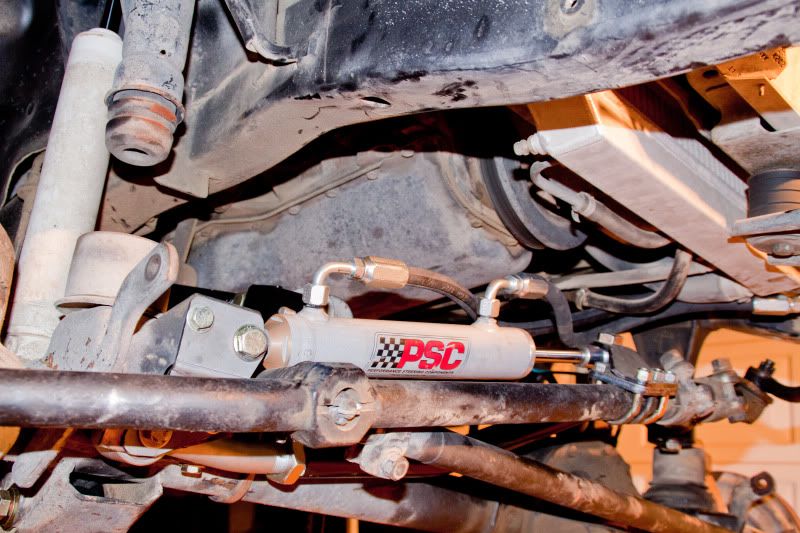
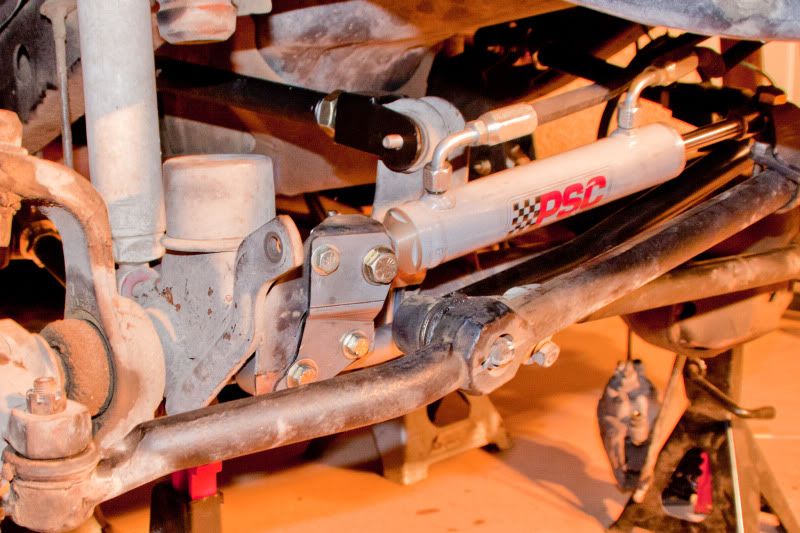
Step seven +/-: Install the ram. With the ram fully extended, mark 3 inches, with a sharpie, from the body on the shaft. Shorten the ram to this mark. Place the ram where the stock damper was and install the draglink mount. Remember the steering should be pointed straight.

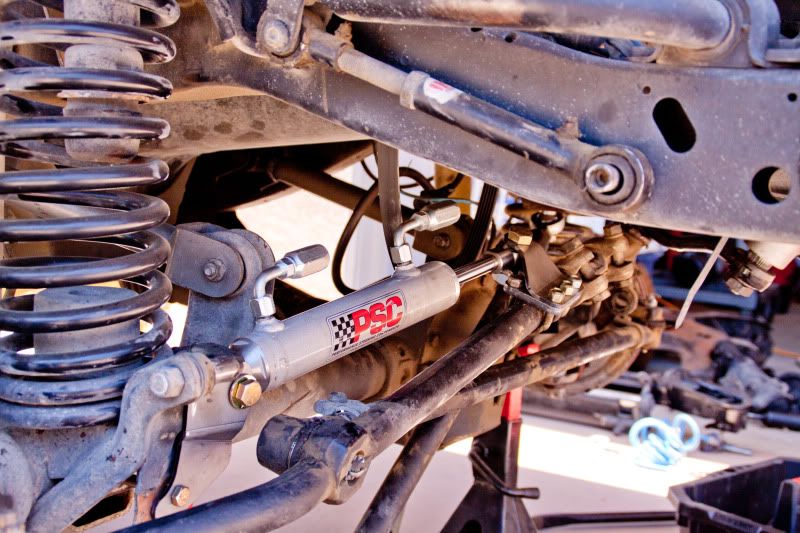
Run the steering to the stops, pulling the large rod end bolt out at each stop to make sure ram is centered. Keep and eye on the steering stops and adjust if required.
Step eight: Mount pump. Again, pretty straight forward. The only difference is that one of the holes on the new pump is drilled and tapped instead of being a through bolt. Not a big deal, just reuse the stock 2 bolts and procure a short bolt with the correct thread for the other.
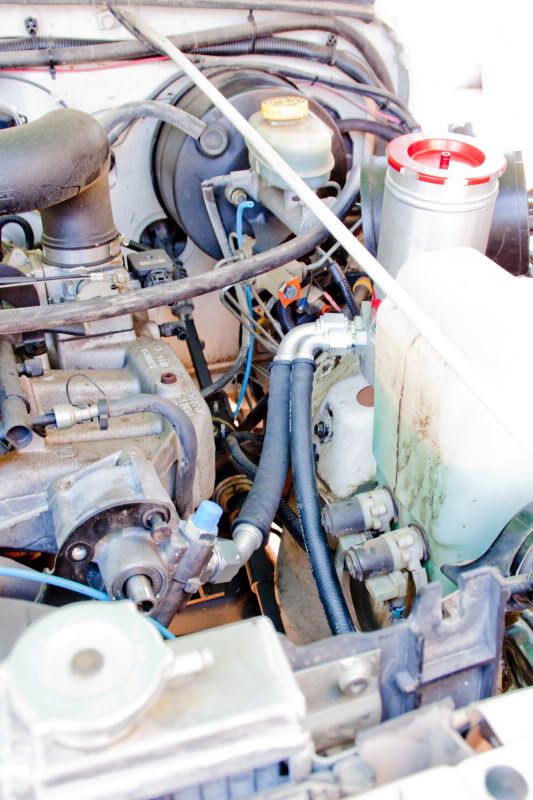
Step nine: Mount the reservoir. This is a little tricky. I had a little more fun because the 97's had a goofy, round EVAP canister in the way. I relocated that, along with a bunch of BS OBA stuff and was able to mount the reservoir to the top of the inner fender. Remember the hood still has to close, so don't eff it up.
Maybe pics later.
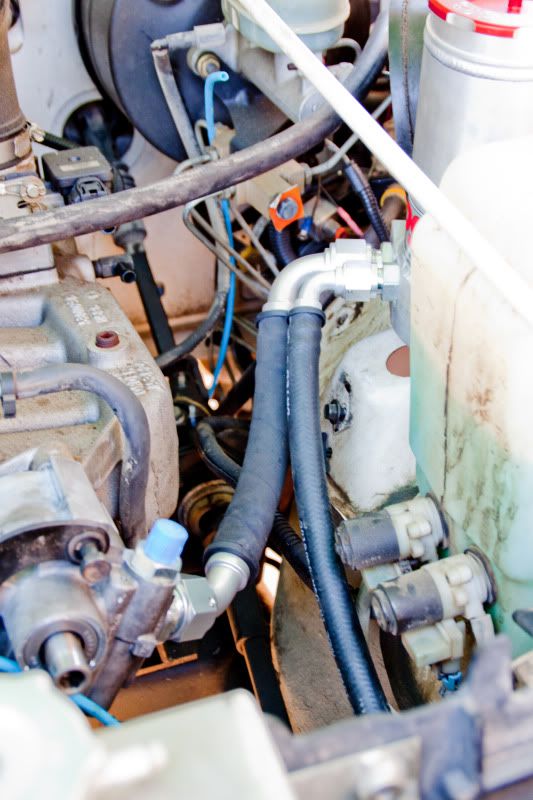
Step ten: Plumb pump and reservoir. Not horribly difficult, just make sure you mark them correctly. Also this hose seems to shrink when you assemble it all. So give your self an extra 1/2" past your mark.
Tired now. More tomorrow, with any luck.
-Chris
Blaine from blackmagicbrakes.com has made quite a nice, practically bolt-in kit, for the Currie HD steering. Goto: Black Magic Brakes.com for the bolt in kit, then call Lance at PSC and ask for the following part numbers:
SG061R-N ~ Steering box ported for ram assist
SC2206K ~ 1.5" bore x 6" stroke ram
SR146-8-12 ~ Gen IV 8.25" Reservoir w/ -8 return & -12 Feed
SP1800-33332 ~ TJ CBR P/S pump & pulley, drilled -6 and -12
Plus a handful of fittings and hose. If you tell Lance your doing the Savvy Ram set up, he should know how to set you up properly.
I kinda did a step by step to show how I went about making this happen on John's 97. Your mileage may vary, but installation should pretty much be the same on most TJ's. Installation should only take about a weekend.
Step one: Jack stand the rig at ride height on the frame. Remove tires and old parts. Figure out a way to get the springs out of there with out hurting your silly self. Just do it, you'll need to cycle the suspension to make sure nothing runs into anything else, so do it. Put the axle on stands at ride height and point the wheel straight.
Step two: Look at the pile of mess you have on the floor and decide where you want to start. I would suggest taking the front bumper/winch/steering box skid off to allow for easier access to stuff. Plus you're less likely to hit your head on it when its over in the corner.
Step three: I started by installing the cooler. Remove the fan shroud bolts and all the radiator bolts, except the bottom 2 . . . just loosen those up a fair bit. We just need to push the radiator and condenser back to allow the cooler to squeeze in there. Also remove the 2 bolts holding the A/C condenser in place.
I jammed a block of wood in there because I only have 2 hands.
Step four: Remove driver side headlight and bucket. If you cant figure this part out . . .
Step five: Get the cooler mount, cooler and hardware ready. Install the mount, it'll rest on the "V" bar. Cram the cooler through the driver headlight hole being sure to drag it across the condenser with the sharp, pokey bits.
With the cooler in place, slip the flat holdy-in-place things where they go, insert the stud plate through the back and nut it up. It's really easyish.Boom
Step six: I don't remember what I did next, so here are some pictures.
Oh, install steering box
Axle brackets. Pretty self explanatory. Assemble it all loose otherwise it doesn't fit very well. Don't tighten til you're damn near done.
Step seven +/-: Install the ram. With the ram fully extended, mark 3 inches, with a sharpie, from the body on the shaft. Shorten the ram to this mark. Place the ram where the stock damper was and install the draglink mount. Remember the steering should be pointed straight.
Run the steering to the stops, pulling the large rod end bolt out at each stop to make sure ram is centered. Keep and eye on the steering stops and adjust if required.
Step eight: Mount pump. Again, pretty straight forward. The only difference is that one of the holes on the new pump is drilled and tapped instead of being a through bolt. Not a big deal, just reuse the stock 2 bolts and procure a short bolt with the correct thread for the other.
Step nine: Mount the reservoir. This is a little tricky. I had a little more fun because the 97's had a goofy, round EVAP canister in the way. I relocated that, along with a bunch of BS OBA stuff and was able to mount the reservoir to the top of the inner fender. Remember the hood still has to close, so don't eff it up.
Maybe pics later.
Step ten: Plumb pump and reservoir. Not horribly difficult, just make sure you mark them correctly. Also this hose seems to shrink when you assemble it all. So give your self an extra 1/2" past your mark.
Tired now. More tomorrow, with any luck.
-Chris
 [COLOR=blue]Chris[/COLOR]
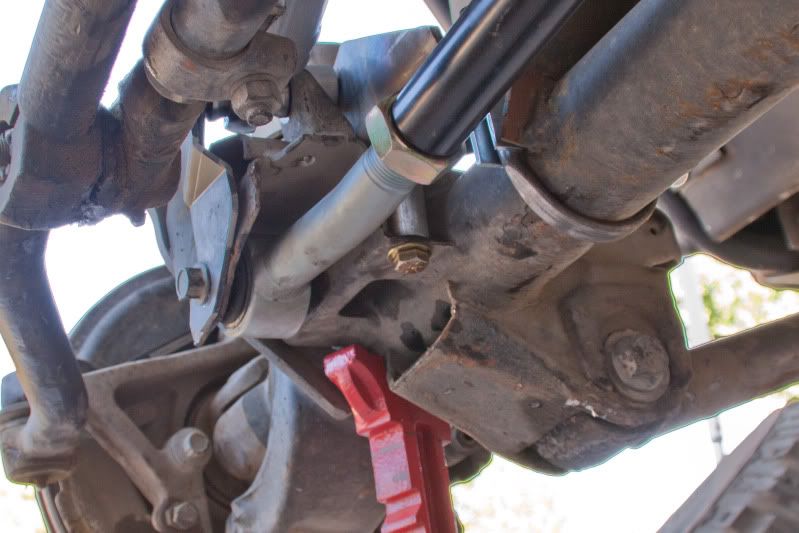

Comment