 Tweet
Tweet
I figured I may as well put some experience to good use hear. If anyone knows the pains of rust its me.. I've had it all, and fixed it all. Here's a quick write-up on replacing the rearmost 3ft or so of a Yj frame. I'm going to skip some of the mechanical garbage like putting the truck on jacks, pulling the gas tank, un-bolting the rear shackle from the leafs, and un-bolting the shocks so the axle can droop down out of the way)
Disclaimer: You wreck your ride.. YOUR fault not mine.
'92 YJ, using a '94 YJ rear clip. (Both rails with crossmember)
First of all... you want to see just how crusty your frame is. A chipping hammer for welding slag works great, but a regular hammer will do. Basically start beating the sides and bottom of the frame, following it further forward until you find a nice solid point to start at. If your frame is as bad as mine, you'll get some nice sized "speed holes" in the bad spots.
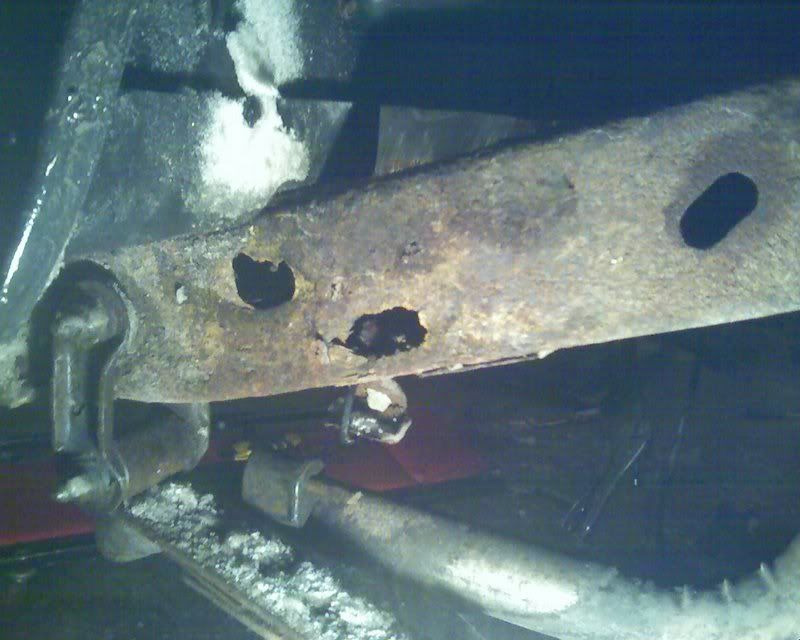
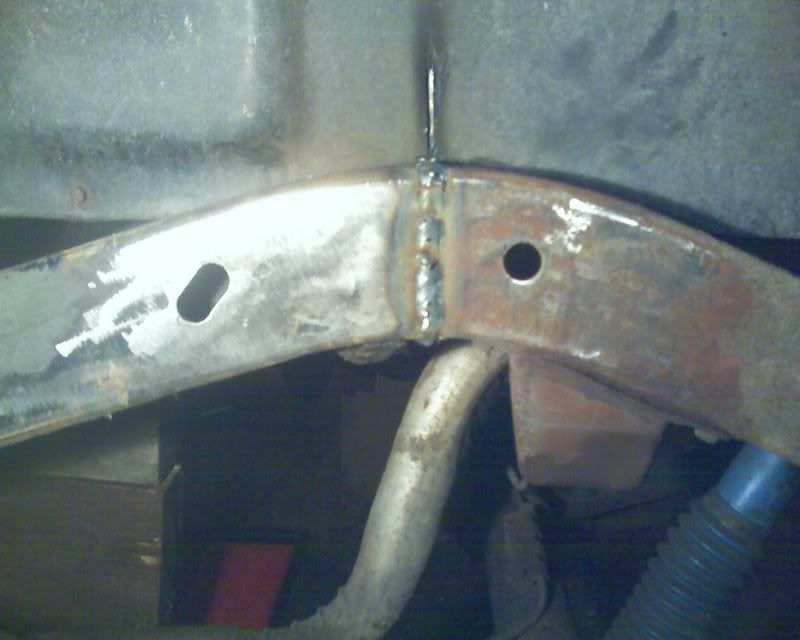
Once you've found your solid frame, mark where you want to chop this bad boy(use a template mentioned in next paragraph). I chose to cut mine just a couple inches behind the hole in the side of the rail, almost directly above the rear axle. Take TONS of measurements from in front, and behind to make sure when you install the new rail it lines up nice.
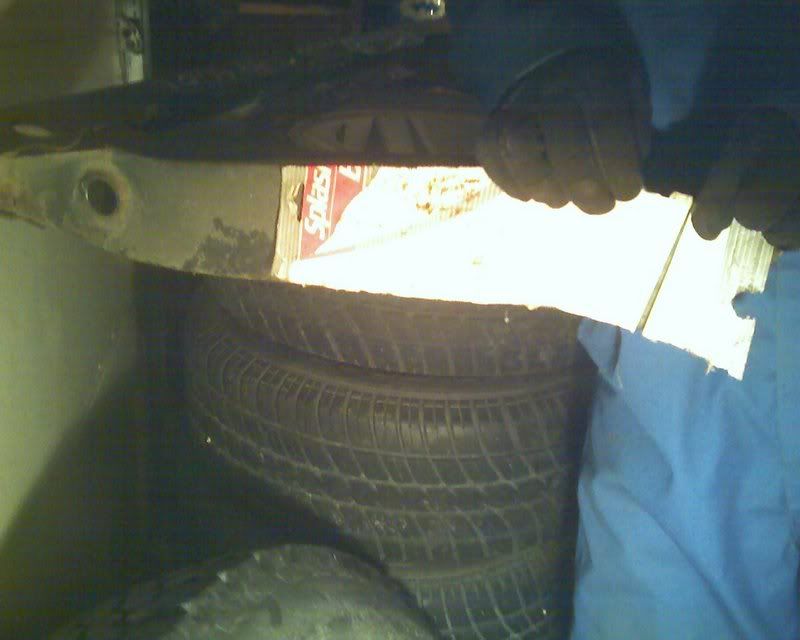
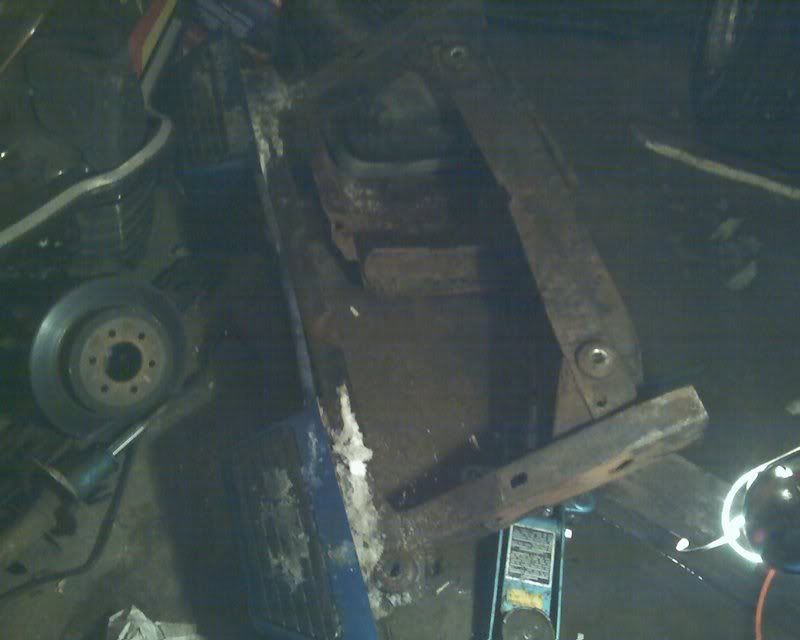
To ensure my cuts would be exactly the same on either side, AND on the new chunk of frame, I first made a template out of stiff, thin cardboard.
This 2-peice template was held up against the rail, lined up on the front side, with the hole in the rail, and measured to a common point at the rear of the frame to ensure that both the old and new chunk of frame could be cut perfectly the same.
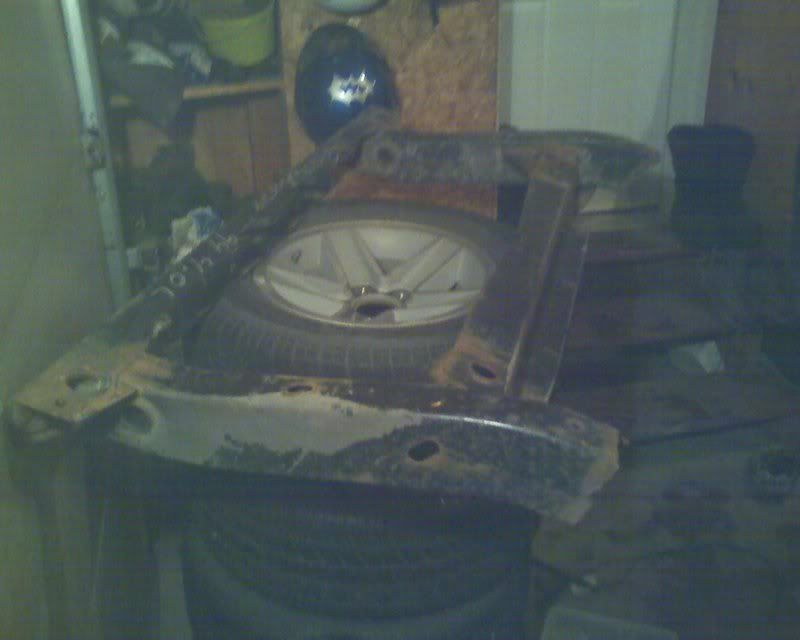
This is a picture of the template lined up against the side of the NEW frame section.
Once both the new, and old frame are marked for cuts and quadruple-checked for accuracy, break out the grinder and sawzall and hack that cancer off!!
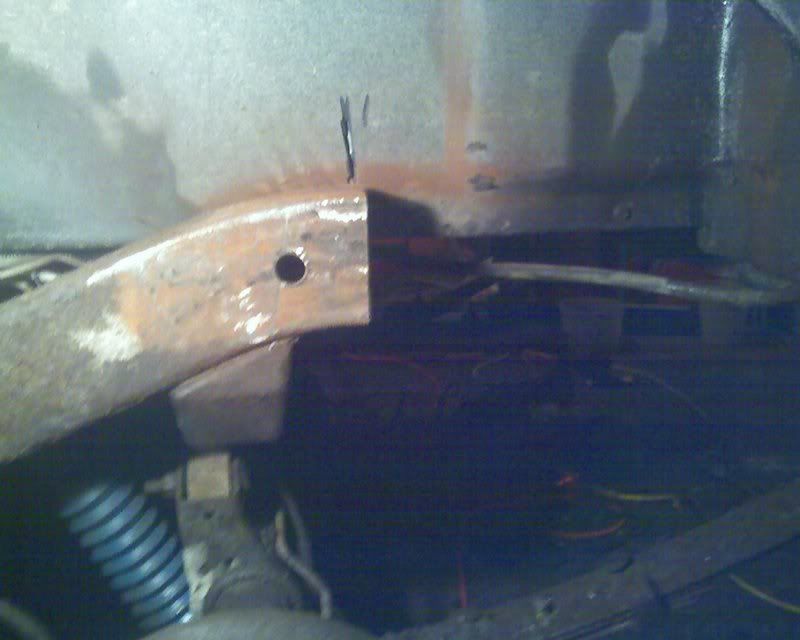
Notice how in the 2nd pic the inner wheel-well hangs lower than the top of the frame? Right behind your cut you want to bend that lip out of the way so you can get in there with your welder after.
Now support that craptastic frame and un-bolt the 4 body-mount bolts that hold it all to the body.
Have a beer. You deserve it.
Next step! Slide your new chunk of frame up into place and hold it there with the 4 body mount bolts hand tight.
Fit everything up good, take some more measurements to see how far off you are and work from there till its ok. GRIND A 45* BEVEL on both the existing frame and new chunk for better weld penetration.
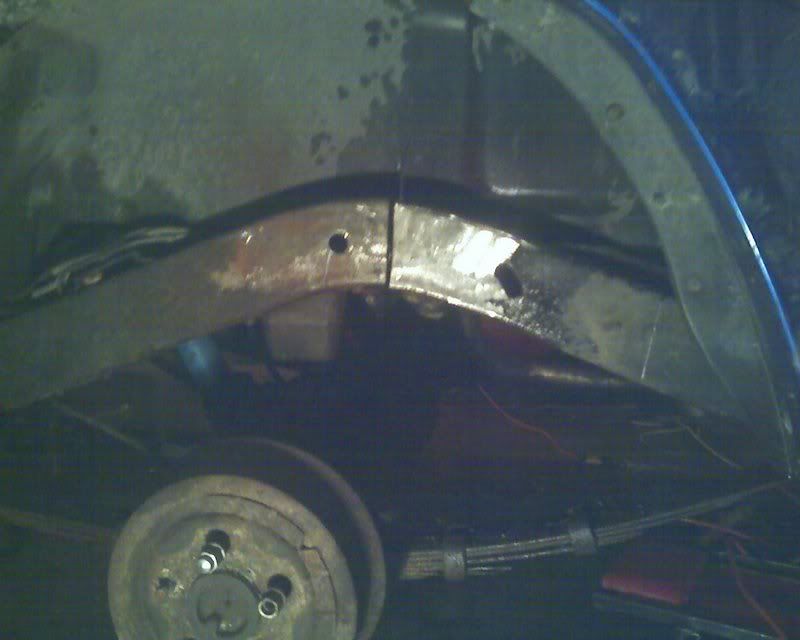
Once my rails were lined up fairly well, I had the front 2 body bolts tight, and the rear 2 loose. I tacked the BOTTOM edges of the frames together, then used a hydraulic jack to raise the rear of the frame and close the gap at the top.
MEASURE AGAIN. If all measurements check out OK, then weld that sucker solid!
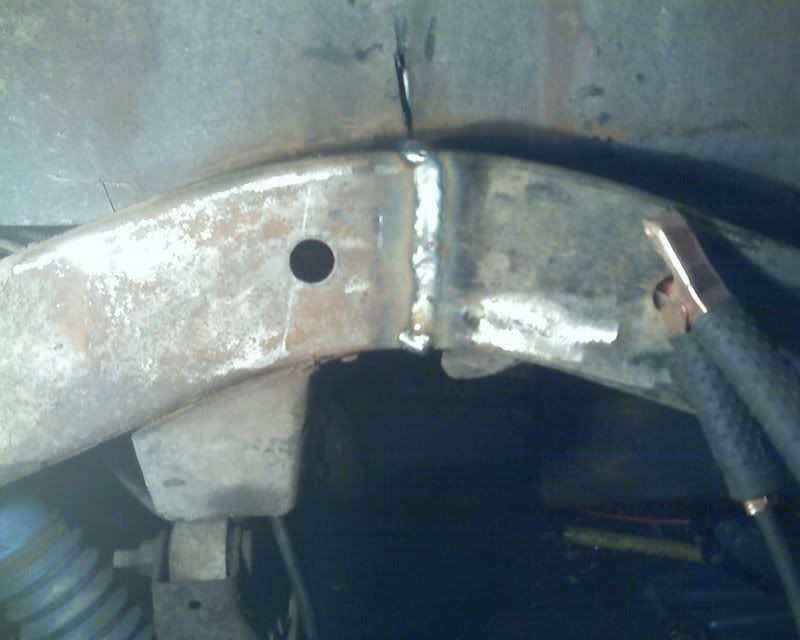
NOTE: The existing frame was 1/4" wider overall than my new frame section. The 1/8" on either side is nominal and nothing to be concerned about.
Now.. DO NOT just leave it like that. I don't have pics of the finished product, but here is the jist of it.
Grind the weld on the outside nice and even with the frame. YOU NEED TO MAKE "FISHPLATES" to weld onto the outside of your frame on either side to add strength.
My "fishplates" were made in the shape of the framerail, about 8" long and 4" high, out of 1/4" plate steel. Cut them shorter than the frame to make welding easier.
These plates need to be welded over top of the welds you just ground down.
Once everything is good and solid, paint and/or undercoat the new frame section. Re-assemble and you are done!
Helpful Notes:
Make sure you have all the body bushings installed in the new rails before bolting up.
Drill drainage holes in the lowest, rearmost part of the rail. This is why your original frame rotted away in the first place.
Make sure that the weight-shift of the axle and removed frame section are not going to make your jeep fall off the jacks! A little trick that has saved my life TWICE is to throw the tires/rims you remove from the vehicle, under the vehicle.
Have a helper-monkey with a strong back!
Buy beer BEFORE you start!
And last, but certainly not least... SAFETY. Goggles, not glasses are a MUST in my opinion for grinding/cutting under a vehicle. Gloves are a good choice if you dont want your hands cut up.
Now go enjoy your now not-so-rusty frame in your favourite mud-hole!
Disclaimer: You wreck your ride.. YOUR fault not mine.
'92 YJ, using a '94 YJ rear clip. (Both rails with crossmember)
First of all... you want to see just how crusty your frame is. A chipping hammer for welding slag works great, but a regular hammer will do. Basically start beating the sides and bottom of the frame, following it further forward until you find a nice solid point to start at. If your frame is as bad as mine, you'll get some nice sized "speed holes" in the bad spots.
Once you've found your solid frame, mark where you want to chop this bad boy(use a template mentioned in next paragraph). I chose to cut mine just a couple inches behind the hole in the side of the rail, almost directly above the rear axle. Take TONS of measurements from in front, and behind to make sure when you install the new rail it lines up nice.
To ensure my cuts would be exactly the same on either side, AND on the new chunk of frame, I first made a template out of stiff, thin cardboard.
This 2-peice template was held up against the rail, lined up on the front side, with the hole in the rail, and measured to a common point at the rear of the frame to ensure that both the old and new chunk of frame could be cut perfectly the same.
This is a picture of the template lined up against the side of the NEW frame section.
Once both the new, and old frame are marked for cuts and quadruple-checked for accuracy, break out the grinder and sawzall and hack that cancer off!!
Notice how in the 2nd pic the inner wheel-well hangs lower than the top of the frame? Right behind your cut you want to bend that lip out of the way so you can get in there with your welder after.
Now support that craptastic frame and un-bolt the 4 body-mount bolts that hold it all to the body.
Have a beer. You deserve it.
Next step! Slide your new chunk of frame up into place and hold it there with the 4 body mount bolts hand tight.
Fit everything up good, take some more measurements to see how far off you are and work from there till its ok. GRIND A 45* BEVEL on both the existing frame and new chunk for better weld penetration.
Once my rails were lined up fairly well, I had the front 2 body bolts tight, and the rear 2 loose. I tacked the BOTTOM edges of the frames together, then used a hydraulic jack to raise the rear of the frame and close the gap at the top.
MEASURE AGAIN. If all measurements check out OK, then weld that sucker solid!
NOTE: The existing frame was 1/4" wider overall than my new frame section. The 1/8" on either side is nominal and nothing to be concerned about.
Now.. DO NOT just leave it like that. I don't have pics of the finished product, but here is the jist of it.
Grind the weld on the outside nice and even with the frame. YOU NEED TO MAKE "FISHPLATES" to weld onto the outside of your frame on either side to add strength.
My "fishplates" were made in the shape of the framerail, about 8" long and 4" high, out of 1/4" plate steel. Cut them shorter than the frame to make welding easier.
These plates need to be welded over top of the welds you just ground down.
Once everything is good and solid, paint and/or undercoat the new frame section. Re-assemble and you are done!
Helpful Notes:
Make sure you have all the body bushings installed in the new rails before bolting up.
Drill drainage holes in the lowest, rearmost part of the rail. This is why your original frame rotted away in the first place.
Make sure that the weight-shift of the axle and removed frame section are not going to make your jeep fall off the jacks! A little trick that has saved my life TWICE is to throw the tires/rims you remove from the vehicle, under the vehicle.
Have a helper-monkey with a strong back!
Buy beer BEFORE you start!
And last, but certainly not least... SAFETY. Goggles, not glasses are a MUST in my opinion for grinding/cutting under a vehicle. Gloves are a good choice if you dont want your hands cut up.
Now go enjoy your now not-so-rusty frame in your favourite mud-hole!
Comment