Just an observation. Wont that design, severely limit your rear storage space, and access to the area?
Announcement
Collapse
No announcement yet.
Cage questions
Collapse
Forum Thread First Post
Collapse
X
-
The two largest items that I put back there are my spare tire, and the ice chest. I'm definitely going to measure to make sure that those can get in and out of there easily. Aside from that, the rest is just tool bags, and other bags. I don't think it'll be to restrictive when it comes to getting to those items.
and there won't ever be a rear seat back there.[COLOR="#FF0000"]R[/COLOR]edneck [COLOR="#FF0000"]D[/COLOR]riveway [COLOR="#FF0000"]F[/COLOR]ab
www.DanielBuck.net - www.DNSFAIL.com - www.FurnitureByBuck.com
Comment
-
Ok, picked up the rest of the tubing this morning! six 10 foot tubes of 1 3/4" .120 DOM, and two 10 foot tubes of 1 1/2" .120 DOM. I'll have alot more waste using 10 foot sections instead of 18 foot sections, but it's going to be alot easier for me to work with in my small garage/driveway, and no tube will need to be longer than 10 feet.
The 1 1/2" tube will be for part of the seat mounts, and most of the gussets/bracing on the intersections. Any extra tubing will be used for other projects, I always get more than I thinkg I need so that I don't have to go down there to get steel every time I need some. And, in case I goof
The channel there isn't for the TJ, it's for motor mounts on the Willys, I just picked up one 10' section of that even though I really only need about 2', I'll keep the rest for other projects.
Wish me luck! If all fails, Kurt I'll be draging my pile to your place haha
haha
 [COLOR="#FF0000"]R[/COLOR]edneck [COLOR="#FF0000"]D[/COLOR]riveway [COLOR="#FF0000"]F[/COLOR]ab
www.DanielBuck.net - www.DNSFAIL.com - www.FurnitureByBuck.com
Comment
-
I got home early today, so I had enough daylight to cut the C pillars out. This weekend I'll get the new C pillars cut and welded in. And I'll start working forward from there
 [COLOR="#FF0000"]R[/COLOR]edneck [COLOR="#FF0000"]D[/COLOR]riveway [COLOR="#FF0000"]F[/COLOR]ab
www.DanielBuck.net - www.DNSFAIL.com - www.FurnitureByBuck.com
Comment
-
ThanksOriginally posted by USMC 0369 View Post[COLOR="#800000"]You have some mad photoshop skillz there Daniel...[/COLOR] If only my fab skills were just as good
  HAH!
HAH!
Ground down the stubs from the factory C pillars, and cut and drilled the top side plates for the C pillar mounts.

 [COLOR="#FF0000"]R[/COLOR]edneck [COLOR="#FF0000"]D[/COLOR]riveway [COLOR="#FF0000"]F[/COLOR]ab
www.DanielBuck.net - www.DNSFAIL.com - www.FurnitureByBuck.com
Comment
-
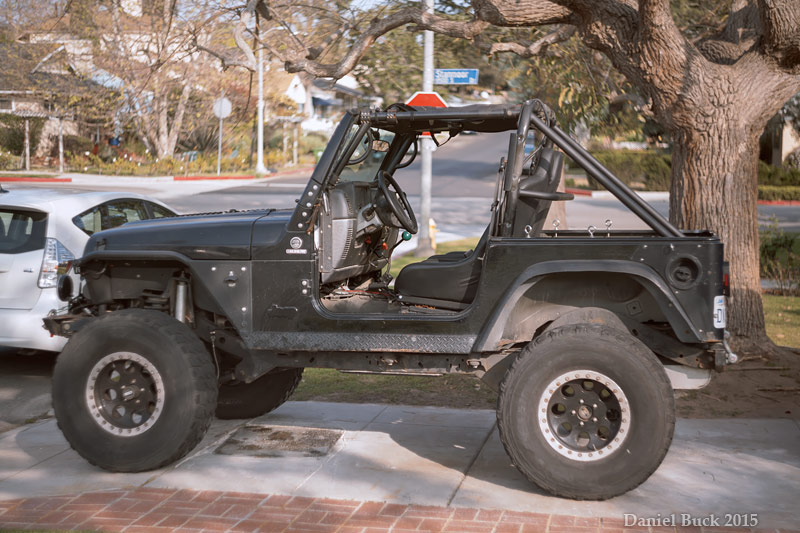
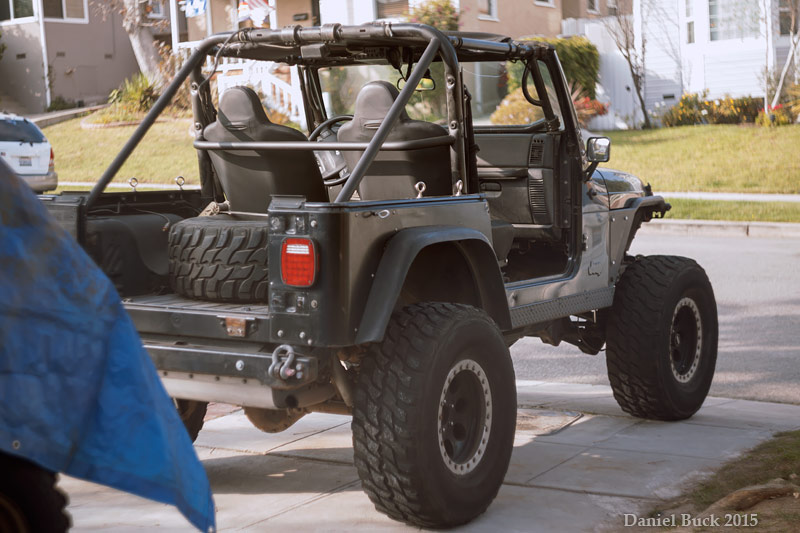
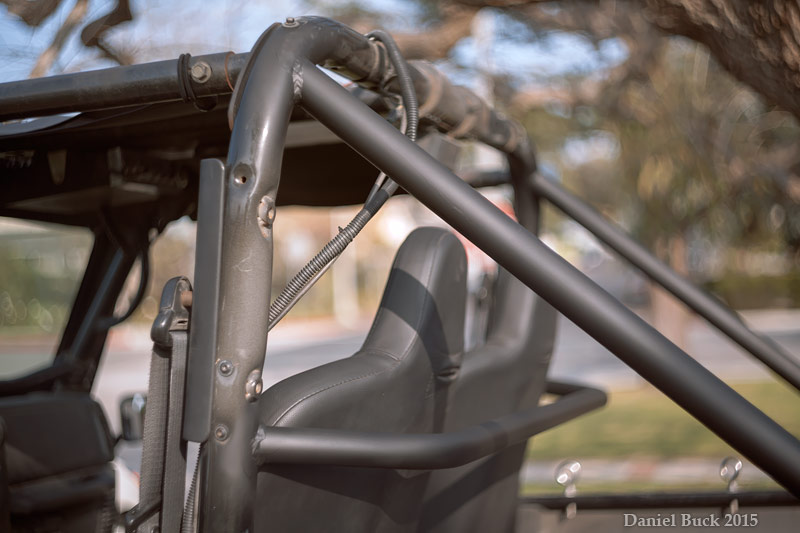
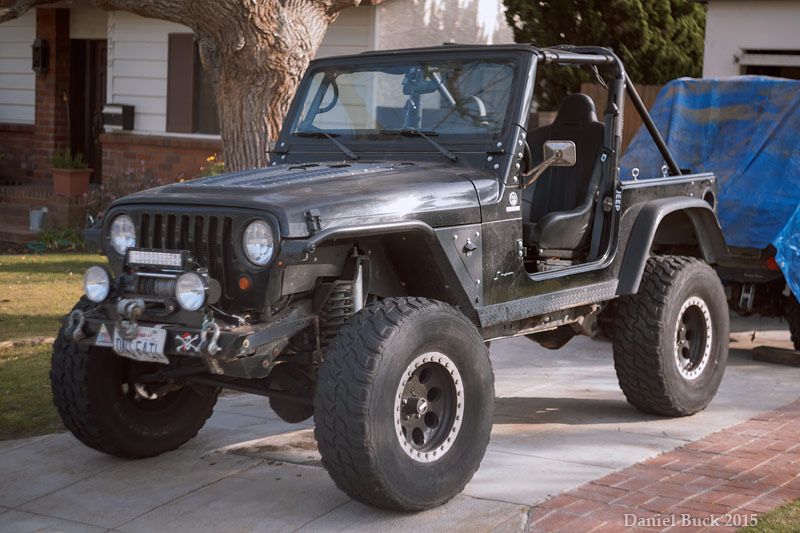
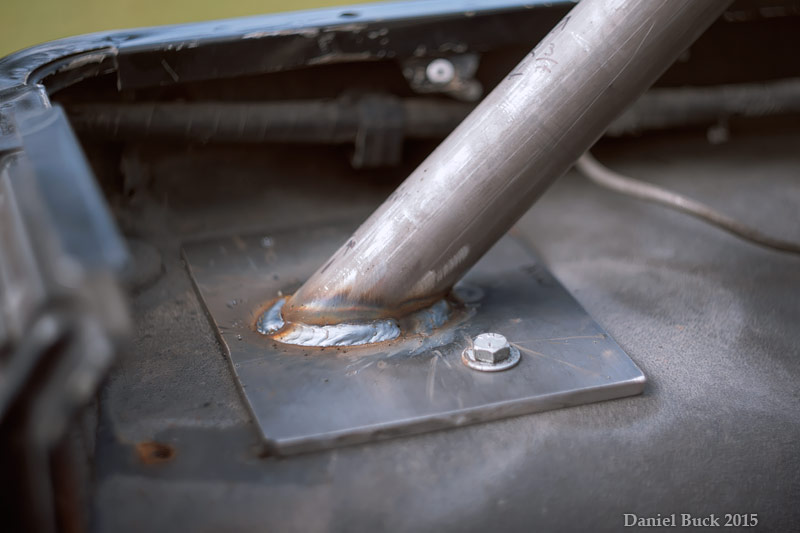
Got the C pillars and harness bar all welded up! The harness bar looks a little low, that's because when I mount the seats to the cage (getting rid of the factory flip-fold mounts) they will be about 1.5" lower, and tilted a bit more father back slightly.
Notching the tubing with and angle grinder and the printouts from the metalgeek site was very easy, not a whole lot of trial and error, just made the cuts, ground them down, test fit, ground a bit more, test fit, and that was pretty much it.
Tomorrow I'll notch and weld in the gussets on the tubes, as well as an additional tube going from the base of the C pillar to the middle of the B pillar, along the top of the tub. I think I have a good idea for how to get the C pillar to the frame and not have to move the Charcoal canister, but I probably won't have time for that tomorrow.
I really dig how this looks, this is how TJs should have been
hopefully next weekend I'll move forward and start working on the A pillar
 [COLOR="#FF0000"]R[/COLOR]edneck [COLOR="#FF0000"]D[/COLOR]riveway [COLOR="#FF0000"]F[/COLOR]ab
www.DanielBuck.net - www.DNSFAIL.com - www.FurnitureByBuck.com
Comment
-
Looks great! You may want to consider four bolts and a sandwich plate on the bottom of the C pillar. Any side load will put all tension on the outboard bolt and it will pull through or snap while the inboard will snap when the plate separates. 3/8" to 1/2" should be fine - and please use grade 8 hardware. Grade 5 will likely tear in half in the case of a hard flop/rollover. Not trying to come across as harsh, it would just be a shame if anything bad happened that could be prevented.God forgives, rocks don't
-sons of thunder
Comment
-
Yep, there will be 4 bolts in place when the lower plate is put there when I run it to the frame. For now I'm just using the 2 factory holes to keep it in place while welding. The additional 2 holes will be drilled when I work on the under side. And yea, all of the bolts are and will be grade 8. I wasn't sure if that was needed or not, but since it's only a hand full of bolts, I figured the cost isn't that much more to go up to grade 8. They are 3/8" 16 I think. I'll also use 4 3/8" bolts for the A and B pillars at the floor, which will also both be run down to the frame.
The C pillar is going to be the most difficult to tie in to the frame, but I think i have a slick idea on how to do it after poking around under there for a bit tonight.
LG, I'm using a Lincoln 180 Dual Voltage MIG welder (can run on both 110 and 220) with the standard argon Co2 gas mix. I'm running it on 220 power, with .030 wire. I have the amps cranked all the way up to 180 for this project. I find that .030 seems to be a very good all-around wire size. For thicker plate like 3/16" and 1/4", it may not be ideal, but if I slow down the travel it seems to do just fine. So I run a big 11 pound wheel of .030 in my welder for pretty much everything accept the thin tubing furniture. For the thin wall furniture, I run .023[COLOR="#FF0000"]R[/COLOR]edneck [COLOR="#FF0000"]D[/COLOR]riveway [COLOR="#FF0000"]F[/COLOR]ab
www.DanielBuck.net - www.DNSFAIL.com - www.FurnitureByBuck.com
Comment
-
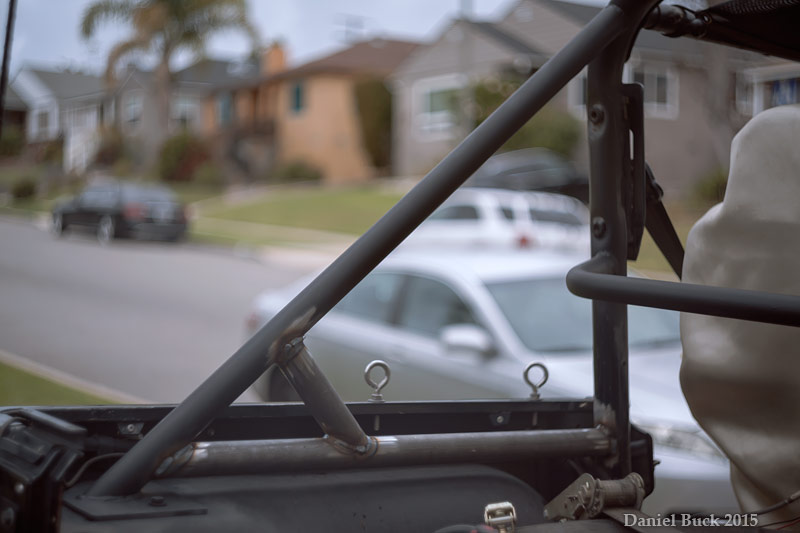
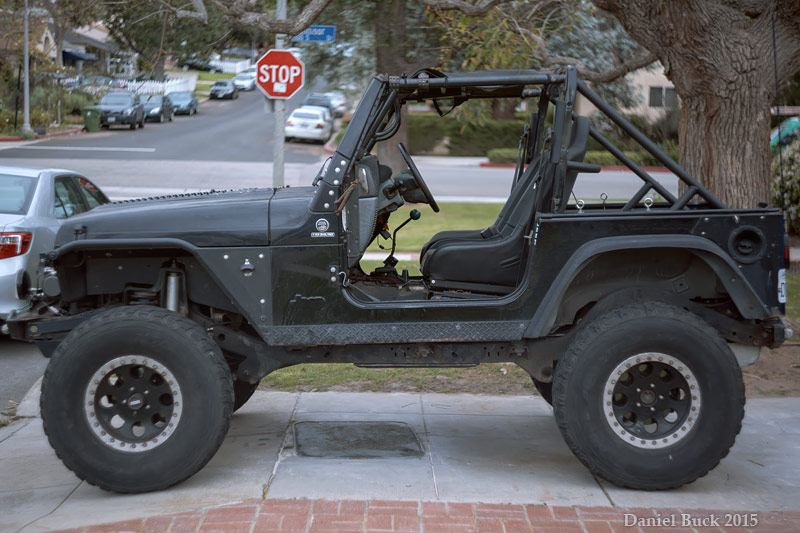
Got a bit more work done today, had to quit early because it was forcast to rain, so I quick painted it and let it dry in time to throw a tarp over it with literally 5 minutes to spare before it started raining.
I was unable to weld all the way around some of the joints, I just couldn't get to them with the tub in the way. I will finish those welds when I have the cage out of the jeep.
There's a reason I put that rather large gusset on the back of the C pillar, that's because I'm going to tie it into the frame about a 8-12 inches forward of the plate that is on the wheel well. If I do that, I completely avoid the fuel filler neck, and the charcoal canister. Kind of an "on the fly" design change. I'm going to tie it in somewhere inbetween where that gusset is. I think I have a straight shot right down to the frame.

 [COLOR="#FF0000"]R[/COLOR]edneck [COLOR="#FF0000"]D[/COLOR]riveway [COLOR="#FF0000"]F[/COLOR]ab
www.DanielBuck.net - www.DNSFAIL.com - www.FurnitureByBuck.com
Comment
-
Yep yep! I'm going to do a tube gusset (probably not quite as big as the one that's on the C pillar right now) on both sides of the B pillar above the driver and passengers head. I would have done those today, but I had to close up early due to the rain. I was hoping to get everything rear of the main B hoop done this weekend, not in the cards though
The next time that I work on it (probably next weekend) I'm going to unstrap the spare tire, and remove it and test a few different triangulation options going from he C pillar to the main B hoop, my only concern is making sure that I can still get the spare tire out, since I have to stand it up and roll it out, the tail gate isn't wide enough to drag the tire out flat.
I'm going to try and get as much done on the cage with it in place, before I remove it. I figure the more welding I do with it bolted in place, the less it's going to warp and move? I imagine ratchet straps and spreader clamps may be needed to get the cage back in. I'm looking forward to getting the rest of the cage done, this is alot of fun! Wish I had more free time, haha[COLOR="#FF0000"]R[/COLOR]edneck [COLOR="#FF0000"]D[/COLOR]riveway [COLOR="#FF0000"]F[/COLOR]ab
www.DanielBuck.net - www.DNSFAIL.com - www.FurnitureByBuck.com
Comment
-
Hm... my odometer was reading "noFUSE" on the way to work this morning. I did cut the wires on the B pillar that used to go up to the speakers (which I no longer have), I wonder if one of them shorted out a fuse? I was in a hurry (because of the rain) so I didn't have time to tape off the wires individually. I imagine that's where the warning is coming from, and not somehow related to me welding onto the jeep with the battery connected?
I'll tape off those wires individually tonight when I get home, and start checking all the fuses.
On a side note, maybe someone can move this thread into the Fabrication section? It's kind of morphed into a fab thread.[COLOR="#FF0000"]R[/COLOR]edneck [COLOR="#FF0000"]D[/COLOR]riveway [COLOR="#FF0000"]F[/COLOR]ab
www.DanielBuck.net - www.DNSFAIL.com - www.FurnitureByBuck.com
Comment
Comment