Announcement

Collapse
No announcement yet.

Homebrew Highline and Rockers

Collapse

Forum Thread First Post

Collapse
X
 
  • Filter
  • Time
  • Show
Clear All
new posts

  • Homebrew Highline and Rockers

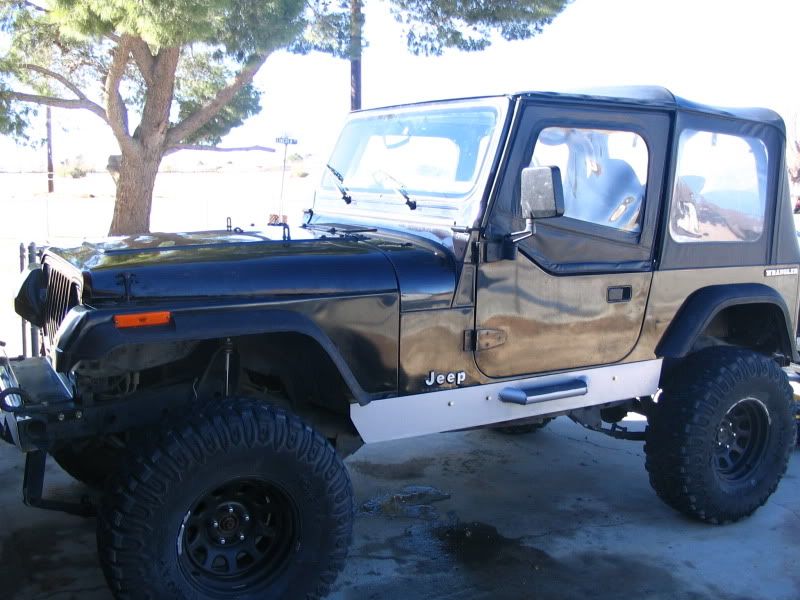
    Well after bashing the rockers umpteenmillion times it seemed in Cougar Buttes decided to make some rockers. Also at the same time raised the front fenders 3" and opened up the rear wheelwell as far as possible and still keep flares on it. This will add room for my forever-on-backorder 35" tires.

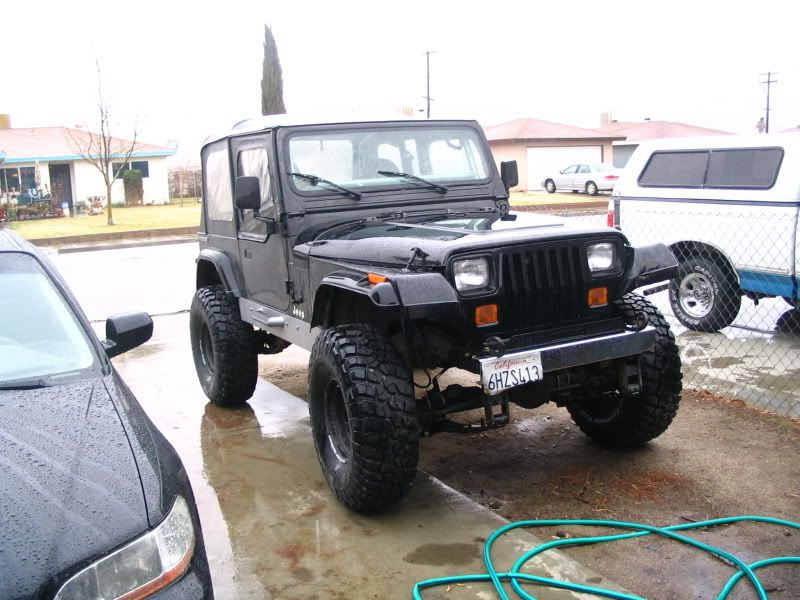
    The rockers are made out of 3/16" plate and mount to the body mounts as well as the footpads of the cage and on the side. Should be stout enough. The step was added as a little helper for the kids to climb in.

    Here is the end result.

    "It's Not Rocket Surgery"

  • #2
    Looks good. How far were you able to raise the rear wheelwell?
    "The Jeep...is a fitting instrument to transport the free people of a free nation with the respect to which we are entitled and the dignity that we deserve."

    Comment


    • #3
      Only raised the rear about 1.5". didnt want to cut into the passenger area. I did cut about 2.5" off the rear most portion of the rear fenderwell that was the large concern for me because I have already moved the axle back 1.5" and am considering moving it back one more inch.
      Gotta love all the little stuff involved in doing minor wheelbase stretches. If I didnt want the back seat space i would bite the bullet and get a fuel cell and xj springs. But for now when i finish stretching the wb i should be right around 98-100 depending on how far forward i push the front axle.
      "It's Not Rocket Surgery"

      Comment


      • #4
        With 35" tires finally installed for comparison.

        2.5" spring lift, 1" shackle lift(soon to change that).

        Who says you need more than 4" of lift or a spring over to fit 35" with no rubbing on a YJ..

        "It's Not Rocket Surgery"

        Comment


        • #5
          Looks good, love the stance... I think its time for me to start a build on a yj....
          [COLOR="Blue"]www.LEADFOOToffroad.com [/COLOR][COLOR="blue"][COLOR="Red"] COMING SOON!!![/COLOR][/COLOR]
          PARTS, SERVICE, INSTALLATION & CUSTOM FAB...

          Comment


          • #6
            Josh we could always trade you know. I have a teralow 4:1 and a Warn 9000XDi to sweeten the deal. (not joking).
            -Scott
            Those left standing
            Will make millions
            Writing books on ways
            It should have been
            -Incubus "Warning"

            Comment


            • #7
              Originally posted by OU812 View Post
              Josh we could always trade you know. I have a teralow 4:1 and a Warn 9000XDi to sweeten the deal. (not joking).
              -Scott
              Getting warmer.....
              [COLOR="Blue"]www.LEADFOOToffroad.com [/COLOR][COLOR="blue"][COLOR="Red"] COMING SOON!!![/COLOR][/COLOR]
              PARTS, SERVICE, INSTALLATION & CUSTOM FAB...

              Comment


              • #8
                Mini update, I did get minor rubbing in the rear when at Calico, I need to trim slightly more sheetmetal at the rearmost portion of the rear wheelwell.

                the front did not rub at all and the tires did not contact the top of the fender openings in front or rear.

                I had checked the clearance using a v notch ditch near my house that lifted tires when going through. I guess that the ditch test doesnt account for bouncing and extreme angles. Good part is none of the rubbing harmed the tires at all.
                "It's Not Rocket Surgery"

                Comment


                • #9
                  I love the almost stock look you have. Non jeep people might. It tell
                  the differance. That's not an easy thing to do.
                  Those left standing
                  Will make millions
                  Writing books on ways
                  It should have been
                  -Incubus "Warning"

                  Comment


                  • #10
                    Keeps it under the radar, seen a few jeeps in my area, sky high spring over with full widths. Usually getting hassled by bored Sheriff's.
                    "It's Not Rocket Surgery"

                    Comment


                    • #11
                      Any chance of a write up? Looks awesome!
                      God forgives, rocks don't
                      -sons of thunder

                      Comment


                      • #12
                        I agree it looks great,X2 on a writeup how did you finish the bottom of the hood ?
                        But can we SURVIVE 2 more years?

                        Comment


                        • #13
                          Write-up instructions. Found my camera screen/viewer died after IDTT so wont be able to add new pics till later.

                          1. Disconnect battery cables and remove battery from tray. Remove battery tray. on battery tray remove mounting boss that directly bolts to innner fenderwell(2-3/8" mounting holes).
                          2. disconnect and remove wiper washer and coolant overflow bottles(no mods necessary removed for access).
                          3. disconnect and remove ignition module from inner fenderwell.
                          3a. remove hood latch catches from hood.
                          4. Unbolt fender well from body and radiator core support (4 bolts on core support, 4 bolts on body)
                          5. measure and mark new mounting holes on tub mounted side of fender. mark holes exactly 3" lower than original holes. Drill holes.
                          6. trim 1.5" of drip/rain rail on tub where fender will be moved to.

                          Complete steps 7 and 8 at the same time to properly align both fenders and core support.

                          7. temporarily remount fender assembly using the 3 tub mounting holes.
                          8. level fender with body lines, temporarily clamp or have helper hold fender. Mark 3 new mounting holes for core support. drill new mounting holes.

                          9. remove fenders both and spray touch up paint on affected area.

                          10. measure and mark hood 3" up from bottom. using masking tape, mark cut line on hood. do both sides of hood at same time to ensure even. CUT WHEN BRAVE ENOUGH. cover cut line with self adhesive door trim(available at parts stores)

                          optional step 10. measure and mark hood 2 3/4" up from bottom. mark with masking tape. CUT WHEN BRAVE ENOUGH. measure 1/4" up from cut line, but several vertical reliefs to 1/4" line. using square metal material(1" square tubing) clamp metal to inner side of hood. bend bottom 1/4" hood underneath to create flat surface.

                          11. paint cut line of hood with touch up paint.

                          12. reinstall fenders using new mounting holes. reinstall all parts removed.

                          13. remove hood latches from fender. turn latch moutning 180* and reinstall.

                          14. mark both sides at same time---- mark hood and drill holes for catch for hood latch.

                          15. install and align hood latches.
                          "It's Not Rocket Surgery"

                          Comment


                          • #14
                            For the Rear trimming.

                            1. Remove both stock fender flares. Flares will be swapped from one side to the other.

                            2. cut inner lip of fender flares at the bottom, where the flare would overlap with the body in original mounting.

                            3. remove inner rubber fenderwell.

                            4. position flare so that at the rear the flare aligns with the vertical body seam. level top of flare with the bottom of steel inner fenderwell. using erasable marker, temporarily mark position of fender.

                            5. referencing center of marked line, cut from the inside of fenderwell out a 1" line at top of inner fenderwell---I really need to add a pic for this step----

                            6. realign fender flare and check marks, remark if necessary.

                            7. Cut along marked line.

                            8. cut vertical body stiffener where cut line overlapped at rear of fender (near gas filler hoses)---need a pic for this as well----

                            9. position fender flare and mark mounting holes on body. drill new holes. mount with hardware(i used machine screws, nuts and washers).

                            Notes.
                            again best to do each step on each side at the same time and ensure all even and aligned.

                            the rear axle on my jeep is moved back 2" from stock, so trimming may be necessary at front of rear fenderwell if axle is still in stock position.
                            "It's Not Rocket Surgery"

                            Comment


                            • #15
                              This link is to the pirate4x4 thread that gave me the confidence that I wasn't going to screw up my jeep when I did this mod.

                              After all, there is hardly ever one single mod that hasn't already been done in a similar fashion in the Jeep world. So some research produced this.

                              The actual writeup/pictures were tj, but some others myself included have added some yj pictures to the thread.

                              http://www.pirate4x4.com/forum/showthread.php?t=538391
                              "It's Not Rocket Surgery"

                              Comment

                              Working...
                              X