 Tweet
Tweet
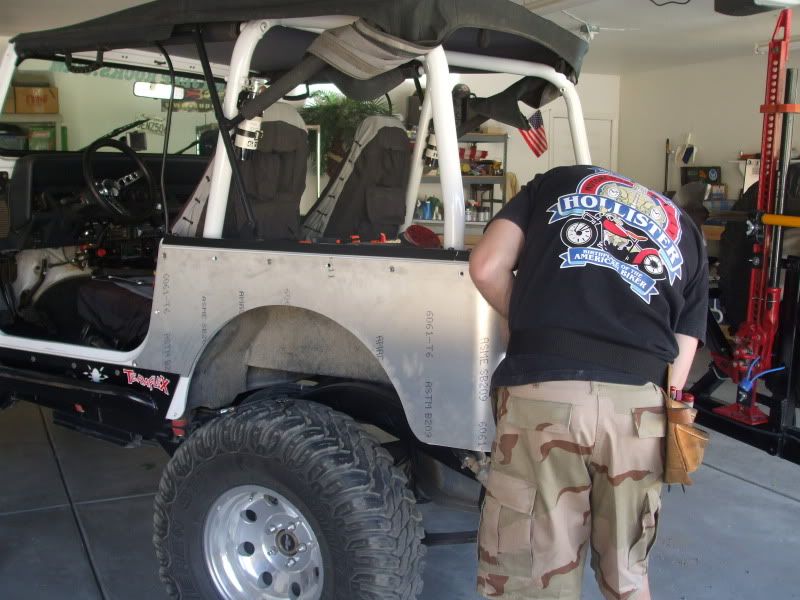
On Friday we tackled the install on the New SAVVY Full Corners. Josh (Snydercj7) and Scott (Desertdog) came over to lend a hand. I sure did appreciate the help guys!
Sorry, I didn't get a Pic by Pic of the install but, I did manage to snap a few pic's when I had a second. I can tell you that the install went together real easy but without the help of Josh and Scott it would not have been fun at all!
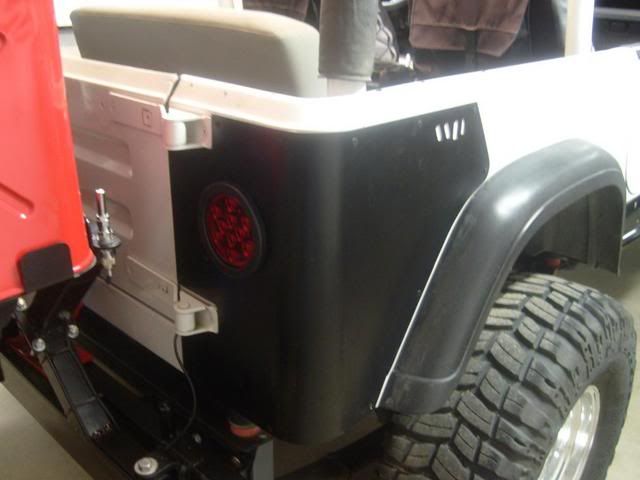
First, We had to remove the stock fender flairs and the old Warrior Products Half Corners that I've been running
(Here are some old Pic's of those corners)
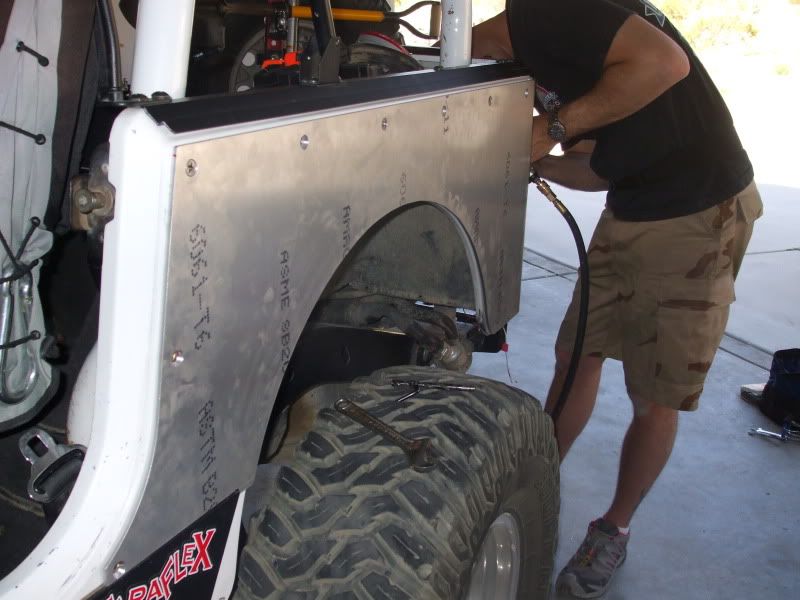
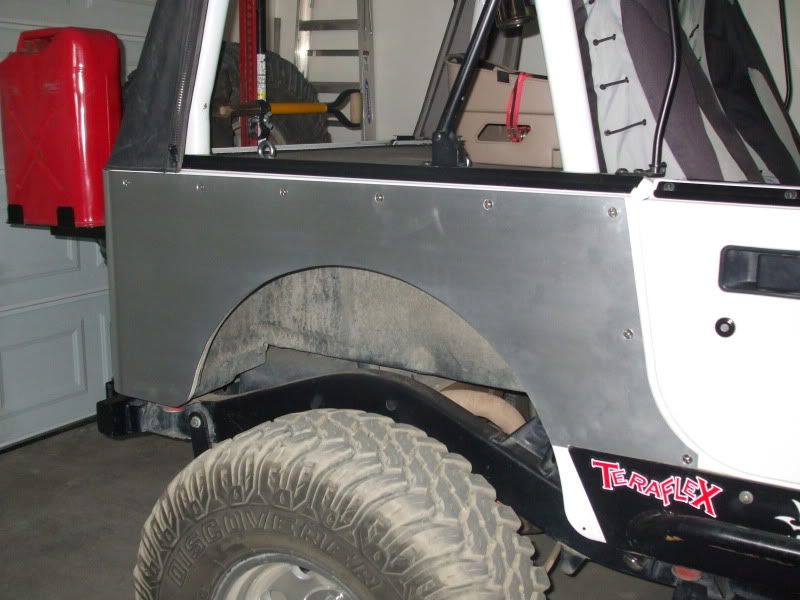
Once we got the Old flairs removed and the rivits drilled out of the corners and removed, we started mesuring and mocking up to the new SAVVY Blank corners to the Jeep. They fit up real nice and tight except for the one on the passenger side which we found that the passenger side of my Jeep had been damaged before and had some extensive bondo work done to it before I came along.
Once we clamped them in place and checked and re-checked everything 3 or 4 times, we center punched all of the mounting holes and marked all on the holes for the gas filler and round tail lights and marked the fender wells out on the drivers side.
We also found that the Poison Spyder Sliders that I run were a 3/16ths of an inch to high and caused us to have to notch the bottom edge of the corners to make them fit correctly.
Also, We did not notch the slots for the tailgate hinges (Like my old WP Corners were) as not to weaken the passenger side corner. The hinges were bolted straight onto the corners and a piece was fabbed from the leftover wheel well piece to space out the hinge on the tailgate.
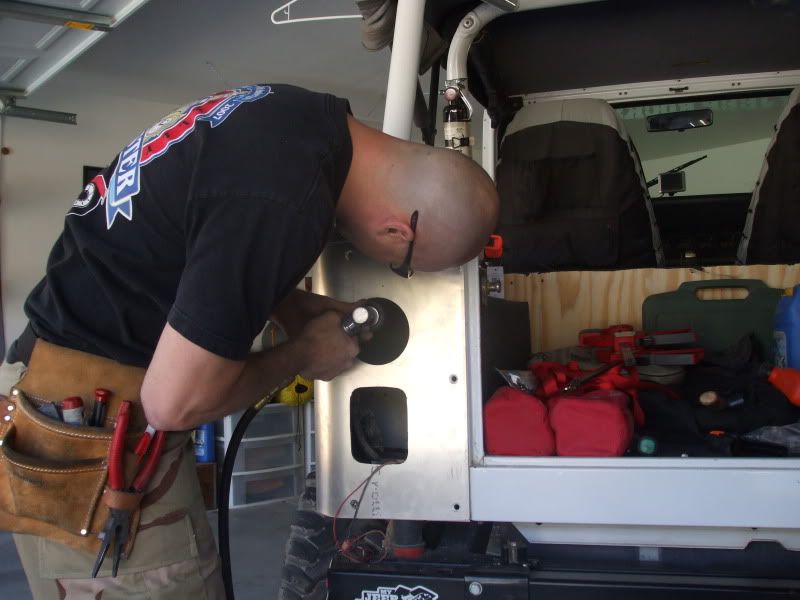
We drilled all of the holes in the side of the Jeep and used the Zirk nuts that were included where they were needed in the body due to inside body re-enforcment. We drilled pilot holes for the tail light and gas filler holes and cut the fender wells out. All cuts were made using a Jig Saw (with the exception of the 4 1/2" round LED tail lights where a Hole saw was used.) and a bar of Oil of Olay Soap (A trick learned by Josh during his Welding Class). The Soap was use (in place of cutting oil) to keep the Jig Saw blade from binding and getting to hot. It also causes less mess than using the cutting oil. It worked great and the aluminum cut like butter! The corners smelled real nice afterward too!
(All cuts were made to the inside of the blanks as not to mar the outside finish of the corners).
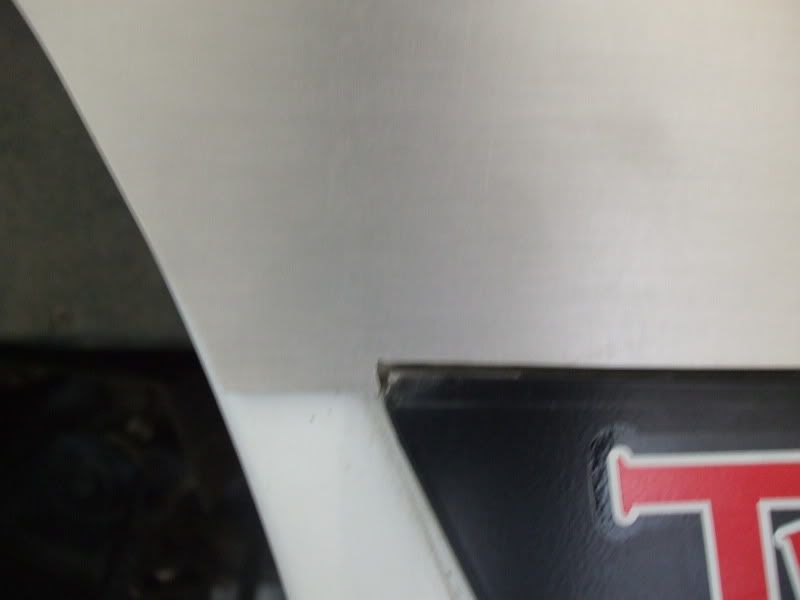
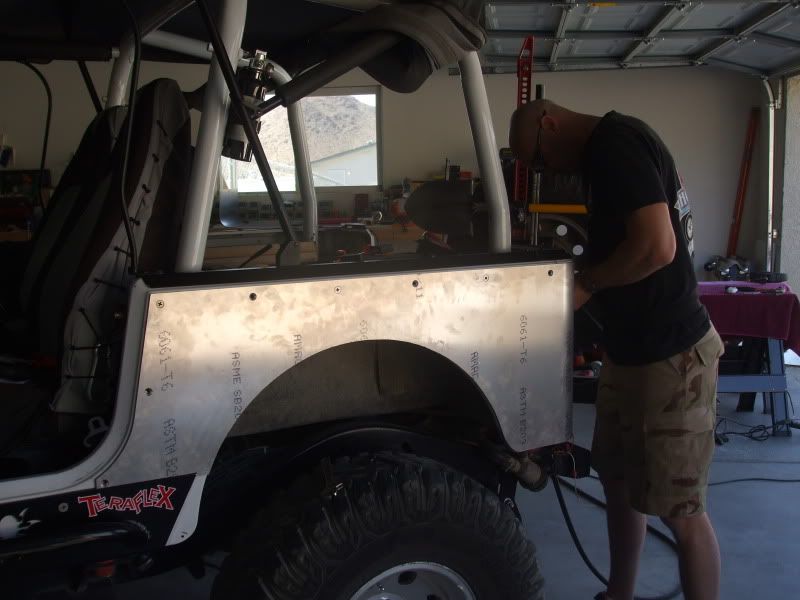
Before they were bolted on, Scott brushed the outsides of the corners with a 3M pad to get that nice brushed Aluminum look.
Once the corner was bolted in we used an angled die grinder and sanding wheel to finish off the inside edge of the gas filler/tail light holes and fender wells.
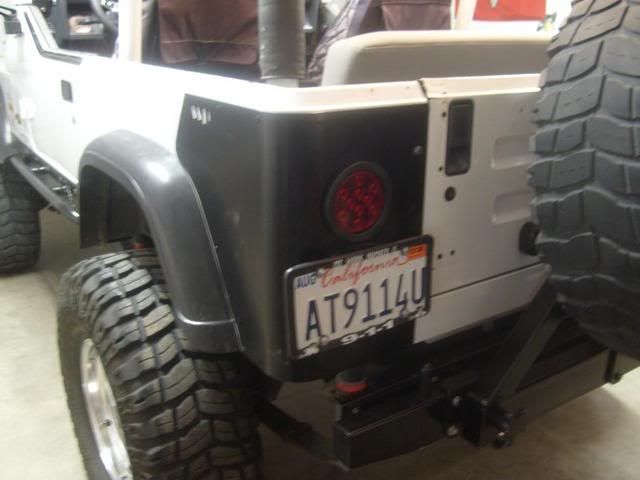
I reinstalled the Gas filler and the licence plate door and the tail lights and decided not to reinstall the stock fender flairs yet. I'm looking at getting a set of rear tube fender flairs from C&C Jeep Fab (Same place I got my front flatties from) to go with my new SAVVY Corners
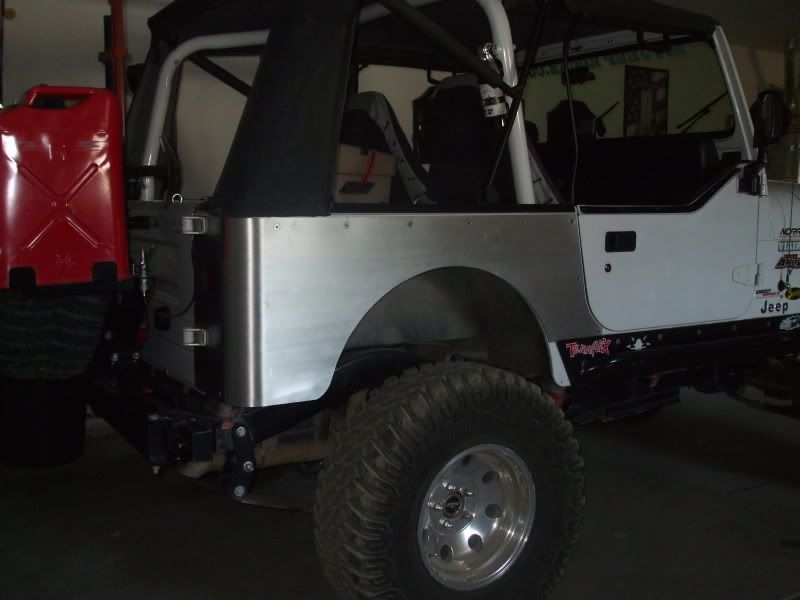
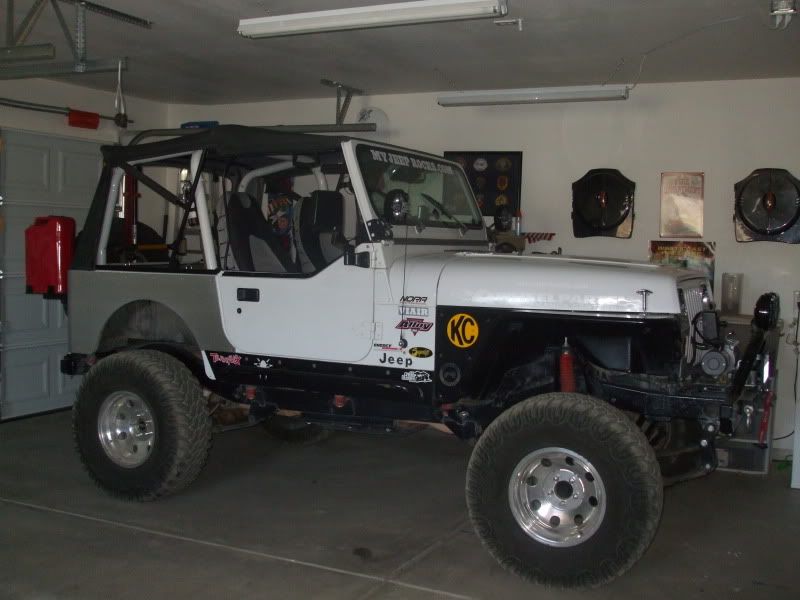
Thanks to Josh and Scott for all of their help and Thanks SAVVY, What a Great product! I can't wait to get my Jeep out on the trail and put them to use!
Scott
Sorry, I didn't get a Pic by Pic of the install but, I did manage to snap a few pic's when I had a second. I can tell you that the install went together real easy but without the help of Josh and Scott it would not have been fun at all!
First, We had to remove the stock fender flairs and the old Warrior Products Half Corners that I've been running
(Here are some old Pic's of those corners)
Once we got the Old flairs removed and the rivits drilled out of the corners and removed, we started mesuring and mocking up to the new SAVVY Blank corners to the Jeep. They fit up real nice and tight except for the one on the passenger side which we found that the passenger side of my Jeep had been damaged before and had some extensive bondo work done to it before I came along.
Once we clamped them in place and checked and re-checked everything 3 or 4 times, we center punched all of the mounting holes and marked all on the holes for the gas filler and round tail lights and marked the fender wells out on the drivers side.
We also found that the Poison Spyder Sliders that I run were a 3/16ths of an inch to high and caused us to have to notch the bottom edge of the corners to make them fit correctly.
Also, We did not notch the slots for the tailgate hinges (Like my old WP Corners were) as not to weaken the passenger side corner. The hinges were bolted straight onto the corners and a piece was fabbed from the leftover wheel well piece to space out the hinge on the tailgate.
We drilled all of the holes in the side of the Jeep and used the Zirk nuts that were included where they were needed in the body due to inside body re-enforcment. We drilled pilot holes for the tail light and gas filler holes and cut the fender wells out. All cuts were made using a Jig Saw (with the exception of the 4 1/2" round LED tail lights where a Hole saw was used.) and a bar of Oil of Olay Soap (A trick learned by Josh during his Welding Class). The Soap was use (in place of cutting oil) to keep the Jig Saw blade from binding and getting to hot. It also causes less mess than using the cutting oil. It worked great and the aluminum cut like butter! The corners smelled real nice afterward too!
(All cuts were made to the inside of the blanks as not to mar the outside finish of the corners).
Before they were bolted on, Scott brushed the outsides of the corners with a 3M pad to get that nice brushed Aluminum look.
Once the corner was bolted in we used an angled die grinder and sanding wheel to finish off the inside edge of the gas filler/tail light holes and fender wells.
I reinstalled the Gas filler and the licence plate door and the tail lights and decided not to reinstall the stock fender flairs yet. I'm looking at getting a set of rear tube fender flairs from C&C Jeep Fab (Same place I got my front flatties from) to go with my new SAVVY Corners
Thanks to Josh and Scott for all of their help and Thanks SAVVY, What a Great product! I can't wait to get my Jeep out on the trail and put them to use!
Scott

Comment