NV4500's don't like to be shifted real fast. They're a truck transmission and they shift like one. They're not slow or clunky, but if you try to shift it too fast you'll feel more resistance going through the gates. Not good for the fiber syncros which is something you really don't want to be replacing.
Announcement
Collapse
No announcement yet.
NV4500 Transplant
Collapse
Forum Thread First Post
Collapse
X
-
Thanks, I'll keep that in mind about the speed-shifting. Sorry it has taken me so long to reply, but my local ISP went out of business, and the only other local "broadband" ISP gave me the run-around (it's their M.O.). Now I've got Verizon 3G and a 2-year service contract. Yippee!holes = cowbell
Comment
-
trailwing, you are right about that, at least in a Jeep sort of context.
Scott, very kind of you. Anytime you feel like getting some fresh Anza air, just let me know. I've got a long punch list of things that still need to be done. I just keep plugging away. Unfortunately the plasma cutter function on my GiantTech 3-in-1 went out, and Mr. GiantTech apparently doesn't have the time to call me back (or any of his other warranty customers, apparently). That means I've gone from doing things the hard way to doing things the extra hard way. I'll probably be heading down to your neck of the woods this week to O-side Driveline. My rear DS needs a couple more inches now. I imagine you'll be working, though.
I'll try to get some pics posted soon. The other day, I decided not to do the planned 3- or 4-link and rear stretch, and just through some stock springs in there. It looks like I'll be leaving my native state permanently within the next few months, but I'm grateful I've got somewhere to go... just wish there were more rocks there...holes = cowbell
Comment
-
If you call me maybe we can meet for lunch then. Sure you don't want to go full width 1Tons? Check this out:
http://sandiego.craigslist.org/nsd/pts/1802168667.html
J/K. But looks like a deal to me.Those left standing
Will make millions
Writing books on ways
It should have been
-Incubus "Warning"
Comment
-
Ok, where were we? Scott, great having lunch with you a month ago(time flies!).
Alright, finally uploaded some pics. I'll try to go in a somewhat chronological order. Probably going to skip a fair amount. Looks like I left off with the body lift, so I think next will be the motor mount lift:
Made these spacers out of some 3" x 4" (?) rect tubing; cut the tubing down to the height I wanted and welded it up. Why did I choose that size tubing? Besides that I'm a glutton for punishment, it was the best thing I had laying around.
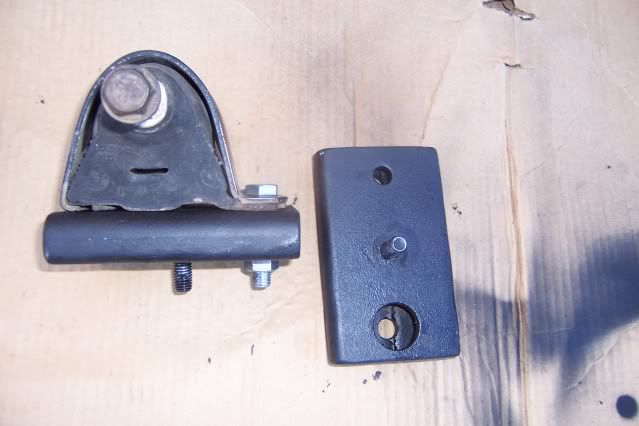
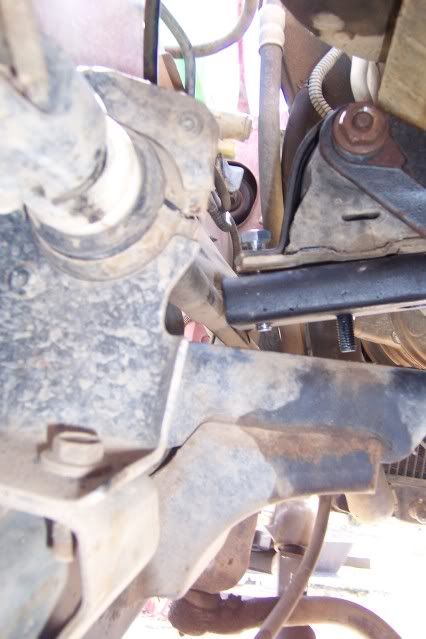
Next step was to mount the tranny up on a crossmember. I started out with a stock NV4500 tranny mount. When I got the mount I found it didn't bolt directly to the tranny, so I made a bracket/adapter out of 1/4" stock. You can see it above the mount. The mount itself was too tall and took up way too much verticle space in the tight little world under my Jeep, and to make it worse, the bolts hung straight down. After trying to figure ways to make it work, I ditched it.
Here's one of my little buddies. Pretty cool, had one of these little guys actually run up onto my hand to eat a juicy mealworm.
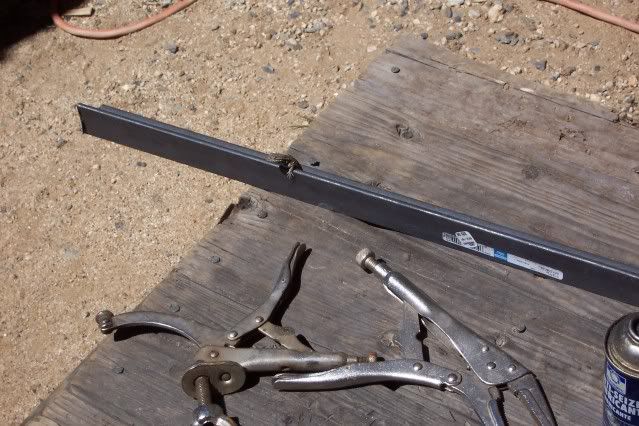
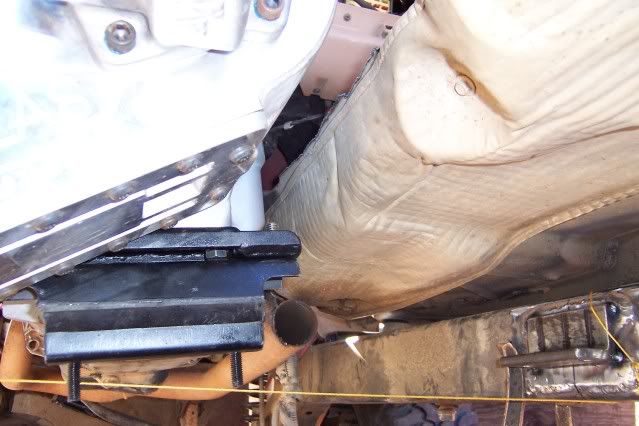
To make a looong story short, here's the tranny mount I fabbed out of 2" trailer hitch stock.
Front (since then I've welded on an exhaust hanger--see below)
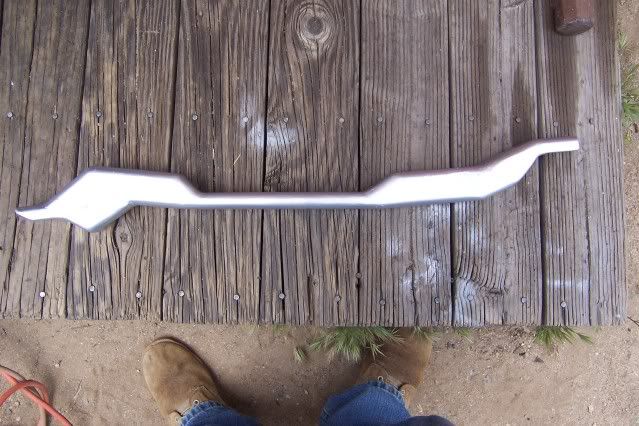
Top
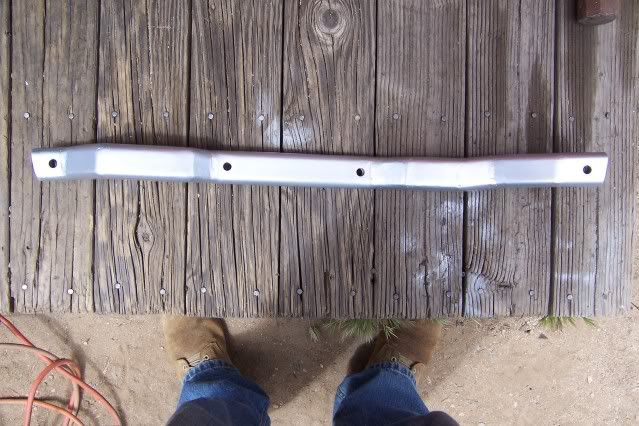
The shape of the thing makes holes look all out of whack, but the outer holes are in a straight line, and the inner holes are in another, parallel straight line. I checked with a laser--at least twice. The important thing is that it positions the driveline correctly, which it does.
Bottom
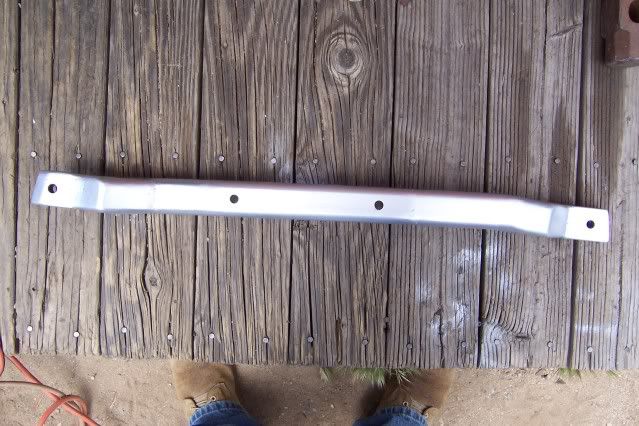
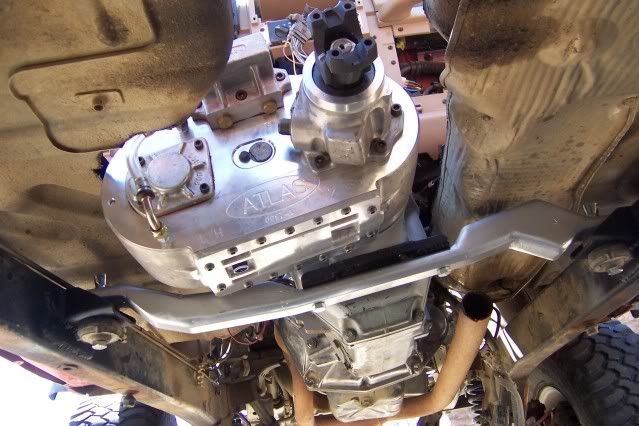
One of my main rules was to use stuff I had on-hand if at all possible. One of my other main rules was to shoot for as flat a belly as possible. Also, I wanted the tranny to be able to flex with the engine to avoid busting something in the middle (the bellhousing). I ended up using body mount bushings and more of that same rect tubing I used to make the body mount brackets and MML spacers. So far, I'm quite pleased with the design and implementation. It's a very strong design, transmission elevation is adjustable, the materials were "free," and it's a breeze to R&R. The desire for adjustability was one factor in deciding to keep the adapter--if necessary, it could be eliminated, lowering the tranny by 3/4". If I were to be real honest, all the time I'd just spent making it probably weighed in too. What I don't like about this is that I had to make it thinner in the middle. I do plan to plate it up, but due to the that will be a fair amount of work, especially without a plasma cutter.
You can see I had to accommodate a 7* clocked tranny. This made things a little less straightforward, but it has worked out just peachy.
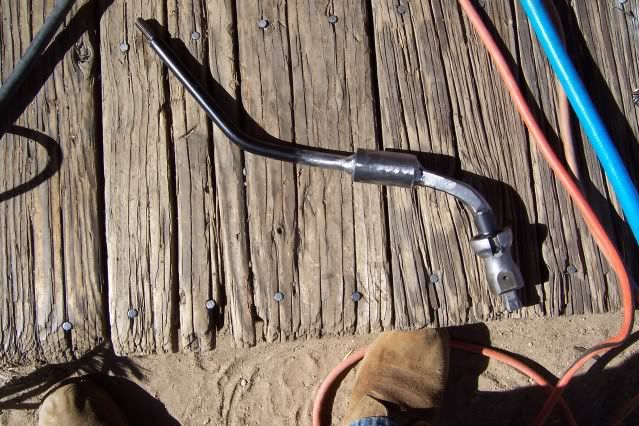
Not sure if it was "next," but sometime afterwards I decided to fab the shifter. It's a 2-piece setup. The lower is the 4500 lower lever, bent backwards (used to be straight) with a piece of tubing welded on, and the upper part is the stock 3550 upper lever, upside down, with a piece of tubing welded on. The top fits into the bottom; I would have done that the other way around, but the tubing I had didn't lend itself to that. Once I figured just how I wanted it, I drilled a hole through it all and bolted them together.
Skipping some stuff (like indexing the Atlas), here's a shot from above after I'd driven it for the first time in 7 months and 3 weeks.
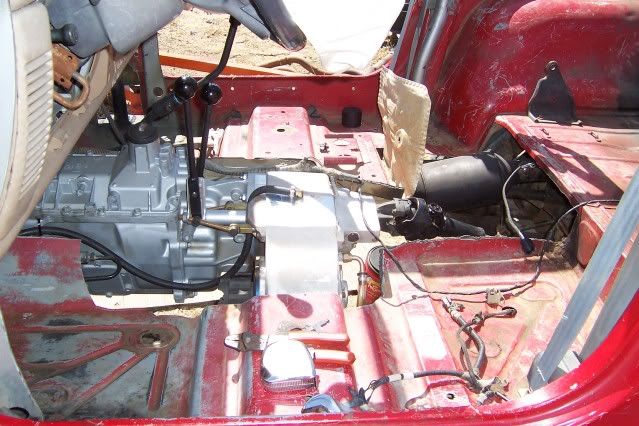
You might have noticed the white thing on the steering wheel. That was the airbag that jumped out and hit me in the face for no apparent reason as I was driving down a dirt road listening attentively to all the little noises the jeep was making. Sure woke me up. It actually bruised and skinned my chin.
Ok, I have more pics, but it's almost 2am and I have to get up early. Tomorrow or so I'll post up how the exhaust and some other stuff worked out.holes = cowbell
Comment
-
a few more pics...
Exhaust is 2.5" from the point where the two headpipes merge into one all the way to the to the end of the tailpipe. It's made up of reconstructed old pieces and 3 u-bends I cut up. I was able to reuse 3 of the stock hangers by modifying them. Below you can see the first such hanger welded to the front of the crossmember. I cut it off of the factory tranny mount. A stainless steel bolt secures it to the the exhaust by way of two reinforced tabs in a double-shear configuration.
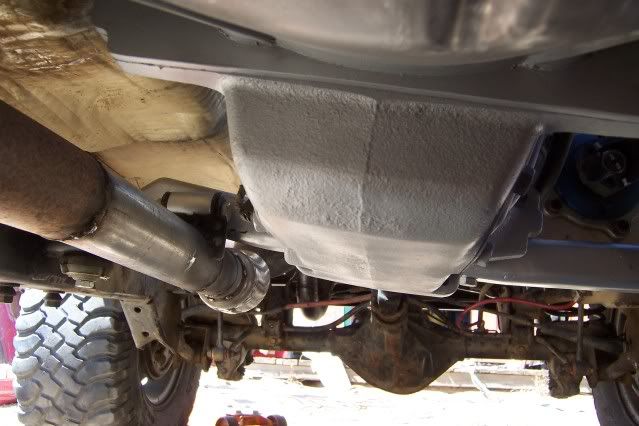
In the next pic you can see the flex joint and the catalytic converter. While the flex joint is somewhat clearance challenged, it gave me a lot more freedom to position things both laterally and vertically. Because the tranny is so big, and because it's clocked 7* counter-clockwise, there really wasn't room for the catalyic converter in the stock position (next to the tranny). Also, cats by nature get very hot, so I really didn't like it next to my gearbox anyway. I just eliminated some superfluous rear legroom, and moved the cat up and back.
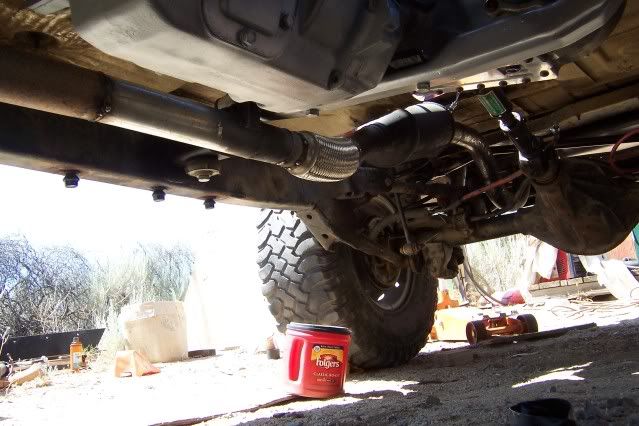
Here's the Magnaflow muffler I bought from DoubleAA over a year ago :bonk: It sounds great, but this Jeep won't be sneaking up on anyone. Thanks again, Andrew! The 4.0 is having no trouble exhaling now. The tailpipe is about flush with the bottom of the bumper.
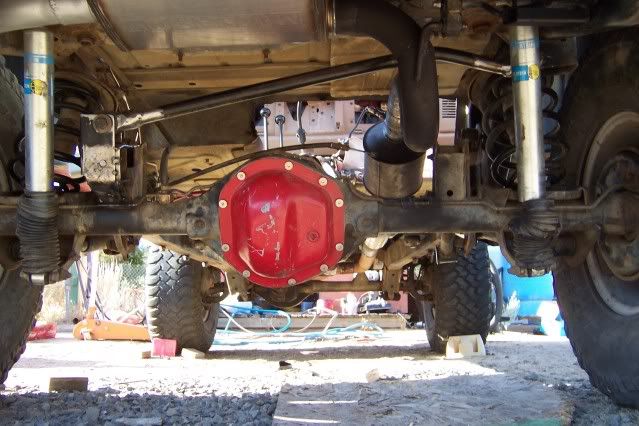
You'll notice that my spring buckets are at a pretty sketchy angle. That's part the awkward transitional phase I was referring to in another thread. The springs will be held on with Ballistic Fab retainers (yeah, I actually bought them--no plasma cutter for a few months now). Only 8-bucks each. This is just a kludge to hopefully get me by until I can do the rear 3-link and stretch.
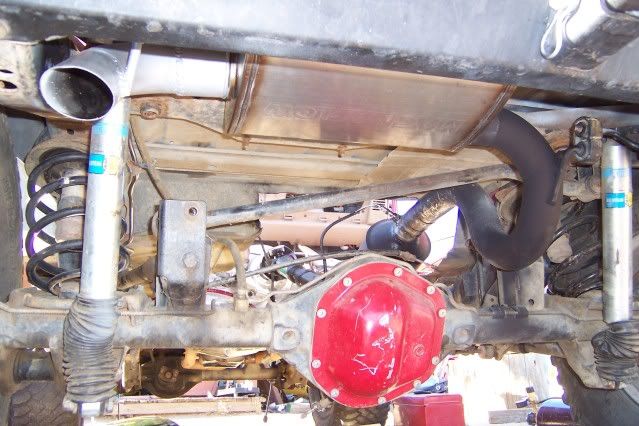
Still fooling with the position of the trackbar bracket. An adjustable track bar unit (actually two) would be very handy, but I don't actually want track bars at all--they make the suspension work asymmetrically to put it vaguely. This is the stock track bark sleeved and with new ends--couldn't get the old bushings out and I needed to put a "twist" in it.
The rear aftermarket bracket was pretty loose, but the bolts were hopelessly frozen with rust, so I cut the heads off. Even then I couldn't get the main bolt out--it's frozen into a sleeve. Also had to cut off the upper trackbar bolt. This is the kind of thing I have contended with every time I work on something new, and a very good reason not to buy a vehicle from the rust belt. Every bolt can be a project.
Here's the fuel tank I bought from wombraider940 (thanks again!) a few months back. Took some work to make it fit here (made to go in stock position), but nothing a BFH, reinforcing material and some welding couldn't sort out. Yes, that's a ratchet strap. I cut off the factory tie-down loops and welded them in position to work as shown. Below the tank is my top-secret composite insulation/ padding. It would have been easier in some respects to put it behind the front seats, but I intend to install a removable rear bucket seat or two.
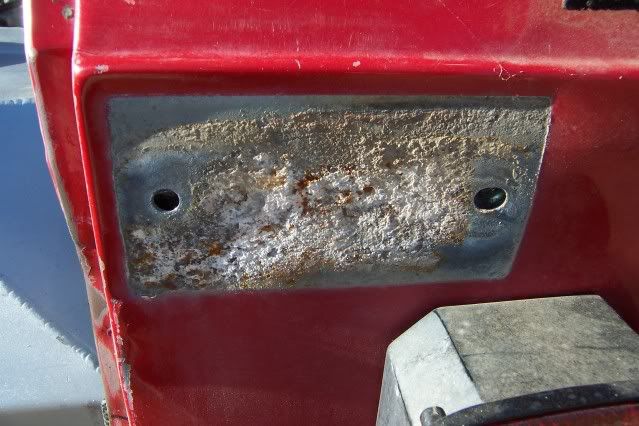
The tailgate is out of the picture in more ways than one. The lower hinge bolts are frozen in. Where the upper hinge used to be you can see evidence of the galvanic corrosion as a result of aluminum being placed on bare steel and exposed to water and even salt spray. I have a better picture I took of this since I recall a discussion of this awhile back. I'll upload it later.
This was actually a pic of the deployed airbags. They have since been deported.
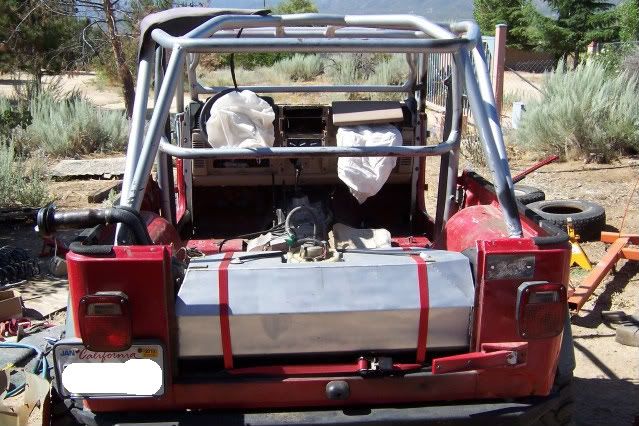
Next I'll upload a pic or two of the fuel tank cover I made.Last edited by inVERt'D; 07-31-10, 07:07 PM.holes = cowbell
Comment
-
Yet more pics
ok, to get it out of the way, here's a pic of that corrosion I was talking about. This has been present everywhere aluminum touches bare steel.
Here's the fuel tank cover. First thing I ever TIG welded.
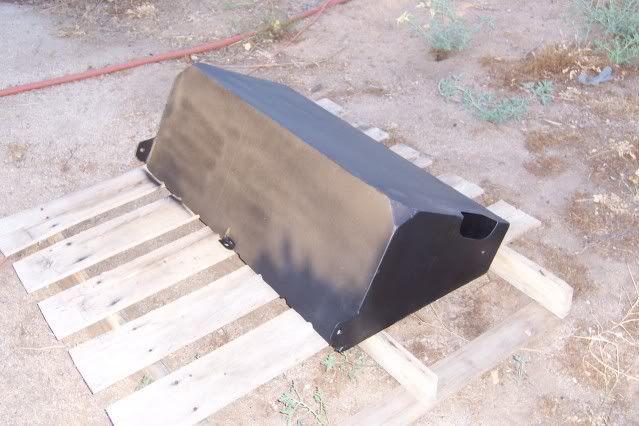
It's not currently installed, because I'm neither satisfied with, nor confident in my fuel high pressure line. Since the cover is such a tight fit, I'll probably leave it out until I'm happy with the stuff it will cover up. Before it's all over, the whole inside of the tub will be painted with black bed liner, and the fuel tank cover will blend right in, stealthy like.
Here are some test-fit pics. Five bolts (and friction) hold it in: (1) seatbelt bolt down location (center), (2) seat bracket bolt locations (sides of wheel wells), and finally (2) bolts also into the cover (welded-in nuts) from behind the wheel wells.
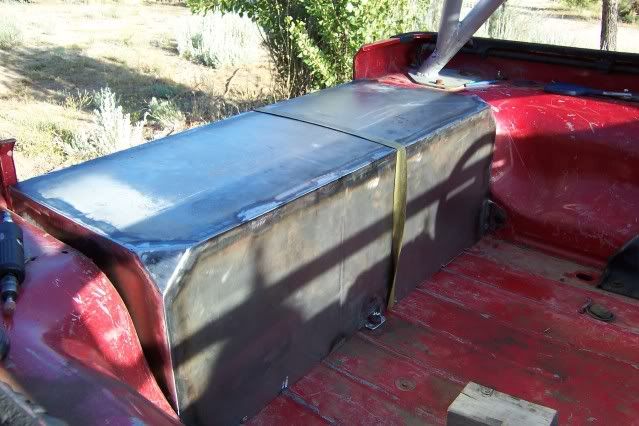
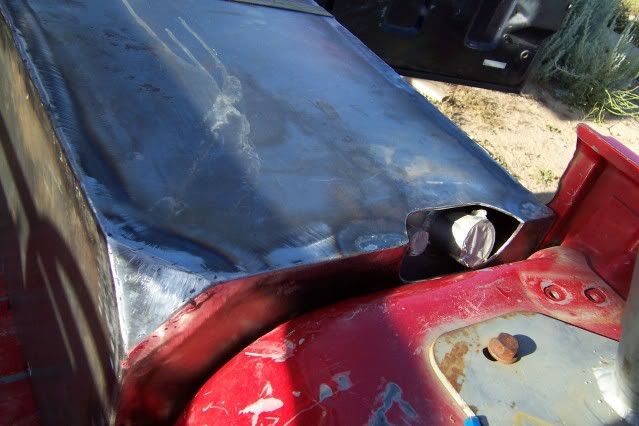
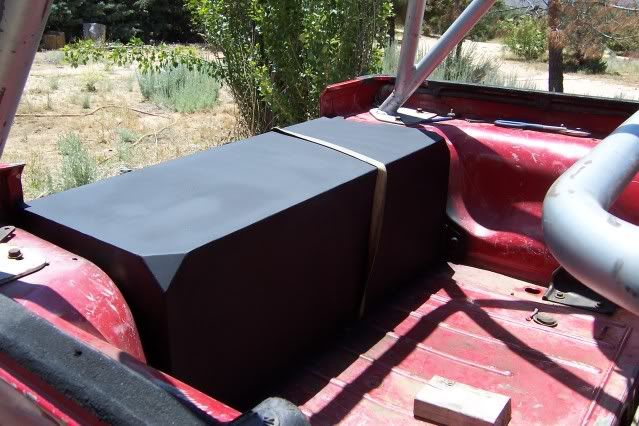
More to come....holes = cowbell
Comment
-
Here's my current suspension seat setup. I just know everybody will be copying me in no time.
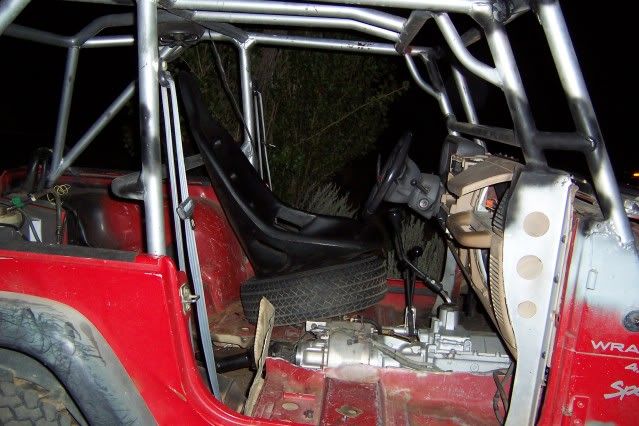
Ok, not the safest or most legal, but it's better than nothing until I get the real deal worked out. I got some 1.5" x .120 wall DOM tubing at Action Gas & Welding supply (they even do chromoly) and took it right down the street to Steel Nutz Offroad to have a couple of pieces bent.
Here's what's going on as of today:
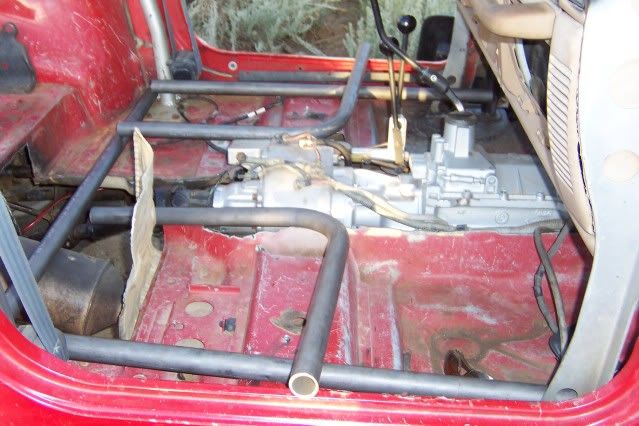 holes = cowbell
Comment
-
Thanks Scott. There's a lot left to do, but I'm feeling good about most of it. The drivetrain runs smooth and cool; both boxes shift nicely and feel very solid. I don't mind the way the 4500 shifts at all--I love it. The 4500's gearing really seems to suit the 4.0 well. I still haven't driven with the low gears in the Atlas, because I'm following their recommended break-in procedure.
Hey I haven't called you up because I'd feel like a chump having you out here in the hot sun, laying in the dirt with red ants stinging you. Then again, if I had a garage I probably would have been done months ago. I'm hoping I'll be ready for a shakedown run before the 14th.holes = cowbell
Comment

Comment